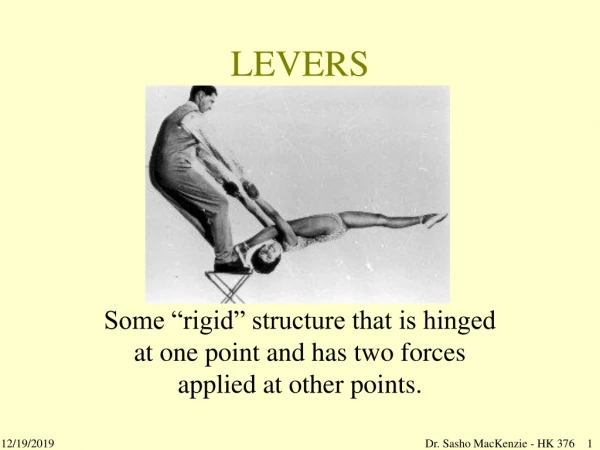
LEVERS
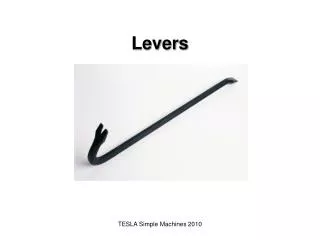
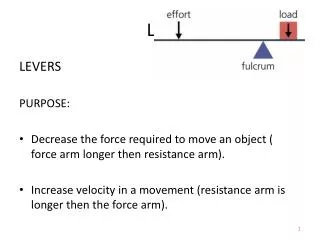
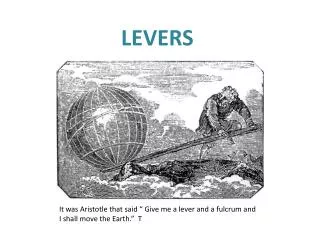
LEVERS. It was Aristotle that said “ Give me a lever and a fulcrum and I shall move the Earth.” T. ~ Archimedes. Introducing… The Lever. A lever includes a stiff structure (the lever) that rotates around a fixed point called the fulcrum. fulcrum. Parts of a lever.

LEVERS
E N D
Presentation Transcript
LEVERS It was Aristotle that said “ Give me a lever and a fulcrum and I shall move the Earth.” T ~ Archimedes
Introducing… The Lever • A lever includes a stiff structure (the lever) that rotates around a fixed point called the fulcrum. fulcrum
Parts of a lever • Fulcrum – The fixed point around which the lever rotates • Effort Arm – The part of the lever that the effort force is applied to (measured from the fulcrum to the point at which the force is applied) • Resistance Arm – The part of the lever that applies the resistance force (measured from the fulcrum to the center of the resistance force)
Forces of the lever • Input or effort Force – Force exerted ON the lever • Output or resistance Force – Force exerted BY the lever, object being moved
Classes of Levers • There are three different classes of levers. The class of a lever is determined by the location of the effort and resistance forces relative to the fulcrum.
1st Class Lever • The fulcrum is located between the effort force and the resistance force. First class levers can multiply force and distance. A first-class lever always changes the direction of force (I.e. a downward effort force on the lever results in an upward movement of the resistance force) • Examples: Scissors, see-saw
Class 1 Levers F A Class 1 Lever has its fulcrum between the effort and the load.
First Class Lever • With a first-class lever, when the fulcrum is closer to the resistance, the output force is increased. However, there is a corresponding decrease in both output speed and distance. Conversely, when the fulcrum is closer tot he effort, the output force is decreased and there is a corresponding increase in both output speed and distance.
2nd Class Lever - • resistance is located between the effort force and the fulcrum. These levers multiply the force but the direction stays the same. • Example: Wheelbarrow
Class 2 Levers L A Class 2 Lever has its load between the effort and the fulcrum.
Second Class Lever • A second-class lever does not change the direction of force. When the fulcrum is located closer to the resistance than to the effort force, an increase in force (mechanical advantage) results. A second-class lever is illustrated below:
3rd Class Lever - • The effort force is located between the fulcrum and the resistance. The effort arm is always shorter than the resistance arm so it cannot multiply the force and the MA is always less than 1. • Examples: Rake, hockey stick
Class 3 Levers E A Class 3 Lever has the effort between the load and the fulcrum.
Third Class Lever • A third-class lever does not change the direction of force; third-class levers always produce a gain in speed and distance and a corresponding decrease in force. A third-class lever is illustrated below. Because it requires more force, third class levers have a mechanical disadvantage.
Lever Recap • Determining the different classes of levers can be very difficult • A trick to help you remember how to classify each lever is FLE 123 • FULCRUM in middle = class 1 • LOAD in middle = class 2 • EFFORT in middle = class 3
Leverage Systems and the Body • Lever: i.e. bones, a rigid rod that moves on some fixed point • Fulcrum: i.e. joint, a fixed point • Resistance: the force opposing movement • Effort: the force exerted to achieve action, provided by the muscles
Levers and the human body • Your body contains muscles attached to bones in ways that act as levers. • Here the biceps muscle attached in front of the elbow provides the force to lift the weights. Can you think of other muscle levers in your body?
Muscle Mechanics – 1st Class Lever first-class lever [E-F-R = effort-fulcrum-resistance] • the fulcrum is placed between the effort and the resistance (load) • e.g., seesaw, scissors • skull (head)/atlas and cervical vertebrae • the muscles of the back (splenius, trapezius, etc.) provide the effort • the mass of the skull provides the resistance (load)
2nd Class Lever • second-class lever [F-R-E = fulcrum-resistance-effort] • the fulcrum is at the end of the lever, the effort is at the opposite end, and the resistance (load) is in between, e.g., a wheelbarrow • 2nd class levers provide greater power to move a large resistance (load) • raising the body on the toes • the mass of body is the resistance • the ball of the foot is the fulcrum • the contraction of the calf muscles to lift the heel upward is the effort
3rd Class Lever • third-class lever [F-E-R = fulcrum-effort-resistance] • the fulcrum is at one end, the resistance is at opposite end, and the effort is in between, e.g., tweezers • the most common type of lever in the body • 3rd class levers provide for rapid motion • e.g., flexing the forearm or adducting the thigh • such movements can still be powerful
Mechanical Advantage Levers can provide Mechanical Advantage by reducing the effort needed to lift a load. The closer the fulcrum is to the load, the less effort is needed to lift the load. The load does not move a great distance. L E F
Levers can be used to move loads farther if the fulcrum is placed close to the effort. In this situation more effort is needed to lift the load, but the load will move farther than if the fulcrum was closer to the load. L E F
Force x Distance = Force x Distance What is the Relationship? Input Force x Length of Input Arm Output Force x Length of Output Arm = # of Weights x Distance # of Weights x Distance =
Calculating Mechanical Advantage • By using the length of the effort arm and the resistance arm you can find the ideal mechanical advantage. We can find the ideal mechanical advantage of any simple machine by dividing the effort distance by the resistance distance. • IMA = length of effort arm (Remember . length of resist arm D=E/R
Mechanical Advantage: Lever • IMA = length of effort arm • . length of resist arm • D=E/R • For our example, MA = 10/5 = 2 v • Distance from effort to fulcrum: 10 feet • Distance from load to fulcrum: 5 feet
Mechanical Advantage Forces can also be used to calculate Mechanical Advantage Mech. Adv. = Resist Force Effort Force Remember: F=R/E For our example: M.A. = 20/10 = 2 10# 20#