Download
1 / 30
300 likes | 327 Views
Learn how to create shaded relief images using aerial photos, DEMs, and ArcMap, including adjusting lighting angles, rendering quality, and combining orthophotos with hillshades for a realistic 3D representation.

E N D
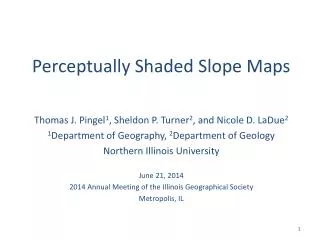
Creating Shaded Relief Images Using Aerial Photos, DEMs and ArcMap
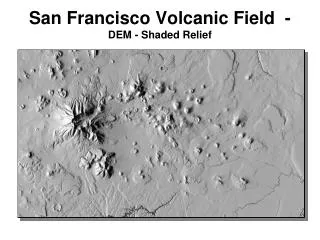
Hillshade created from DEM with default lighting at 315° azimuth, 45° altitude
Hillshade created from DEM with lighting at 170° azimuth, 40° altitude to approx match shadows on aerial photo
Hillshade with 315° lighting angle Hillshade with 170° lighting angle
conflicting shadows Naturally lit orthophoto Hillshade lit from 315°
complimentary shadows Naturally lit orthophoto Hillshade lit from 170°
Combined orthophoto and semi-transparent hillshade using hillshade constructed with 315° lighting angle
Combined orthophoto and semi-transparent hillshade using hillshade constructed with 170° lighting angle
Creating 3D Scenes Using Aerial Photograph, DEM and ArcScene
In the Layer Properties box for the air photo, click on the Base Heights tab and change the setting to obtain heights from surface and browse to the correct elevation file. The airphoto is now draped over the elevation surface as seen in this edge-on view
The default view now shows a true 3D representation of the scene
The Layer Properties Rendering tab is the key to getting good-looking images in ArcScene. Check the Shade areal features … box (this is unchecked by default). Change the Quality to High (this is set to a midpoint position by default). The high-quality render takes up lots of video memory, so, if you’re running on an older PC or one without a high end video card, your image may break up as it is rotated in ArcScene. The Shade areal features… comes into play on the next step, which will not work if this is not checked.
Scene Properties Illumination governs the scene light position. This light position, and checking the “shade layers relative to scene light” box in the layers properties, governs how shadows and highlights play across the scene as it is rotated, enhancing or disrupting the 3D effect.
The Sun Position and Elevation http://www.srrb.noaa.gov/highlights/sunrise/azel.html Lat/Long read from ArcMap screen Date and time from meta data
315° 170°
Zooming in for a closer look Scene light set to 315°: conflicting shadows do not match those in the air photo
Scene light set to 170°: Noconflicting shadows with those in the air photo
315° lighting angle 170° lighting angle