Download
1 / 11
110 likes | 250 Views
Microsoft PowerPoint Getting Started Guide. Prepared for Towson University Dr. Jeff M. Kenton Amy Chase Martin 2007.

E N D
Microsoft PowerPoint Getting Started Guide Prepared for Towson University Dr. Jeff M. Kenton Amy Chase Martin 2007
PowerPoint is a presentation software tool that allows you to create dynamic on-screen slide presentations. These slides may also be printed to serve as handouts to support your presentation. This handout will introduce you to a number of skills you will use when creating a simple slide presentation using PowerPoint. The instructions in this guide were created using PowerPoint 2002 but the procedures are similar in several versions of PowerPoint. • Skill list: • Open PowerPoint . . . . . . . . . . . . . . . . . . . . . . . . . . . . . . . . . . . 3 • Entering text into a placeholder. . . . . . . . . . . . . . . . . . . . . . . . . 4 • Saving a PowerPoint Presentation. . . . . . .. . . . . . . . . . . . . . . . . 4 • Creating a bulleted list slide . . . . . . . . . . . . . . . . . . . . . . . . . . . . 5 • Creating a clip art and text slide . . . . . . . . . . . . . . . . . . . . . . 5 • Re-sizing and moving a clip art image. . . . . . . . . . . . . . . . . . . . . 6 • Resize and move text boxes . . . . . . . . . . . . . . . . . . . . . . . . . . 7 • Insert an autoshape into a slide . . . . . . . . . . . . . . . . . . . . . . . . . 8 • View slides . . . . . . . . . . . . . . . . . . . . . . . . 9 • Change order of slides . . . . . . . . . . . . . . . . . . . . . . . . . . . . . . . 9 • View slides as a presentation . . . . . . . . . . . . . . . . . . . . . . . . . . 10 • Creating speaker’s notes . . . . . . . . . . . . . . . . . . . . . . . . . . . . 10 • Printing speaker’s notes . . . . . . . . . . . . . . . . . . . . . . . . . . . . . 11 • Exit PowerPoint . . . . . . . . . . . . . . . . . . . . . . . . . . . . . . . . . . . . . 11
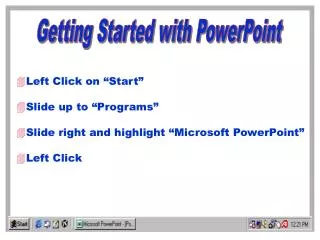
Open PowerPoint • Click the Start button on the computer’s desktop. • Select All Programs • Locate PowerPoint andselect it.It may be listed as an option once you select Microsoft Office. • Once PowerPoint is open on your computer screen, your screen may look like this – Menus Buttons The PowerPoint window has many different buttons, menus and screen elements that are designed to assist you when you create a presentation. It is not necessary to use every tool available in order to create a dynamic presentation with different colors, pictures and text styles. This packet will introduce you to some of the basic tools available in PowerPoint. For now observe the miniature slide pictured in the center of the window. It has two placeholders for you to type the text you want included in your slide. Title Text Placeholder Text Placeholder
Entering Text into a Placeholder You’ll now click in the Title text placeholder to enter a title for your presentation. In this example we typed Teaching Methods. Now you try: • Click in the Title Text Placeholder on the slide. • Type the text of your choice. • Click elsewhere on the slide to complete the entry. To add text in the subtitle text placeholder: • Click in the Subtitle Text Placeholder on the slide. • Type the text of your choice. • Click elsewhere on the slide to complete the entry. You’ve created a Title Slide for your presentation! Saving a PowerPoint Presentation Saving a PowerPoint presentation is like saving any Microsoft Office file. You may choose Save from the File menu or click the Save button on the Standard toolbar. The first time you save your presentation, you will need to give it a name so that you can store it on your computer. Now you try: • Select File, Save. • The Save As dialog box will open so that you may name and save your presentation. • If you accept the default • name assigned to your • presentation, click the • Save button. Otherwise, • type a name in the • File name: box and • then click Save. • TIP: Save your presentation often as you work on it.
Creating a Bulleted List Slide The most common slide type in PowerPoint is a bulleted list slide. In fact, after you have created a Title Slide and click the New Slide button, PowerPoint assumes that the type of slide you will desire is a bulleted list slide. Now you try: • Click the New Slide button OR select Insert, New Slide A new slide appears with placeholders for title text and bulleted text. The Slide Layout Task Pane also appears on the right side of the PowerPoint window. If you wanted a different type of slide layout such as a chart or text and clip art slide, you could select it from the list of available layouts. • Add text to the new slide by clicking in the Title Text placeholder and typing the desired text. • Click elsewhere on the slide to complete the entry. • Click in the body text placeholder and type the first line of bulleted text. • Press the Enter key on the keyboard. • Type the second line of bulleted text. • Press the Enter key on the keyboard. • Continue typing and pressing Enter to complete the text on the slide. • Save the presentation again by selecting File, Save. Since you have already saved and named this presentation, PowerPoint will not ask you to name it a second time and will simply save your changes. Slide Layout Task Pane Creating a Clip Art and Text Slide There are a number of ways to include images such as clip art on your slides. One method is to create a slide using the Title, Text and Content layout. Now you try: • Click the New Slide button OR select Insert, New Slide • Scroll down through the list of available slide layouts on the Slide Layout task pane and click the Title, Text and Content layout.
A new slide appears with a layout similar to the one pictured here: • Add Title text by using the procedure you have performed on other slides. • Add bulleted text by following the procedure you used on the bulleted text slide. • Click the Insert Clip Art picture on the content placeholder. The Select Picture dialog box appears. NOTE: The images in your dialog box may be different than those displayed here. • Scroll through the Select Picture dialog box and choose an image for your presentation. • Click the image to select it. • Click the OK button to insert the image into the content placeholder. • Save your presentation by clicking the Save button OR selecting File, Save. Drag this bar down to scroll. Sample image Slide with Clip Art image inserted. Re-sizing and Moving a Clip Art Image You may change the size and position of Clip Art images and other pictures inserted into a PowerPoint presentation. You simply click the image to select it and then drag one of the corner handles to resize it. Now you try: • Make sure the image you inserted is selected by clicking on it once. It should have small white circles, handles, surrounding it. • Move your mouse to one of the corner handles and click and drag the handle towards the image to make it smaller OR away from the image to enlarge it. • Release the mouse to complete the size change. Re-sizing handles Click and drag corner handle
Move the image to the desired location on the slide by clicking in the center of the image and dragging it to another location. When you click and drag an image to move it, the mouse changes to a four-headed arrow. • Release the mouse to complete the move. Slide with clip art image resized and positioned Resize and Move Text Boxes You may change the size and position of text placeholders. You simply click the text to select it and then click the border of the text box to move it. Now you try: • Click once on the bulleted text. A border of diagonal lines will surround the text. • Click the diagonal border once to select the border. The border will appear as small dots surrounding the text. • Click on one of the resizing handles and drag to resize the textbox. Here we will remove the blank space at the bottom of the text box by clicking in the bottom center handle and dragging upwards. • Move the text box by selecting it using the previous method (NOT on one of the handles) and then dragging the border to another position • Click elsewhere on the slide to complete the move. • Save the presentation.
Insert an AutoShape Into a Slide Autoshapes are pre-defined shapes such as rectangles, arrows and circles. They may be as large or as small as you wish. Autoshapes may be moved or resized, or even be filled with different colors. You use the AutoShapes menu on the Drawing toolbar to select the type of shape you would like to insert. Now you try: • We are going to create a 5 point star in this example. Select the Autoshapes menu on the Drawing toolbar. • Select Stars and Banners from the menu. • When you select the Stars and Banners submenu, a palette of several images appear. We will select the 5 point star. Click the 5 point star to select it. • The mouse has changed to a crosshair . Move the crosshair onto your slide on the empty left-hand side of the slide. Hold down the mouse and drag down and to the right. • Release the mouse. • You may re-size the shape by clicking and dragging one of its corner handles. TIP: To maintain the shape’s proportions, hold down the SHIFT key while dragging the corner handle. • You may move the shape by clicking in the center of the shape and dragging it to another position. • You may change the Fill color of the shape by selecting it (ensuring that its handles are visible), then clicking the down arrow attached to the Fill Color tool on the Drawing toolbar. • Select the desired color from the palette by clicking on it.
View Slides You may move between different slides and view them at any time. You can use the scroll bar on the right side of your screen by clicking and dragging up or down. Alternatively, you may click the Previous Slide or Next Slide buttons. Now you try: • Click the Previous Slide button on the scroll bar • to view the previously created slide. • Click the Previous Slide button on the scroll bar • to view the previously created slide. • Click the Next Slide button on the scroll bar to view the next slide in the presentation. Previous Slide Button Next Slide Button Change Order of Slides The order of the slides in your presentation may be changed at any time. For instance, let us assume that you created a slide, slide number two, and you would now like it to appear after the current slide number three. You may simply drag slide number two into position after slide number three using the Slide Sorter view of the presentation. Now you try: • Click the Slide Sorter View button on the lower left corner of the presentation window. The slide sorter window appears. • Click and drag the slide you want to • reorder into the desired position in the • presentation. In this example, we are dragging the current slide 3 into a position before slide 2. • Release the mouse to position the slide.
View Slides as a Presentation You may view your slides as they will appear in your presentation by clicking the Slide Show button on the lower left corner of the presentation window or by choosing Slide Show, View Show from the menu. Now you try: • In Slide Sorter view, click the first slide in your presentation once to select it. OR if you are in Normal view… • Click the Previous Slide button on the scroll bar until you are displaying the first slide in your presentation. • Select Slide Show, View Show. The first slide in your presentation appears on your screen. • Press the Enter key on your keyboard to advance to the next slide. • Press the Enter key in order to advance through the presentation until you reach the end of the presentation. • Press the Esc key on your keyboard. You return to your previous view of the presentation. You may press the Esc key at any time during a presentation to exit it. • Save the presentation. Creating and Printing Speaker’s Notes It is helpful to have notes to refer to when you are giving your presentation. Those notes will usually relate to the contents of each particular slide in your presentation. They are NOT visible when the presentation is shown in Slide Show view. Notes are created by selecting View, Notes Page from the menu. Now you try: • Navigate so that you are looking at the first slide in your presentation. (If you are not in in Normal View, select View, Normal). • To view the Notes area of the presentation window, select View, Notes Page. The screen will instantly reduce and display a smaller version of the slide, immediately above a large, blank area for you to enter your notes. Notes entry area
It may be nearly impossible to view the Notes area comfortably. To change the zoom of the page, so that you may type your notes more easily, click the arrow on the Zoom box. • A dropdown list of various screen magnifications appears. Select the level of magnification you desire. (In this example we have selected 75%). • Click in the box marked “Click to add text”. • Type the notes you would like to say about the first slide. You may change the size of the type by selecting a different font size from the Font Size dropdown menu on the Formatting toolbar. Print Speaker’s Notes The purpose of Speaker’s Notes is to create a printed text that you may use to support your presentation. You print them by making the appropriate selection in the Print dialog box. Now you try: • Select File, Print. • From the Print What: box, select Notes Pages • Click OK. Exit PowerPoint When you have completed your presentation, or if would like to close the presentation and complete it at a later time, you may select File, Exit. This procedure will close both the presentation and the entire PowerPoint application. Now you try: • Select File, Exit. If you have not saved your most recent changes to the presentation, you will be prompted to do so. • If prompted to save changes, click the Yes button. • PowerPoint saves any changes and exits.