Download
1 / 38
380 likes | 679 Views
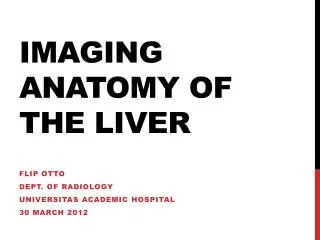
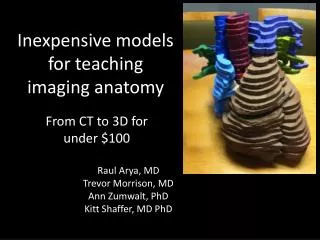
Inexpensive models for teaching imaging anatomy. From CT to 3D for under $100. Raul Arya, MD Trevor Morrison, MD Ann Zumwalt, PhD Kitt Shaffer, MD PhD. topics. Overview Radiologic Anatomy labs Rationale for developing models Materials list/technique Examples Future directions.

E N D
Inexpensive models for teaching imaging anatomy From CT to 3D for under $100 Raul Arya, MD Trevor Morrison, MD Ann Zumwalt, PhD Kitt Shaffer, MD PhD
topics • Overview Radiologic Anatomy labs • Rationale for developing models • Materials list/technique • Examples • Future directions
Radiologic Anatomy labs • Human Anatomy—gen taught in 1st year of medical school, many allied health courses • Students benefit from refreshers later in training • Radiology at BU is a required 3rd/4th year course, depends on anatomic knowledge • Special 2 hour lab sessions were developed to tie principles from 1st year to clinical setting
Anatomy and Radiology in the curriculum Year 4 Year 3 Year 1 Year 2 Anatomy Radiology basic sciences clinical rotations great opportunity to return to anatomic concepts, reinforce principles
Basic lab design • 2 hour session in 2nd week of 4-week course • About 20-25 students per group • Students count-off into 4 groups • Students rotate among 4 stations during the session, about 20 min per station
Typical stations • Model building (the opposite of dissection) • Construct a complex part of the body from simple parts • Poster demonstrating typical imaging of the body area, structures to identify • Computer station showing video clips and labeled images of body area • Ultrasound station where students can scan each other or models
stations Station 1: poster Station 2: building models
stations Station 4: ultrasound Station 3: computer
Initial models • Using relatively inexpensive plastic skeletons • Building muscles, organs from inexpensive materials • Foam • Duct tape • Plastic tubing • Electrical wire • Fastened to skeleton with velcro
Some body areas are too complexand small for this method • Life-size skeletons limit models of some areas • Pelvis • Heart • Brain • Knee • Inner ear
Materials list • Art foam board ($15 for 2 sheets, ½ inch) • Wood glue ($6 for 16 oz) • Rubber cement ($3 for 4 oz) • Hand saw ($15) • Acrylic paint (interior white $20/gal, colored with artists paint, basic colors $12) • Wood or dry wall screws ($10) • Heavy duty Velcro fasteners ($15) • Wood dowels ($3, depending on diameter) Total: $99
Software • Osirix • free clinical imaging software for Mac • allows manipulation of CT or MR data • can do measurements, change slice thickness • export images into JPG format • Photoshop • NOT free (but Elements version is good enough, $100 at OfficeMax) • allows overlay of grid, numbers, resizing, printing
Technique-1 • Decide how large you want your model (width) • Using Osirix, measure the actual width and height of original object • Calculate the desired height of your model, and how many ½ inch foam board slices you will need to get that height (could use thicker foam board) • Using Osirix, generate a set of the desired number of image slices by changing thickness
Getting the proportions right enlarged JPG image original CT image 11 inches desired model size: 14 in tall, 11 in wide =28 slices (if using 1/2 inch thick foam) actual size: 13 cm tall, 10 cm wide Use Osirix to generate 28 slices at 0.5 cm thickness
Technique-2 • Export the images from Osirix to an image processing program like Photoshop • Enlarge the images to the actual desired size of your model • For complex shapes, it may be helpful to draw a colored grid on the images to help with alignment when building the model • Print the images actual size (may need to tape together if larger than standard paper)
Printing the images original CT image, exported from Osirix as JPG (slice 3 of 28 total)
Printing the images typical slice from the cardiac model (note: flipped right/left so images can be stacked from ABOVE rather than BELOW) enlarged using Photoshop to desired size of final model
Printing the images colored grid to help in alignment slice number to help in keeping track of cutout pieces and order of stacking colored outline of where to cut (helpful for very complex shapes) slice 3 of 28
Printing the images tape the printed images together
Technique-3 • Glue the printed images onto the foam board with rubber cement • Use the hand saw to cut out the desired structures • Glue each layer on the BOTTOM of the previous layer using wood glue (align the grid if you included it on the images) • If you flip R/L, then you can glue each with the image on the TOP (which is a bit easier) • Remove the paper after each layer is in place
Working with foam board cut out the relevant areas
Working with foam board apply rubber cement to back of paper
Working with foam board glue printed image to foam board
Working with foam board cut out pieces with hand saw
Working with foam board glue slices on top of each other and remove paper (this model has been painted)
Technique-4 • If desired, paint with acrylic paint • Attach velcro to assembly points, reinforcing with screws • If needed, drill holes to insert wooden dowels for more support, attaching with wood glue
Final touches velcro dowels
Total time for pelvis model • ~2 hours to figure out proportions, print images and tape together • ~2 hours to cut out pieces • ~1 hours to assemble pieces (in stages, letting them dry between) • 1 hour to paint • 1 hour to add reinforcements total: 7 hours
Total time for heart model • ~2 hours to figure out proportions, print images and tape together • ~3 hours to cut out pieces • ~2 hours to assemble pieces (in stages, letting them dry between) • 1 hour to paint • 1 hour to add reinforcements total: 9 hours
If you can get the images, you can make the model • Sources of images • CT • MR • Actual tissue sections, photographed
Future directions • Huge knee • Inner ear • Base of skull • Big wrist
Website • www.shafferseminars.net • Any further questions: • kitt.shaffer@bmc.org
References • Lufler RS, Zumwalt AC, Romney CA, Hoagland TM. Anat Sci Educ. 2012 Jan;5(1):3-9. Effect of visual-spatial ability on medical students’ performance in a gross anatomy course. • Zumwalt AC, Lufler RS, Monteiro J, Shaffer K. Anat Sci Educ. 2010 May-Jun;3(3):134-40. Building the body: active learning laboratories that emphasize practical aspects of anatomy and integration with radiology. • Griksaitis MJ, Sawdon MA, Finn GM. Anat Sci Educ. 2012 Jan;5(1):20-6. Ultrasound and cadaveric prosections as methods for teaching cardiac anatomy: A comparative study. • Ivanusic J, Cowie B, Barrington M. Anat Sci Educ. 2010 Nov-Dec;3(6):318-22. Undergraduate student perceptions of the use of ultrasonography in the study of "living anatomy". • Shaffer K, Small JE. Acad Radiol. 2004;11(9):1059-70. Blended learning in medical education: use of an integrated approach with web-based small group modules and didactic instruction for teaching radiologic anatomy.