Download
1 / 56
560 likes | 628 Views
Explore the limits of OpenGL rendering and the advantages of ray tracing in creating realistic images with optical effects like reflections, refraction, shadows, and more.

E N D
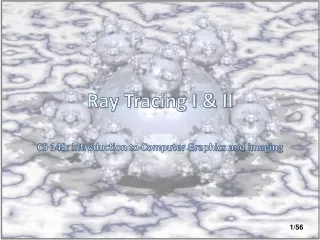
Ray Tracing I & II CS 148: Introduction to Computer Graphics and Imaging
OpenGL vs. Real World • Limits to opengl rendering • Reflectance • Draw the object twice • Cannot easily handle complex reflections
OpenGL vs. Real World • Limits to opengl rendering • Global Illumination • Ambient Lighting • Not realistic Note the soft shadow above and the hard shadow below
OpenGL vs. Real World • Limits to opengl rendering • Volumetrics • Sprite rendering • Not realistic
Why We Use Ray Tracing • Much more realistic than scanline renderings. • Capable of simulating a wide variety of optical effects. • reflection, refraction, shadows, scattering, subsurface scattering, dispersion, caustics, and participating media.
What is Ray Tracing • Generating an image by tracing the path of light through pixels in an image plane • Simulating the effects of light’s encounters with virtual objects.
Ray Tracing History Image courtesy Paul Heckbert 1983
Ray Tracing History Kajiya 1986
Real-Time Ray Tracing • Ray tracing is typically not used in games • Too expensive but possible • GPUs are very good at tasks that are easily parallelizable • NVIDIA Optix system • Typically all GPU power is used
Basic Ray Tracing Algorithm Create a ‘virtual window’ into the scene
Defining the Rays [0,+∞)
Basic Ray Tracing Algorithm Shoot ray from eye through pixel, see what it hits
Basic Ray Tracing Algorithm Shoot ray toward light to see if point is in shadow
Basic Ray Tracing Algorithm Compute shading from light source
Basic Ray Tracing Algorithm Record pixel color
Pseudocode Image Raytrace (Eye eye, Scene scene, int width, int height) { Image image = new Image (width, height) ; for (int i = 0 ; i < height ; i++) for (int j = 0 ; j < width ; j++) { Ray ray = RayThruPixel (eye, i, j) ; Intersection hit = Intersect (ray, scene) ; image[i][j] = FindColor (hit) ; } return image ; }
Up vector Eye lookAt Defining the Camera • Camera at eye, looking at lookAt, with up direction being up • Recall the gluLookAt for OpenGL camera. b a = lookAt – eye b = up a
Defining the Camera • a, b don’t have to be orthogonal or unit length • Form an orthonormal basis u, v, and w: b v u a w
Recall the OpenGL Frustum • Uses a pinhole camera. • The image plane is in front of the focal point which means the image is right side up. • The frustum is the volume of our view (shown in blue below). • The image plane is the plane of the frustum nearest to the camera.
Defining the Image Plane • The viewing system has the origin eye and is aligned to the uvw basis. • The image plane is defined as a rectangle aligned to uv and orthogonal to w. • The point P on the image plane can be represented by coordinate (u,v,w) with the basis u, v, and w and the origin eye: P=eye+uu+vv+ww. • Similar to the image plane in OpenGL.
Defining the Image Plane us = tan(fovy/2)*ws vs = tan(aspect • fovy / 2 )*ws C = eye + wsw LL = C + (us• u) – (vs • v) UL = C + (us• u) + (vs • v) LR = C – (us• u) – (vs • v) UR = C – (us• u) + (vs • v) The size of the image plane is (2us,2vs). UR UL vs v u C w wsw eye fovy LL Note that the size of the pixel plane (2us,2vs) and its distancews from the eye determines the field of view. LR us
Computing Rays from Pixels • Given a pixel (i, j) in the viewport (i0, j0, nw, nh), we can calculate the coordinate of the pixel in the (u,v,w) coordinate system: • So the location of the pixel in the world space is • Then the direction of the ray is • The ray through pixel (i,j) is
Calculating Ray-Object Intersections • Given a ray R(t)=A+tD, find the first intersection with any object where t ≥ tmin and t ≤ tmax. • The object can be a polygon mesh, an implicit surface, a parametric surface, etc.
Ray-Sphere Intersection • Ray equation: • Implicit equation for sphere: • Combine them together:
Ray-Sphere Intersection Quadratic equation in t: With discriminant:
Ray-Sphere Intersection For the case with two solutions with t1<t2, choose t1 for the first intersection.
Ray-Sphere Intersection • Intersection Point: • Intersection Normal: P
Ray-Plane Intersection • Ray equation: • Implicit equation for plane: • Combine them together and solve t for the intersection point p: • For ray-triangle intersection test, we can project the 3 vertices of the triangle and the intersection point p onto the plane, and run the point-inside-triangle test in 2D as we did for rasterization in Lecture 3.
Or you can avoid projection… • For each edge e of the triangle: • Compute the normal direction n orthogonal to e and pointing to its opposite vertex in the plane of the triangle. • Pick one of the two endpoints of e (assuming it is P1 here), and test whether • If , then P is outside the triangle. • Otherwise P is inside the triangle.
rasterize( vert v[3] ) { line l0, l1, l2; makeline(v[0],v[1],l2); makeline(v[1],v[2],l0); makeline(v[2],v[0],l1); for( y=0; y<YRES; y++ ) { for( x=0; x<XRES; x++ ) { e0 = l0.a * x + l0.b * y + l0.c; e1 = l1.a * x + l1.b * y + l1.c; e2 = l2.a * x + l2.b * y + l2.c; if( e0<=0 && e1<=0 && e2<=0 ) fragment(x,y); } } } Recall: Point Inside Triangle Test in Rasterization v0 l1 l2 v2 l0 v1
Ray-Triangle Intersection • Ray equation: • Parametric equation for triangle: • Combine:
Ray-Triangle Intersection is 3 equations with 3 unknowns: in which
Ray-Triangle Intersection • Rewriting it as a standard linear equation: Satisfying
Ray-Triangle Intersection • Solving the linear equation using Cramer’s rule, we will get the expressions for . • Notice the 4 matrices have some common columns which means we can reduce the number of operations by reusing the numbers when computing determinants.
Pseudocode bool RayTriangle (Ray R, Vec3 V1, Vec3 V2, Vec3 V3, Interval [tmin, tmax]) { compute t; if(t < tmin or t > tmax) return false; compute β; if(β < 0 or β > 1) return false; compute α; if(α < 0 or α > 1-β) return false; return true; } // Notice the conditions for early termination. // Remind: for the projected 2D point inside triangle test, you can return early as well when testing the sides of the 3 edges.
Computing Normals for Intersection Points • Barycentric interpolation again • Interpolating from the 3 normals of the triangle vertices • Adding extra details on the surface • Bump mapping, normal mapping, and displacement mapping.
Texture, Bump, Normal, and Displacement Mapping • Texture mapping • Compute the texture coordinate (u, v) of the intersection point by barycentric interpolating from the texture coordinates of the 3 vertices of the triangle. • Lookup the texture color c by (u, v) from the texture • Take c as the local material color and multiple c with the computed lighting color for the final point color • Bump mapping and normal mapping • For each intersection point, obtaining the perturbed normal by looking up the heightmap/normal texture using (u, v) similar to looking up color in texture mapping • Combine the perturbation with the true surface normal and use the new normal to calculate the lighting at that point • Displacement mapping • Notice that the location of the intersection point will be changed by displacement • Requires adaptive tessellation to obtain micropolygons to represent the surface with enough resolution for accurate intersection tests
Ray Tracing Transformed Objects • Rendering duplicated objects in the scene. • Keep one instance of the geometry data and transform it.
Ray Tracing Transformed Objects • Triangle: Still a triangle after transformation • Sphere: becomes ellipsoid • Write another intersection routine? • …or reuse ray-sphere intersection code?
Ray Tracing Transformed Objects • Idea: Intersect untransformed object with inverse-transformed ray 28/44
Ray Tracing Transformed Objects • Transform intersection back to world coordinates • Intersection point: • Intersection normal: 29/44
Recall: Transforming Normals We can’t just multiply the normal by the 3x3 submatrix of modelview matrix. If the modelview matrix is non-orthogonal, e.g. contains a non-uniform scaling… Idea is to preserve dot products for arbitrary Insert identity matrix where N’ is a WRONG normal in the transformed space scale y
Lighting the Intersection Point • The lighting on each intersection point is the sum of influences from all light sources. • Cast rays from the intersection point to all light sources. • Similar to the OpenGL lighting model. • Different light types: • Ambient light, point light, directional light, spot light, area light, volume light. • Different material properties: • Diffusion, specular, shininess, emission, etc. • Different shading models: • Diffusive shading, Phong shading.
Casting Shadows Rays • Detect shadow by rays to light source • Test for occluder • No occluder, shade normally (e.g. Phong model) • Yes occluder, skip light (don’t skip ambient)
Spurious Self-Occlusion • Once the intersection point is found, add ε to t to avoid the redundant intersection report for the shadow ray and the original surface • This often fails for grazing shadow rays near the objects silhouette. • Better to offset P in the normal direction from the surface • The direction of the shadow ray shot from the perturbed point to the light source may be slightly different from direction of the original shadow ray. • Also need to detect the intersections of the new P with other objects in the scene to avoid an incorrect offset. The perturbed point may be still inside the object Offset along the normal Offset along the ray
Avoiding incorrect self-shadowing • Self shadowing • Add shadow bias (ε) • Test object ID Incorrect self-shadowing Correct 23/44
Example: Diffusive Shading The intersection point and normal calculated in the ray-object intersection test