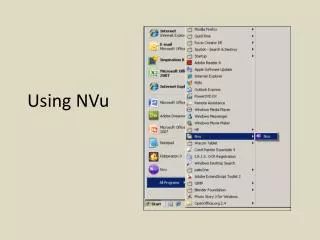
Using NVU
Using NVU. To create your Career Portfolio. For instructions on obtaining and installing NVU, please see the file: Installing NVU. After installing NVU, you can find it on your Desktop Or in the Start menu under “All Programs” Or you may find a quickstart button on your taskbar.

Using NVU
E N D
Presentation Transcript
Using NVU To create your Career Portfolio For instructions on obtaining and installing NVU, please see the file: Installing NVU
After installing NVU, you can find it on your Desktop Or in the Start menu under “All Programs” Or you may find a quickstart button on your taskbar.
Close the “Tip of the Day” window
NVU includes a “Site Manager” which is actually very useful. But for today’s exercise, we wish to concentrate on the Editing features, so: Click the little X to close the Site Manager Instead we will useMy Computerwhich is a more capable file manager Use of My Computer is described in the File Management page
Now we have a broad, blank screen to create the web page. Note the tab, which says it is “untitled” That’s because we haven’t saved it yet.
But we must keep track of our webpage files! We need a file manager! Click on Start…
… then click on My Computer to start the file manager utility
My Computer is now open. Click on the “Folders” button to get the two-pane folders view
Scroll up to find My Documents Click to open it. Then find My E-Portfolio Click to open it. Your web files will appear in the right pane.
Website development requires good file management You can return to My Computer at any time by clicking this button on the task bar
NVU works much like a word processor, with editing and formatting buttons that should be familiar if you use Word. But NVU has also has features to make it a good web page editor
So just start typing! Type in “E-Portfolio” And press the ENTER key(on your keyboard) This places the cursor on the line below. Type in the career field you have chosen for this assignment.
Select both lines, then Click the centering icon. This will center your text on the page.
Click the “Larger Font Size” button twice. This will make your text larger.
Click the “Larger Font Size” button twice. This will make your text larger.
Click the “Larger Font Size” button twice. This will make your text larger.
Select only the top line Click the Larger Font Size icon twice To make that text even larger.
Select only the top line Click the Larger Font Size icon twice To make that text even larger.
Select only the top line Click the Larger Font Size icon twice To make that text even larger.
Save this page! It is NEVER TOO EARLY to save! Click File Then click Save As…
Type in a title Make it pleasant, polite, and so that it gives the reader a clear idea of the page contents. Then click OK
Click the down-arrow for the “Save In…” box Locate My Documents then My E-Portfolio and click on it.
This filename is WRONG! ERASE it and type in “index.html” NO OTHER name is correct for your home page. It must ALWAYS be named “index.html”
Type in “index.html” And hit Save
Your index page is now saved. It “knows” where it is! Note that the title now appears on the tab
Let’sInsert a Photograph! Place the cursor at the end of the “r” in “Engineer” Press the ENTER key TWICE This will move the cursor down to a blank line
Click the down-arrow for the “Look In…” box Locate My Documents then My E-Portfolio and click on it.
Click “Views” button, then click Thumbnails to see small versions of the pictures in this folder.
Click on the picture you want to add to your web page, then click “Open”
Click on the picture you want to add to your web page, then click “Open”
Type in Alternate Text (a few words to describe this picture) then click “OK” It is possible to avoid the alternate text by checking “Don’t use alternate text” But alternate text is needed for a web page to be ADA-compliant, so using it is good, and sometimes required
Click the SAVE button to update the index.html file on disk. That way, if the power fails or the computer crashes, you don’t have to re-do this step Note the little red disk-looking icon on the tab for this page. The red icon means that this page has not been saved since it was last changed. Save early, Save Often!
Click the New button to create a new blank page This will be our Mission Statement page Note that the red icon is gone. Nothing has been changes since the page was last saved. We will make more changes soon, but for the moment, our work is “safe”
Note this this page is untitled We will save it right away.
Click File, then Save As… just like you did for the Index page. Type in the title: “My Skills” and click OK
BE SURE to note WHERE this page is about to be saved. There is ONLY ONE good spot for it… ….in your “My-E-Portfolio” folder NOWHERE ELSE! Once the filename has been corrected,Click Save Again, NVU has copied your Title and is wanting to use it as a Filename. That is WRONG! It contains S P A C E S (won’t work!) And CaPitAl LetTeRs (confusing!) Erase “My Skills.html” and type in: “skills.html” (no capitals, no spaces!)
Start Typing your Skills Use the “Select Larger Font” button to make the headers larger Hit SAVE now an then as you are working, And again when you are done.
Linking your pages to each other Click on the E-Portfolio… tab To bring up your index.html page
Linking your pages to each other Click on the E-Portfolio… tab To bring up your index.html page
Linking your pages to each other Place the text cursor below the photo, and type in: “My Skills” My Skills
Linking your pages to each other Select the words: “My Skills” And click the Link button
Linking your pages to each other Select Choose File
Linking your pages to each other Select: skills.html And click Open
Linking your pages to each other Click: OK
Linking your pages to each other “My Skills” is now blue and underlined, indicating that it has been converted into a hyperlink. Let’s see if it works!
Checking your Links Click on Save, then on Browse This “warning” box may pop up. If it does, click “Remember my choice…” and then Launch Application
Checking your Links Your Index page will appear in your default web browser Click on My Skills to see if the link works…