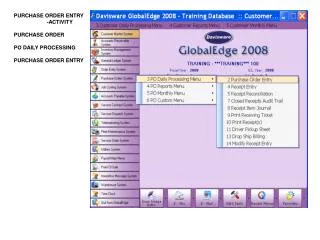
Cerner Order Entry
Cerner Order Entry. Basics. Subject Menu. Objectives. Upon completion of this module the learner will have a basic understanding of: Orders Terminology Order Entry: 4 Basic Steps Creating Favorites Folders Using the Favorite Folders Organizing the Favorite Folder Removing an Order

Cerner Order Entry
E N D
Presentation Transcript
Cerner Order Entry Basics
Objectives • Upon completion of this module the learner will have a basic understanding of: • Orders Terminology • Order Entry: 4 Basic Steps • Creating Favorites Folders • Using the Favorite Folders • Organizing the Favorite Folder • Removing an Order • Duplicate Order Alert Order Options • Modifying an Existing Order • Discontinuing an Order
Orders Terminology • Add Orders Window - Starting point for the order entry process. Allows for searching of the specific orderable desired. • Orders Profile - Opening widow in Orders section displays processed orders. Orders are separated by category. • Order Status Filter – Allows orders to be displayed in the Orders Profile filtered by status, in which the user can change to their preference. • Scratch Pad – Area in which the selected orders reside prior to signing. Allows for order details to be added or changed. • Menu (View) - Displays the various sections of the Orders Profile, separated onto categories.
Opening the Order Section • Open the chart • Click the Orders band in the Menu
Orders Section Overview Add Order Button Order Status Filter Order Profile Menu (VIEW)
Order Entry: 4 Basic Steps • Find the Order • Complete the Order Details • Sign the Order • Refresh the Screen
Step 1: Find the Order • Click the +Add button to open the Add Order Window. • When the Add Order window opens type the first 3-4 letters of the order in the Find box (system will do an automatic search) • Then click the Order in the list
The Basic Components of the Add Order Window Patient Demographic Banner Find box Filter Order Type Diagnosis Problems
Step 2: Complete the Order Details • Now select the appropriate Order Sentencefrom the list (“None” is the default) • When finished click the OK button Note: Order Details can also be completed on the Order Scratch Pad
Adding the Ordering Physician • Non-providersMUST add the name of the Ordering Physician and the Communication Type used. • When finished click the OK button to close the Ordering Physician window • Then click the Done button to open Scratch Pad
Mandatory Fields • Mandatory fields (Details) are yellow and identified by this ICON
Step 3: Sign the Order • When the Order Details (mandatory and non-mandatory) are complete, click the Sign button in the lower right corner
Step 4: Refresh The Screen • After signing, the order Status is “Processing” • Click the Refresh button to change Status • After refreshing, the order Status is “Ordered”
Creating Favorites Folders • Right click on the Order • Then select Add to Favorites • Now click the New Folder button and name the folder • When finished click the OK button.
Using the Favorites Folder • Click the Star ICON located in the Add Order window • Click the Folder you wish to open • Click Order in folder to move to scratch pad
Setting a Home Folder A Favorites Folder can be set as the Home or Default when the Add Order window opens • Click the Star to open the Favorites Folder • Right click on the favorites folder you want to designate as the Home folder • Click “Set as Home Folder” The Meds folder has now been set as the Home and will default open
Organizing The Favorites Folder • Click the down Arrow to the right of the Star ICON and click Organize Favorites • Then follow the directions in the upper left corner of the Organize Favorites window • When finished click the Close button
Removing an Order To remove an order before it is signed: • Right click on the order and then click Remove
Duplicate Order Alert Options • Duplicate Order Alerts fire when duplicate Orderables are identified in the system (i. e. CBC with Diff). • The New order alert has a yellow triangle ICON to the left of the order and has 3 options to address the alert: • Order Anyway • Remove new order • Modify new order
Duplicate Alert Options Cont. • An existing order has only 1 option when selected to address the alert: • Cancel/DC
Modifying an Existing Order • Right click on the existing order and left click Modify • Now “modify” the existing order details and click the Orders For Signature button (lower right corner) • Then click the Sign button and Refresh the screen
Discontinuing an Order • Right click on the existing order • Left click Cancel/DC • Add a cancel reason if needed then click the Orders For Signature button (lower right corner) • When finished click the Sign button and Refresh the screen
Conclusion • We hope this Computer Based Learning course has been both informative and helpful. • Feel free to review this course until you are confident about your knowledge of the material presented. For further information about this module please contact Cinda Cowen at 226-5366