Computerized Provider Order entry
Computerized Provider Order entry. Provider-Comprehensive Guide for trainers. CME information. St. Peter’s Hospital is accredited by the Medical Society of the State of New York to provide continuing medical education for physicians.

Computerized Provider Order entry
E N D
Presentation Transcript
Computerized Provider Order entry Provider-Comprehensive Guide for trainers
CME information St. Peter’s Hospital is accredited by the Medical Society of the State of New York to provide continuing medical education for physicians. St. Peter’s Hospital designates this live educational activity for a maximum of 2 hours AMA PRA Category 1 Credit (s) ™. Physicians should only claim credit commensurate with the extent of their participation in the activity. Disclosure: Speaker has no conflicts of interest in relation to this talk. This talk has not been commercially supported.
Table of contents • Introduction • Objectives • Policy & Procedures • Census Set Up • Access Patient Data • Allergies • Patient Factors • Worklist Management • Orders Tab Overview • Searching for Orders • Signing Orders • Active Orders Display • Order Detail Form Review • Med Student Order Entry • Ordersets • Order Modification • Personal Favorites • Shopping Cart • Clinical Checking • Hand On Practice Ordersets • Order Tips • Departmental a la carte ordering • Medication Order Entry (simple) • Medication Order Entry (complex) • Adding Patient Problems • Preliminary Cause of Death • Benefits of CPOE • Telephone/Verbal Order Process • Downtime Process • Hands on Practice a la carte
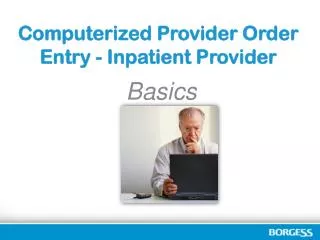
INTRODUCTION • What is CPOE? • Computerized provider order entry is the process of entering medical orders into Soarian electronically by a licensed provider. • Go-Live – June 11, 2013 • Hospitalist (medicine ordersets/a la carte) • All RNs/Ancillaries that currently accept telephone/verbal orders • Go-Live June 12, 2013 • Cardiology (order sets/ a la carte) • All other providers encouraged to use CPOE a la carte ordering Units excluded from Live • Hospice • NICU
Objectives The learner will • Become more proficient with SoarianEHR regarding order placement of medications, labs, imaging and use of Ordersets • Understand the patient safety benefits of CPOE • Understand CPOE policies and procedures • Understand how CPOE impacts use of Soarian • I.eWorklist Management (orders to be co-signed/orders approaching expiration) • Management of active orders • Downtime process
Policy and procedures • Allergies, height and weight must be entered before a provider can enter patient orders • Generally nursing will enter this information but you will be trained on how to complete this function • Medical Students will be able to enter CPOE orders however the orders are NOT ACTIVE until they are co-signed by their supervising provider
Census set up • To set up your census select Search then Coverage Tab • Your assigned group will display on the left • Place a check in the box, add to Selected Coverage, Save & Close
Census set up • Select Include Coverage Patients from drop down menu • This census includes all of your hospitalized patients (inpatient, outpatient, and ED)
Worklist Management • Your Worklist is populated from patients on your census • The Worklist contains Alerts, Orders to be Signed, Orders Approaching Expiration, Consultations, and New Results associated with your patients • The orders associated with these items can be easily managed from the Census page using your Worklist
Access to patient data • Click this ICON to launch into Patient Record (default view is all results) • Click on patient name for open census display • Click this ICON to access Orders Tab
allergies • Allergies must be completed before a patient order can be entered • If you attempt to place an order and Allergies have not been entered you will receive this message • Click Close
Reassess Allergies • Reassess Allergies displays in the patient header for new patients and at every new visit • From the Charting tab click on Allergies • The Reassess Allergies window displays, then Select No Change or Update to enter Allergy information and click Save
Reassess allergies • You must click the verify button • A message window will open indicating Allergies verified • Click ok to complete • At anytime you can view the history by clicking the View Allergy History button • The Allergy history will display in the window
Entering new ALlergies • Click on Charting tab then Allergies • You can enter new Allergies one of two ways • Select from common Allergies menu and from here you will be taken to the Allergy reaction window OR • Type the Allergy in the search box and from here you will be taken to the Allergy selection window • The allergy name will appear in the Search Results, click the allergy then click the arrow • The allergy will move to Selected Results • Then click Add
Allergy Reaction window • To complete Allergy details click on the Reactions drop down menu and select the reaction • Severity will auto populate • Click Save • The Allergy will display on the screen • You must click the verify button • A message window will open indicating Allergies verified • Click ok to complete
revising allergies • From the Charting tab click on Allergies • Select the Allergy that needs to be revised • To revise Allergies click the Status drop down menu and select either not active or marked in error • Click Save
Patient factors 1 3 • It is essential for height and weight to be completed with every patient visit • In most cases this information will be entered by the nurse • If this information has not been entered by the nurse you may complete • Click on Charting tab (1), Assessments (2), then Patient Factors (3) 2
Patient factors • Enter Height, Weight and How Weight Obtained • Select the double arrow box to convert into a different unit of measure, then click ok • The status will default to Complete • Sign using the pen in the lower right corner
Orders tab overview • The Orders screen is made up of two main sections • Current Orders and • Unsigned Orders • The left side of the screen is the Current orders • The Current orders display will default to Active Orders Since Registration • From this section orders can be discontinued, renewed, completed and co-signed • The right side of the screen is the Unsigned Orders • This section will list orders that have been entered for a patient but have not been signed electronically
To Access orders • From the Orders Tab • Click on Add Order
Orderables page overview Search box Tabs to narrow search results • From this screen you can place orders several ways: • Favorites Pick List- under Common Tab, displays orders in categories • All available CPOE Ordersets are located in CPOE Ordersets Tab • Searching
Searching for orders 1 3 2 3 4 • Enter the order in the search field and click corresponding tab (All/Meds/Labs) • Search using a minimum of 4 characters, more characters = more direct hit • The search results will be listed to the right of the screen • Click on the box of the order • Click Add to Order Session
Searching for multiple orders • You can search for multiple orders at one time • There must be a space between the orders
Signing orders Sign Here • After clicking “Add to Order Session” the orders will move to the Unsigned Orders screen on the right hand side • Prior to signing orders review and make any necessary changes • The tab at the bottom right hand side of the screen is where orders are signed off
Active orders display • After orders are signed they will move to the left hand side of the screen • All Active Orders Since Registration will display here
Active orders display sort options • From Active Orders • Click the Arrow to change sort options • Note options for Since Registration-Reverse Chronological-displays active orders by date OR Past 3 Days-Reverse Chronological
Discontinuing an order • From the Active Orders display click on the box next to the order to be discontinued • A green check mark will appear then click on Discontinue
Discontinued order • The Discontinued order moves to the Unsigned Orders screen • The Discontinued order must be signed by the provider to be effective • After signing the order moves to the Active Orders display • The order displays in gray and will remain there for 1 hour • Hover over the order to see details
Renewing medication orders • This ICON indicates a medication order is approaching expiration • To Renew orders from the Active Order display click on the box of the order to be renewed • A green check mark will appear • Click Renew • The order will move to the Unsigned Orders screen • The order must be signed by the provider to be effective
Renewed medication order • After signing the Renewal order will move to the Active Orders display • Both the original order and the renewal order will be listed • Once the original order reaches the stop date and time it will become a completed order and will no longer be listed in Active Orders • The Renewal order will remain on the Active Orders display • The order will be validated by pharmacy and verified by the RN in MAK
Order detail form review • During order entry you may be prompted to complete required fields on an Order Detail Form prior to signing off the orders • Required fields are Bold for easy identification • Some required fields will default in information • Note Priority default is Routine and can be changed • If the required field is not valued it will turn “Pink” when attempting to sign the order • In this example when ordering a Chest X-Ray the Reason for Request and Patient on Telemetry is required
Order detail form review • If you attempt to place the order without completing the required information this message will appear reminding you to check that the information has been entered correctly
Medication order detail form general review • If you need to change a medication order, open the order detail form to modify • ONLY Frequency, Priority, Start Date and Duration can be modified • Do NOT modify dosage and route • If needed information can be typed in the Clinician Directions field
Medical students order entry • A Target Co-Signature is required for all orders entered by Medical Students • Session Defaults can be set from the Orderables Page OR Unsigned Orders screen • Orders will not be Active until co-signed by supervising provider • Do not discontinue or renew orders from Active Orders, you will receive an error message • Click on ellipsis to search for provider name
Orderset guiding principles • Ordersets are a grouping of predefined (means fewer clicks) convenience orders for a specific disease or condition • Every patient should have an admit orderset • Admit ordersets contain patient status, activity, diet etc… • For Core Measure diagnosis use Admit orderset plus disease specific orderset • I.e. (Admit Medicine + Pneumonia) • I.e. (Admit Cardiology + Heart Failure) • All patients must have a patient status order and VTE prophylaxis assessment/orders
Orderset guiding principles • Ordersets may have orders that are pre-checked • Prechecks can be deselected • Utilizing a disease specific orderset does not label a patient with that diagnosis or condition • Once the orders are entered the association with the orderset name is lost • When ordering from an orderset click “Add to Order Session” these orders will remain on the Unsigned Orders screen and will enable searching for “a la carte” or “ad hoc orders” • Please remember to review and sign orders
CPOE ordersets • Medicine related ordersets are listed here • Other CPOE specialty ordersets can be found on this screen • Click the black arrow to expand the nested ordersets
Foundation ordersets • Foundation Ordersets are located in “Other” • VTE Prophylaxis Medical and Surgical can be found here or in an Admit orderset
Using an orderset • Click on the black triangle to expand the order set to see the details • There are some mini ordersets within a larger order set • Some items are prechecked • If you do NOT want the item you must deselect the checkmark
Using an orderset • If you want to order an item that is pre-checked, you must place a checkmark in the mini orderset header checkbox • You will receive this message if you do NOT place a checkmark in the mini orderset header checkbox
Using an orderset • Remember to use the scroll bar to see the entire order set • This notation indicates the End of Order Set • Clicking “Add to Order Session” moves the orders to the Unsigned Orders screen
Using an orderset • Evidence links and notes may be displayed within ordersets • Local Evidence links contain St. Peter’s specific policies, procedures and/or standards of care • If you clink on any of these links you will be directed to source documents
Modifying an order from unsigned orders screen • Click on the words of the order to be modified • Order Detail Form will open to enter modifications • In this example the IV rate was changed from 75mL/hr to 100mL/hr • Click Apply • Modified order on Unsigned Orders Screen • Sign orders to complete
Removing orders from unsigned orders screen • ALL orders need review by the provider prior to signing off • If an order needs to be removed, check the box of the order that is no longer needed & click remove • The order will be removed from the Unsigned Orders Screen
Creating personal favorites from unsigned orders screen • From the Unsigned Orders screen, check the box of the order you would like to Add to Personal Favorites • Click Add to Personal Favorites • You will receive this message, Click OK • The order will be added to your Personal Favorites • Adding Personal Favorites must be done prior to signing the orders • Your Personal Favorites are only visible to you
Personal Favorites management • From Orders tab click on Add Order • Click Personal Favorites tab • Place a checkmark in the box of the order to be used • Click Add to Order Session • The order will move to the Unsigned Orders screen • Sign order to complete • To collapse or expand Personal Favorite categories use these ICONS • To remove a Personal Favorite • Place a checkmark in the box of the order to be removed • Click on the “X” to remove
Unsigned orders screen is my shopping cart • From Orders tab click on “Add Order” to return to the Orderables Page • You can enter additional orders from order sets, personal favorites or a la carte searching • Place a checkmark in the box of the order then click “Add to Order Session” • You can fill your shopping cart (add orders to Unsigned Orders screen) • Review ALL orders, make any necessary changes and “check out once” by signing to complete
types of Clinical checking • Therapeutic Duplicate • Generic Duplicate • Allergy • Adult Max Dose • Pediatric Max Dose • Drug Drug Interaction • Pregnancy Precautions • Lactation Precautions • Geriatric Precautions Level 1 (age 75 and over) • Pediatric Precautions Level (up to age18) A more comprehensive explanation of clinical checking with examples can be found in your training packets
Orderset hands on time • Surgery practice with Foundation Ordersets • VTE Prophylaxis Surgical • Analgesics Foundation • Bowel Care Foundation • IV Fluids • Antiemetics • Medicine/Cardiology Practice • 1 Admit Medicine OR Admit Cardiolgy • Plus VTE Prophylaxis Medical • Plus 1 Disease specific • For example Admit Medicine & Heart Failure • (VTE Prophylaxis Medical is in Admit Order sets and can also be found in “Other” CPOE orderset category)
Patient status order tips • All patients need a status order (inpatient, observation, outpatient) • If the patient’s status changes during hospitalization use “change patient status order” • All status orders require Attending Physician and Diagnosis • To search for the Physician name click on the box with ellipsis • In the Search field enter Physician name and click search • Select the name from Search Results and click Add