Download
1 / 6
60 likes | 233 Views
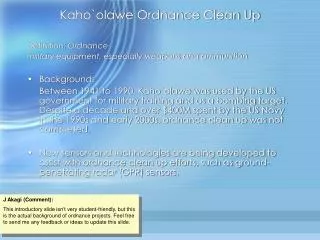
Kaho`olawe Ordnance Clean Up. Definition: Ordnance military equipment, especially weapons and ammunition Background:

E N D
Kaho`olawe Ordnance Clean Up Definition: Ordnance military equipment, especially weapons and ammunition • Background: Between 1941 to 1990, Kaho`olawe was used by the US government for military training and as a bombing target. Despite a decade and over $400M spent by the US Navy in the 1990s and early 2000s, ordnance clean up was not completed. • New sensors and technologies are being developed to assist with ordnance clean up efforts, such as ground-penetrating radar (GPR) sensors. J Akagi (Comment): This introductory slide isn’t very student-friendly, but this is the actual background of ordnance projects. Feel free to send me any feedback or ideas to update this slide.
6 Control Unit and Graphical Display 1 5 Transmit Antenna Receive Antenna 2 4 Sample GPR displays (side views) Transmitted EM Energy Reflected EM Energy 3 Ordnance Ground Penetrating Radar (GPR) Sensors Example of GPR sensor
Example Go! Motion GPR Sensor Project J Akagi (Comment): This is just an example lab experiment I thought up… not sure if you already have any GPR sensor projects in mind. Supplies:- Go! Motion + USB cable- laptop computer with Logger Lite- unopened soda can or water bottle- scotch tape- printer paper (8.5” x 11”)- ruler Procedure:(1) Cut printer paper in half lengthwise and tape strips together. Paper should now be 4.25” x 22”.(2) Tape bottom of can to one end of paper, and place on a table.(3) Connect Go! Motion to laptop computer via USB cable.(4) Open Logger Lite software.(5) Hold Go! Motion sensor 2 feet above center of paper. (Do not move sensor for remainder of steps.(6) Click “Collect” button in Logger Lite to start recording data. (7) Pull paper from end without soda can along table, so that the can goes directly under Go! Motion sensor.(8) Click “Stop” button.(9) Save Logger Lite data, and observe graph.(10) Repeat steps 2-9 with different configurations by varying number of cans, orientation, height of sensor, type of object, etc.
Microwaves: Used for GPR sensors. Radiates from radar antennas. Infrared: Used for motion detectors. Radiates from people. Electromagnetic Spectrum
Infrared (IR) Motion Detector Sensors • Infrared Motion Detection: • Senses location of IR energy; • does not require visible light • Determines when rapid movement of energy • source occurs using image processing • Sensor is triggered by motion of (red) source, • not by presence of source Visible (left) and IR (right) picture of two dogs on a sofa. Red curved lines used to indicate infrared sensor. • Thermal Imaging: • IR sensors able to determine location of • source without visible light, as shown • Thermal imaging can also be used to • determine the object’s temperature
Example Go! Motion IR Sensor Project J Akagi (Comment): This is just an example lab experiment I thought up… not sure if you already have any IR sensor projects in mind that may more accurately mirror an infrared motion detector. Supplies:- Go! Motion + USB cable- laptop computer with Logger Lite - tripod Procedure:(1) Place Go! Motion sensor on a tripod about 5 feet from a wall, aimed at the wall. (2) Connect Go! Motion to laptop computer via USB cable.(3) Open Logger Lite software. (4) Have a student to stand between the sensor and wall, about 1 foot in front of the wall. (5) Click “Collect” button in Logger Lite to start recording data. (6) Have student walk side to side along the wall.(7) Click “Stop” button.(8) Save Logger Lite data, and observe graph.