Download
1 / 26
260 likes | 284 Views
Learn how to make your PowerPoint presentations accessible from the start by using accessible templates, themes, styles, and layouts. Ensure proper slide reading order, alternative text for images, and accessible tables and links. Understand key accessibility principles and best practices to follow in creating inclusive presentations.

E N D
Powerpoint accessibility Creating accessible powerpoints from the start
Keys to accessibility • Templates and Themes • Styles • Slide Layouts • Slide Reading Order • Alternative Text for Images • Tables • Links • Other Accessibility Principles
Templates and Themes • Choose themes with good contrast and simple backgrounds • Accessible templates can be downloaded – does not guarantee accessibility but DOES increase likelihood of finding good template • Link: Sampler of Accessible Templates
Styles • General • Headings used correctly to organize presentation content • Do NOT use formatting buttons alone to style text • Fonts • Size: recommend 50+ for headings, 32+ for content • Font style • Headings and bullets: Arial, Calibri, Verdana • Paragraph content: Cambria, Palatino Linotype, Times New Roman
Styles (2) • Colors • Do not use color as the only way to convey information • Use contrasting color (dark on light background, light on dark background) • Avoid color blind combinations (red-green most common) • Spacing • Avoid using Enter to control spacing between points • Change spacing: Home tab > small arrow in the corner of Paragraph group > Spacing box > use After, Before, Line Spacing options • Bullet Points and Lists • Avoid using manually typed characters, such as hyphens or asterisks • Use proper list elements: Home tab > Bullets drop down or Numbering drop down found in the Paragraph group
Slide Layouts • Importance: Ensures the information on slides has the correct heading structure to allow navigation and proper reading order by a non-sighted user • How does a screen reader navigate? • Typical layout components • Slide “title” is presented as a heading to screen reader users • Ensuring it is read first on each slide allowing navigation • One or more “placeholder” areas where content (lists, images, tables) is entered
Slide Layout: new slide • How to create a new slide: • Home or Insert tab > choose New Slide icon > PowerPoint will usually create a new slide with the same layout as the currently-selected slide • To select a specific layout while creating a new slide: • Select the small arrow next to the text “New Slide” on the icon > drop down menu will be shown and you can choose a layout
Slide Layout: existing slide • How to change slide layout on an existing slide: • Select the slide you would like to change. • On the Home tab, select Layout. • Choose the desired layout from the dropdown.
Slide master • Use: Provides ability to make changes to all slides within a presentation (changing text size of all slide titles, changes to specific slide layout, create new custom layouts) • How to set up slide master: • Select View tab > Slide Master • The first slide in the left hand sidebar is the Master Layout which will apply all changes to this layout to every slide in the presentation • Changes to slides under the Master Layout will be applied to only slides that use that specific layout
Slide master (2) • To create new slide layout: • Select Insert Layout > Rename to give new layout a descriptive name > then you can: insert placeholder objects, change size and position of objects on the slide, etc. • Save changes to the layout: • Select Close Master View (or Close Master on Mac). All changes will automatically be applied throughout the presentation
Slide reading order • Importance: Ensures everyone reads the content in the order you intended • How does a screen reader generally navigate reading order: • Usually read in the order defined by the slide layout • #1: Slide title • #2: Prepopulated content areas that would contain lists, images, tables • #3: Additional content is read in the order in which it was added to the slide
Slide reading order (2) • How to check/change the reading order • Home > Arrange > Selection Pane • Reading order for the elements are listed bottom to top (bottom is read 1st by the screen reader) • To reorder: click and drag into the appropriate position
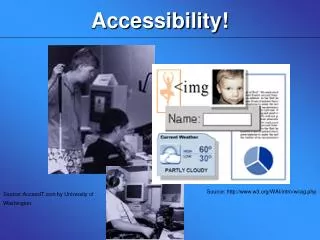
Alternative text for images • Importance: Helps people who can’t see the screen to understand what’s important in images and other visuals • Other visuals: pictures, SmartArt graphics, shapes, groups, charts, embedded objects, video • Avoid using text in images as the sole method of conveying important information
Alternative text for images • What does a screen reader do with an image? • If no alternative text is available, the screen reader will either: • a) reference “Image” and move on or • b) make no reference that an image is present
Alternative text (2) • How to Add Alt Text In PowerPoint 365 and 2019 • Right-click on the image > select Edit Alt text > enter appropriate alternative text in the Alt Text sidebar field • If the image is decorative, leave the field blank and check Mark as decorative. • NOTE: Do not select the "Generate a description for me" button (Windows-only). The quality of the automatically-generated descriptions is usually very poor, and a description of an image is often not the same as alternative text.
Alternative text (3) • How to Add Alt Text PowerPoint 2016 • Right-click on the image > choose Format Picture > select the Size & Properties icon (3rd image to the right) > choose Alt Text. • Enter appropriate alternative text in the Description field only (not the Title field).
tables • Importance: Provide information about how one piece or sets of information relates to another and is a quick tool to recognize data patterns and relationships • How does a screen reader access a table: • Without proper formatting: read in literal order as the table code; linear reading order that may not be the same as visual reading order • With proper table reading format: reads the content in the visual reading order to put meaning on the information • Provides location reference for content being read without having to listen to the entire table: • Label column headers: column headers are read as the user moves horizontally along a row; allows user to review the title of the column without navigating back up to the first row to remember which column they are on • Label row headers: row headers are read s the user moves vertically up and down a column • Example: Screen reader reading different table layouts
Tables (2) • Steps to identify column headers in a table: • Click inside the table > Table Tools options should become visible > Design tab (called Table Design on Mac) should be opened • If the top row of the table contains headers for each column (most tables do), make sure the Header Row checkbox is selected. • Steps to identify row headers in a table: • If the first column of the table contains headers for each row, make sure the First Column checkbox is selected.
Tables (3) • Avoid merging cells: blocks screen reader from navigating in a way that makes sense, increasing likelihood of content confusion • Avoid nesting tables inside of tables: increases likelihood screen read will have problems navigating and getting stuck inside a cell
Links • Inserted URLs are automatically created as hyperlinks but screen readers will read the entire URL address which will not provide much useful information to the screen reader user • Rather add descriptive text to be displayed and read in lieu of the URL address • Hyperlink text: https://xess7-prod.ec.jccc.edu/StudentRegistrationSsb/ssb/term/termSelection?mode=search • Description: JCCC Credit Class Search
Links • Steps to change the displayed text of the hyperlink • Right-click the link > select Edit Hyperlink (on Mac, right-click the link and select Hyperlink > Edit Hyperlink) > in the dialog box click in the Text to Display field at the top > enter descriptive text for the link
Other accessibility principles • Transitions and animations should be simple. • Can be distracting • Flashing or highly visual transitions/animations can cause vestibular disturbances and/or trigger seizure disorders • Video: Ensure it is captioned • Transcript: Ensure a transcript is available in lieu of any embedded audio
Check accessibility tool • Tool to assist in identifying many common accessibility issues • Results of running the tool to inspect the presentation will be listed in 3 different categories: • Errors: Content that makes the document difficult or impossible to read and understand for people with disabilities • Warnings: Content that in most (but not all) cases makes the document difficult to understand for people with disabilities • Tips: Content that people with disabilities can understand but that could be presented in a different way to improve the user’s experience
Check accessibility tool (2) • Selecting an item in the report will provide information about the issue and instructions on how to repair it at the bottom of the sidebar
references • Microsoft PowerPoint: Making presentations accessible to people with disabilities • WebAIM: PowerPoint Accessiblity