Download
1 / 31
310 likes | 437 Views
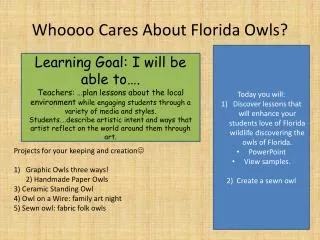
Whoooo Cares About Florida Owls?. Today you will: Discover lessons that will enhance your students love of Florida wildlife discovering the owls of Florida. PowerPoint View samples. 2) Create a sewn owl. Learning Goal: I will be able to….

E N D
Whoooo Cares About Florida Owls? • Today you will: • Discover lessons that will enhance your students love of Florida wildlife discovering the owls of Florida. • PowerPoint • View samples. • 2) Create a sewn owl Learning Goal: I will be able to…. Teachers: …plan lessons about the local environment while engaging students through a variety of media and styles. Students….describe artistic intent and ways that artist reflect on the world around them through art. Projects for your keeping and creation Graphic Owls three ways!2) Handmade Paper Owls 3) Ceramic Standing Owl 4) Owl on a Wire: family art night 5) Sewn owl: fabric folk owls
Whooooo cares about Florida owls? I do! 1) Go over owl facts using your graphic organizer with students.
The Owl Family The Seattle Audubon Society has a Bird Web that has information about all sorts of birds and owls. You can even play the sound of the owl in this web site. Owls vary in sizes and colors. They generally have an upright posture, large heads, front facing eyes, and strong, sharp bills with a pronounced downward curve. Owls can hunt and see in day but most are nocturnal or semi-nocturnal. They see very well at night and have keen directional hearing that allow them to catch their preys easily. Depends on the species of owls, the feathers range from snowy white, to black or brown colors with spots. Owls have extensive feathering, with feathers often extending to the tips of the toes. Owls can be found in open woodlands, forested area and along stream, deserts, suburban areas, and parks.
An owl’s diet varies. It includes small rodents, mice, chipmunks, squirrels, birds, and larger insects. Other prey include small fish, small snakes, lizards, and soft-shelled turtles, small frogs, toads, and salamanders. Teacher Resources: Florida Audubon Society http://fl.audubon.org/birds-wildlife Cape Coral Burrowing Owls http://capecoralburrowingowls.com/ Virtual field trips with your students through webcams: http://capecoralburrowingowls.com/Videos.html Information on the Cape Coral Burrowing Owl Annual Festival: http://capecoralburrowingowls.com/CCFW-Burrowing-Owl-Festival.html Due to urbanization and deforestation, there is a concern of declining owl population and some species may be added to the at-risk list. Owls are monogamous birds forming long-term bonds. They may nest on cliffs, in haystacks, hollow trees, burrows , in barns, old buildings, or other cavities.
The Barn Owl is a gray-and-tawny owl with a white, heart-shaped face and dark eyes. It has long legs. http://www.ct.gov/dep/cwp/view.asp?q=325962 http://www.birdweb.org/birdweb/bird/barnowl Burrowing Owls are the smallest among all owls. They are ground dwellers, and have long legs. Adults are light brown, mottled with white. They have white throats and eyebrows, and yellow eyes. http://myfwc.com/wildlifehabitats/profiles/birds/owls/burrowing-owl/ Spotted Owls are medium-sized owls with brown eyes and no ear-tufts. They are gray-brown in color, with light spotting on their backs and breasts. http://www.birdweb.org/birdweb/bird/spottedowl
Great Horned Owls are large, powerful owls with prominent ear-tufts, prominent facial disks, and bold yellow eyes. Their plumage is a mix of mottled brown with white-and-black barring, http://www.birdweb.org/birdweb/bird/great_horned_owl The Eastern Screech Owl is a small, nocturnal, woodland Owl. There are two color morphs, a gray phase and a reddish-brown phase. http://www.owlpages.com/owls.php?genus=Megascops&species=asio Barred Owls are a bit larger than Spotted Owl. They have brown eyes and no ear-tufts. Breasts are barred horizontally and bellies vertically, with a clear demarcation between the horizontal and vertical barring. http://www.birdweb.org/birdweb/bird/barred_owl
Variety of Florida owl projects Graphic Owls
Materials Lesson 3: Gel Medium & Painted Papers Materials: *all the same as in lesson 2 With the addition of: -tempera paint -brushes & texture painting tools: combs, stamps, whatever you have on hand to create ‘Eric Carle style’ painted papers. Lesson 1: Book Paper Collage Materials: Drawing paper Transparency Sharpie Permanent Marker Glue Old brush to spread glue Construction paper Lesson 2: Gel Medium & Up-cycled Book Collage Materials: *all the same as in Lesson 1 With the addition of: -gel medium -acrylic paint -tape
Steps to create Graphic Owl Lesson 1 Draw contour lines & some feather patterns. Trace with Sharpie on transparency. Brush the back with glue. Use torn phone book/newspaper pages to create background. Secure to construction paper to mat.
Graphic Owl Lesson 2 Steps: 1) Mix acrylic with gel medium and paint around the owl. 2) Tape book pages to the back. 3) Secure on a construction paper as a mat.
Graphic Owl Lesson 3 Steps: *Follow steps to create owl on transparency and use gel medium and acrylic paint to paint on the backside. -Allow one day to create painted backgrounds with students. You can let students choose a color scheme and then one contrasting color to create emphasis. -When dry secure both together and matte on a construction paper background.
Handmade Paper Owlan exploration of texture and mixed media Example of student work by Ariana, age 9
Getting Ready Materials: scraps of construction paper, scraps of cardboard (paper towel and t.p. rolls work very well), feathers, scraps of yarn, embroidery floss, string…, glitter or sea-flakes, black construction paper for the base/background Tools: Blender, dish tubs, sponges, mold (the frame which shapes the paper *Embroidery hoops with fiberglass screen works very well), and felts -plenty of newspaper for absorbing excess water.
Vocabulary:Mold –the frame which shapes the paperPulp-the smallest bits or fibers which are suspended in waterCouching (pronounced cooching)-the process of moving the paper from the mold to the feltsFelts-absorbent material (newspapers work well) which provides a place for the new paper to dry
Step 1: Make the pulp: Mix scraps of construction paper or scraps of cardboard in blender with water. About 1 part scraps/3 parts water. The consistency looks a little like applesauce. This is your pulp. Step 2: Pour pulp into dish tubs and add water so that pulp is suspended freely in the water Step 3: Add varied “bits” to pulp for texture, such as yarn, floss, flakes…
Step 4: Slip the mold under the pulp to the bottom of the dish pan. Shift mold slowly back and forth to distribute pulp evenly over the mold, then pull up slowly. Allow mold to drip over the pan. Make sure to hold the mold “table side up”, not like a bowl.
Step 5: Place newspaper on top of the pulp side of the mold, and then flip over. Step 6: Sponge the screen gently and squeeze the water back into the dishpan. Do not rub the screen with the sponge.
Step 7: Couching: Carefully lift the screen from one side to the other and lift the mold off the paper. Step 8: Press more water out of the paper by placing paper towels on top and gently pressing (if needed) Step 9: Allow paper to dry on the felts (newspaper) until ready to collage. (At least overnight)
Step 10: Begin collage using handmade papers, twisted paper towels, paper scraps, twigs, feathers, etc…
This student made 3 pieces of paper. Allow for various colors of pulp by providing several dishpans. Provide various sizes and shapes of molds. Paper can also be torn to create a soft, deckled edge.
Tips to Help Make Things Run Smoothly Tip 1: Have several stations set up for students to make their paper. I usually have 8 stations; 4 with neutral colored pulp and 4 with various other colors. Tip 2: Collect construction paper scraps from other projects as the year goes by. Have students sort and tear up scraps when time allows. I store torn colors in separate zip lock bags. Tip 3: Make most of the pulp and store in plastic jugs before students arrive. I always make 1 tub of pulp in front of students so they can see the process.
Muchas gracias por venir a la Noche con las Artes y el apoyo al desarrollo de sus niños creativos! Disfrute de la creación con arcilla!-Sra. Lena-Gower Usted va a utilizar arcilla "aire seco" para esculpir "Una familia de búhos. Cada miembro de la familia va a esculpir un búho. Clay aire seco significa que usted puede dejar que el aire arcilla seca durante la noche y pintarlo al día siguiente! Thank you so much for coming to the Night with the Arts & supporting your children’s creative development! Enjoy creating with clay!! -Mrs. Lena-Gower • You will be using ‘air dry’ clay to sculpt ‘A Family of Owls’. Each family member will sculpt one owl. Air Dry Clay means that you can let the clay air dry over night and paint it the next day!
Before we begin….. • 1) Please work together. • You will be creating as a family. Yourchild has learned these skills in art class, so they can show off their art skills by helping! • 2) ‘Clean-up Job’ cards: • Please make sure that your job is completed for the entire classroom before leaving. When you leave you can hand your clean-up card to your teacher. 1) Por favor trabajen juntos. Usted será la creación de una familia. Su hijo ha aprendido estas habilidades en la clase de arte, para que puedan mostrar sus habilidades artísticas, ayudando! 2) tarjetas 'Clean-up de Job:Por favor, asegúrese de que su trabajo se completa para toda la clase antes de salir. Al salir le entregue su tarjeta de limpieza a su maestro.
Step 1: Make your clay a pancake by rolling it into a sphere (does not have to be perfect). “Palm, palm, squish, turn” ____________________________________________________ Paso 1: Presente su arcilla un panqueque haciéndolo rodar en una esfera (no tiene que ser perfecto). "Palm, Palm, squish, gire" Step 2: Make the body: Stamp a wooden spoon to make the belly outline of the owl and use a paper clip to achieve a feather texture. ________________________________________________________________________ Paso 2: Hacer que el cuerpo: Imprima una cuchara de madera para hacer el contorno del vientre de la lechuza y el uso de un clip de papel para conseguir una textura de plumas.
Family Art Night Owl Materials: -Air Dry clay, paper clip, wooden spoon, wire cutter -wire hanger, wire cutter, yarn, fabric scraps -marker cap, clay tools (optional), watercolor paint Steps with air dry clay: Make a pancake with largest chunk of clay. 2) Roll the pancake so the sides are smooth.
Family Art Night Owl Steps: Press spoon in clay to create belly, bend paper clip and press into clay to create feather texture. Cut and bend hanger, curl at the ends. Fold top portion of the pancake over the wire.
Steps to finish owl: Use one of the small scraps to form a triangle beak. Scratch and attach using paper clip and water. Press marker cap in for eyes and make decorative lines. Optional: Add accessories (bows, ties, etc.) with extra piece of clay. Tie yarn and fabric scraps for decoration, paint with watercolor while the paint Family Art Night
Classroom Fundraiser: Owl Magnets *Create tiny slab owls in the same manner as the owls from the Family Art Night slides. *Finish: watercolor paint or oil pastel and black watercolor paint. *Hot glue or superglue strong magnets on the back. I use the ‘rounds’ from Michaels. They are about $6 for 50 with the 40% coupon. Set-up: I set up a large easil with a magnetic white board in the front office to display and sell magnets. Prices range from $1-3 per magnet. I send out a staff email explaining the sell and normally display them for about two weeks. In the past, I have made about $300 for my classroom selling magnets that way! Especially around Christmas time as stocking stuffers. Create slab owl magnets using air dry clay or regular earthernware clay: Inspiration sources: