Download
1 / 36
360 likes | 519 Views
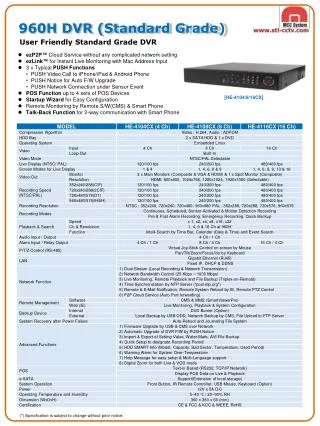
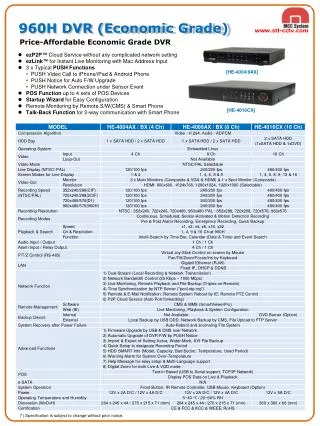
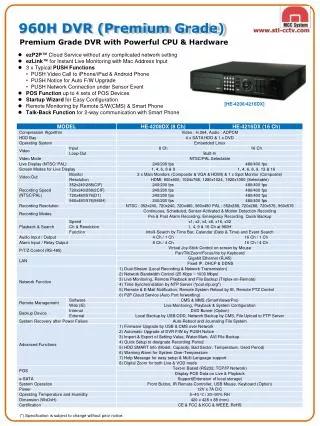
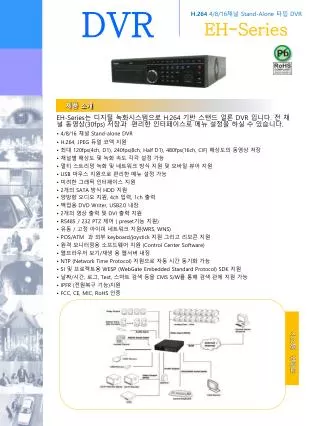
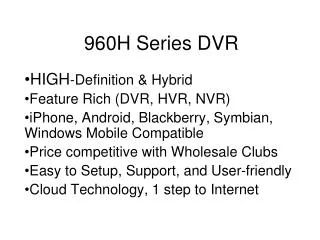
960H Series DVR. HIGH -Definition & Hybrid Feature Rich (DVR, HVR, NVR) iPhone, Android, Blackberry, Symbian, Windows Mobile Compatible Price competitive with Wholesale Clubs Easy to Setup, Support, and User-friendly Cloud Technology, 1 step to Internet. UNPACK AND CHECK PARTS. DVR

E N D
960H Series DVR HIGH-Definition & Hybrid Feature Rich (DVR, HVR, NVR) iPhone, Android, Blackberry, Symbian, Windows Mobile Compatible Price competitive with Wholesale Clubs Easy to Setup, Support, and User-friendly Cloud Technology, 1 step to Internet
UNPACK AND CHECK PARTS • DVR • POWER SUPPLY • MOUSE • REMOTE CONTROL • PAPERWORK • CLOUD SETUP INSTRUCTIONS
EVALUATE NETWORK INFRASTRUCTURE • IDENTIFY LOCATION OF MODEM AND ROUTER • IS THERE MORE THAN ONE ROUTER? • IS THERE A COMPUTER ON SITE?
CAT-5 CABLES BETWEEN DEVICES • CAT-5 CABLES SHOULD BE LIMITED TO 300 FEET • AVOID RUNNING CAT-5 CABLES NEAR FLORESCENT LIGHTING • TEST CUSTOM MADE CABLES BEFORE USING, PLEASE!
INSURE ALL INSTATLLED CAMERAS DISPLAY A PICTURE THIS VERIFIES ALL CHANNELS ARE OPERATIONAL POWER UP DVR
MAIN MENU • Right Click screen to bring up the menu drop down bar • Click on Main Menu to pull up menu icons • The thing that you need to do is select the INFO icon
INFO • Click on VERSION • User does not interact with this page. It provides system info including firmware build date, Serial Number, Mac address and information about the Recording Channels
CHECK THE HARD DRIVE • VERIFY SIZE OF HARD DRIVE • VERIFY STATUS • RIGHT CLICK once to go back to Main Menu
MAIN MENU • Right click anywhere in the screen to bring up the drop down bar • Click on Main Menu • Now click on General under SYSTEM
Display Setup • The default display setup
GENERAL SETUP • Time Setup: choose 24 or 12 hour format • The date format is defaulted at MM/DD/YY. Leave this setting at the default • Enable the DST setting
GENERAL SETUP • The menu language is defaulted in English • Check the HDD full option. Leave the default setting on Overwrite • The auto logout is defaulted to “0” min
MAIN MENU • Right click anywhere in the screen to bring up the drop down bar • Click on Main Menu • Now click on ENCODE under SYSTEM
RECORD SETUP • Click on the ENCODE icon • From the Encode menu you are able to change the FRAMERATE & RESOLUTION & QUALITY
MAIN MENU • Right click anywhere in the screen to bring up the drop down bar • Click on Main Menu • Now click on TOOL icon check the account info
Account Setup • Click on Account from the drop down menu • Click on Modify user to change the user name • Click on Modify Password to put current, new and confirm the new password and then click OK
USER SETUP • CHANGE USER NAME (OPTIONAL) • CHECK THE AUTHORITY IN ORDER TO HAVE PERMISSIONS FOR EACH ADDED USER
SET ADMIN PASSWORD • ENTER DEFAULT LOGIN INFO: • User: admin • Password: 123456 • ENTER THE NEW PASSWORD • CONFIRM THE NEW PASSWORD • CLICK OK TO SAVE
MAIN MENU • Right click anywhere in the screen to bring up the drop down bar • Click on Main Menu • Now click on RECORD icon check the Record config.
Schedule Setup • You can schedule each of the cameras • Period shows the time frame of scheduled recording • 4 different schedules can be created for each channel
MAIN MENU • Right click anywhere in the screen to bring up the drop down bar • Click on Main Menu • Now click on ALARM icon check the Motion Detect
Motion Setup • Click on Motion Detect • Select all channel if needed to enable all motion detect • Select the channels that are needed to be turn on motion record
MAIN MENU • Right click anywhere in the screen to bring up the drop down bar • Click on Main Menu • Now click on RECORD icon check the Back up.
Backup • Click on Backup • Click on detect so that it will find the external storage to backup • Click on Backup once a external storage is detected • Choose start and end time and select channel to backup
Digital Zoom • Double click on one channel • Hold the left key on the mouse and drag into a box • Release the mouse • Click anywhere within the selected area
MAIN MENU • Right click anywhere in the screen to bring up the drop down bar • Click on Main Menu • Now click on RECORD icon select Playback
Playback • Select date and time • Select any TWO cameras • Click on play to playback recorded video • If the SYNC MODE is select, it allows two channel play simultaneously
Device Setup • Select Abnormality under ALARM • Choose event type and enable Message or Buzzer base on personal preferences
PTZ Setup • Click PTZ Config. under SYSTEM • Choose camera or channel • Choose protocol • Choose address (or ID) • Choose Baud rate
System Logs • Click on INFO in Main menu • Select LOG • User can choose type to check the system and user activities
Channel Setup • Click DIGITAL under SYSTEM SETUP • Click on Channel type • User has different options to select channel type • Choose channel combinations
IP Camera Setup • Click DIGITAL under SYSTEM SETUP • Select DIGITAL CHANNEL • Choose channels to enable • Click ADD to add camera • Search Cameras • Choose Protocols and enter address and username & password for camera
Cloud Setup • Login cloud service website: http://xmeye.net • Follow the guide to install it step by step
Cloud Setup • Click ”next”, search for IP address • Click “Next”, see pic as left
Cloud Setup • Click “Next”, see pic as left • Click “Next”, to enter the interface of user registration, see left pic
Cloud Setup • Click “Next”, show the device serial number • Click “Next”, enter the interface to finish registration, see left picture • Click Finish afterwards