Download
1 / 11
110 likes | 125 Views
Here are some tips from the experts at Atlantis Worldwide that can help you troubleshoot your C-arm artifacts and know what to do to help eliminate them.

E N D
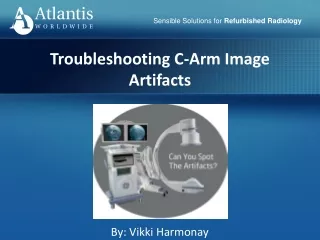
Sensible Solutions for Refurbished Radiology Troubleshooting C-Arm Image Artifacts By: Vikki Harmonay
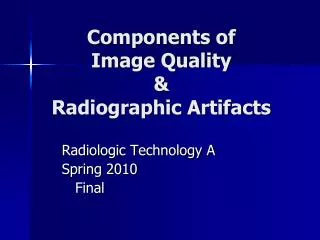
Sensible Solutions for Refurbished Radiology C-Arm artifacts are spots, streaks, smudges or other foreign forms that can appear in your C-Arm images for a variety of reasons. Artifacts on C-Arms These can be physical issues with the hardware or digital issues with your C-Arm’s computer. Here are some tips from the experts at Atlantis Worldwide that can help you troubleshoot your C-Arm artifacts and know what to do to help eliminate them.
Sensible Solutions for Refurbished Radiology Is it Debris? Some artifacts are due to dirt, dust or debris that have found their way inside the system. Others can be debris from inside the C-Arm’s image intensifier. Sometimes the phosphor lining inside the system can break down and flake off. That can mean that a serious part needs to be replaced. If your C-Arm has a bad or broken connection, or failure among the parts in the image processing chain, you can also get digital artifacts.
Sensible Solutions for Refurbished Radiology Let’s Start Troubleshooting First, you need to determine the nature of your image artifact. Take a close look at the artifact’s appearance. Those caused by debris are usually specks or spots without rounded, blurred edges. They can also appear as streaks. Digital artifacts, on the other hand, tend to be squarer or pixelated in appearance, with edges that are clean. If you think the cause of the artifact is physical, you need to locate the debris in your system.
Sensible Solutions for Refurbished Radiology You can find lint or dust in a lot of different places within your C-Arm, but if it’s in the image, it’s definitely in one of four different places: the camera, collimator, the II or the tube port. The first step is to perform a simple magnification test. Take an image in the normal mode. Note the size and position of the image artifact. Next, take the same image in mode 1 or mode 2 and see if it changes size or position. If it stays the same size, that means it’s either in the top of the II lens or in the camera. If the artifact changes size or position, the debris is either in the lower part of the II or the tube port.
Sensible Solutions for Refurbished Radiology Next Steps If your artifact didn’t change during the magnification test, the next thing to do is clean the camera lens. Use an air puffer like the ones used to clean a regular photo camera lens. These cost about $10. You’ll find them where handheld cameras are sold. If the lens has a smudge on it, use an eyeglass cloth to wipe it away. If cleaning the lens doesn’t remove the artifact, chances are you have to replace the camera.
Sensible Solutions for Refurbished Radiology If the artifact magnifies when tested, you need to clean the grid on the II, the collimator and the tube port. Only use the air puffer on the silver part when cleaning the grid. If you can’t clean it away, in all likelihood you’ll have to replace the camera, as well. If it’s a digital artifact, the issue is usually with one of the image processing boards. Has it been caused by a poor connection at a board or cable? Reseat the cables and boards to ensure strong connections. If that doesn’t work, it’s time to contact a technician.
Sensible Solutions for Refurbished Radiology Talk To An Expert If you find your C-Arm can’t be fixed and must be replaced, remember: you don’t have to buy a new C-Arm. In many cases, a certified refurbished C-Arm can provide you with the performance and warranties you want, at a much lower price point. Talk to the experts at Atlantis Worldwide and see if that’s a solution for you. We have 28 years of success stories and would love to help you. Contact Us Today!
Sensible Solutions for Refurbished Radiology Some blogs you may have missed: 1. Top 10 Tips for the Operating Theater Radiographer 2. Single-Plane Or Bi-Plane Cath Labs: Which Is Right For You? 3. C-Arms & Vascular Health 4. Comparing The GE Innova Digital Cath Lab Family: 2100, 3100 & 4100 5. Top 7 C-Arms for Your Orthopedic Practice
You can read this on our website https://info.atlantisworldwide.com/blog/troubleshoo ting-c-arm-image-artifacts
Sensible Solutions for Refurbished Radiology Contact Us 200 Park Avenue, Suite 1752 New York, NY – 10166, USA Phone: 1-914-366-9100 Toll Free: 1-800-533-3356 Fax: 646-762-6562 info@atlantisworldwide.com https://www.atlantisworldwide.com https://info.atlantisworldwide.com/blog