Download
1 / 31
310 likes | 449 Views
Learn how to edit videos like a pro using Premiere Elements. Explore basic mechanics, task units, workflow, and essential tools. Understand creating clips, transitions, titles, and more with this comprehensive tutorial. Get hands-on experience with trimming, merging clips, applying effects, and sharing your final masterpiece. Elevate your editing skills to the next level!

E N D
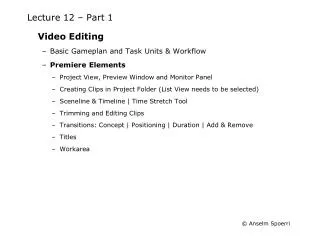
Lecture 12 – Part 1 • Video Editing • Basic Gameplan and Task Units & Workflow • Premiere Elements • Project View, Preview Window and Monitor Panel • Creating Clips in Project Folder (List View needs to be selected) • Sceneline& Timeline | Time Stretch Tool • Trimming and Editing Clips • Transitions: Concept | Positioning | Duration | Add & Remove • Titles • Workarea
Video Editing – Basic Gameplan • Identify Clips in your “raw footage” • Identify IN and OUT points • Create clips • Decide on Order of Clips • Drag & drop clips onto Timeline • Test if “Illusion of Continuity” is created • Transitions? • Specify how adjacent clips are merged • Insert Image or Sound • Detach video and audio tracks • Trim video or audio • Insert new video or audio • Titles? • Font Selection, Position, Overlay?
Video Editing – Task Units & Workflow • Capture • Import Digital Media source files • Create & Organize Clips • Sequence Clips • Edit & Modify Clips • Create Transitions • Apply Effects for Video or Audio • Create Titles • Share
Create Clips • [ • ] • Specify IN / OUT • Drag & Drop Clips onto Timeline Video Editing – Basic Mechanics
Premiere Elements – File & Workspace • Adobe Premiere Elements 10 30 day Free Trial http://www.adobe.com/products/premiere-elements.html • Project = Premiere Elements file • Stores references to all clips, arrangement and transitions or effects applied • Workspace • Task Panels • Project: organize “source material” or clips • Create, Name & Edit clips : IN / OUT in Preview Window • Edit: Transitions, Effects , Titles • Share: AVI, YouTube • Sceneline / Timeline Window • Drag clips from Project or Preview Window to Scene/Timeline • Monitor Panel • View program or sequence of clips on Scene/Timeline
Project View • A. List view B. Grid view C. Up one level D. New folder E. New item F. Delete item G. Hide/Show video files H. Hide/show audio files I. Hide/show image files J. Icon indicating that the media is being used in the project K. Video clip L. Folder to help classify assets
Preview Window • A. Zoom control • B. Clip In point • C. Current time • D. Current-time indicator • E. Playback controls • F. Clip Out point • G. Clip duration • Drag & Drop Preview Image to List View in Project View to Create Clip
Sceneline & Timeline • A. Current-time indicator B. Time ruler C. Zoom control D. Video track E. Audio track
Monitor Panel • A. Mini Timeline B. Current time C. Playback controls D. Split clip E. Add text F. Freeze frame
Timeline Tools • A. Selection B. Time Stretch C. Pan and zoom tool D. Smart Trim mode E. Motion Tracking mode F. Properties G. Audio Tools options H. Marker Tools options
Time Stretch Tool • Reverse Clip: Clip > Time Stretch and Stretch dialog box: Select Reverse Speed
Add Clips to Timeline • Alt-drag insertion: second audio track unaffected. • Default insertion: all clips after insertion point shift
Overlay Clip in Timeline • Ctrl-drag/Cmd-drag clip from Project to first frame you want to overlay. When the pointer changes to Overlay icon, release mouse.
Clearing and Ripple Deletion • Clearing: Delete clip and leave gap of same durationEdit > Clear • Ripple Deletion: delete clip and close the resulting gap Edit > Delete And Close Gap, or press Delete or Backspace.
Transitions View • Edit > Transitions • Drag & Drop Transition onto Clip in Timeline or between Clips in Sceneline
Keyframes • A. Previous Keyframe button B. Add/Remove Keyframe button C. Next Keyframe button D. Current-time indicator E. Effect properties menu F. Add Keyframe pointer
Setting Work Area to be rendered • Timeline > Render Work Area or Hit Enter • Creates Preview Files
Lecture 12 – Part 2 • Video Editing • Pan & Zoom Tool for Exploring Images • Audio Mixer • Narration: Recording | Editing • L-cut and J-cut and Timeline Markers • Effects • Share: Upload to YouTube
Audio Mixer and Smart Mixer • As you make adjustments, keyframes are added to the track.
J-cut and L-cut • A Clip trimmed for J-cutB Clip trimmed for L-cut • Audio & Video need to be unlinked J L
Markers in Timeline • A. Timeline Marker B. Menu marker C. Markers menu D. Beat marker
Effects View • A. Preview of selected clip • B. Effect menus • C. Edit Effects button (opens Effect Properties view) • D. List of applied effects • E. Search box • F. Panel menu
Effect Properties View • A. Clip name • B. Show/Hide Keyframes button • C. Toggle Animation button (also Keyframe summary icon) • D. Effect properties • E. Property values • F. Play Audio button • G. Loop Audio button • H. Delete button