Download
1 / 12
120 likes | 251 Views
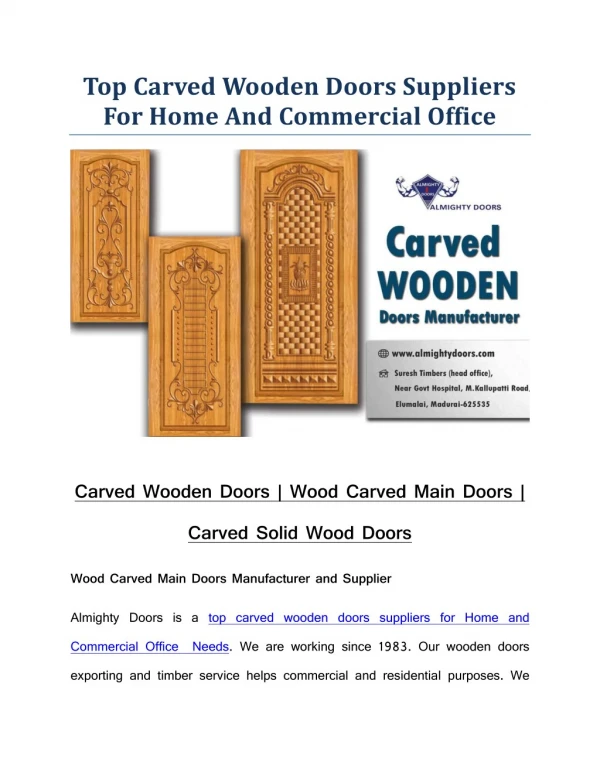
Carved Tile Vignette Pottery 1. Vocab. Vignette - A decorative design or small illustration used on the title page of a book or at the beginning or end of a chapter. Foreground - the part of a scene or representation that is nearest to and in front of the spectator

E N D
Vocab • Vignette - A decorative design or small illustration used on the title page of a book or at the beginning or end of a chapter. • Foreground - the part of a scene or representation that is nearest to and in front of the spectator • Middle ground - a standpoint or area midway between extreme or opposing positions, options, or objectives • Background - the part of a painting representing what lies behind objects in the foreground
Assignment • You will make a 6”X9” or 8”X8” (your choice) clay bas-relief tile with underglaze decoration. • Your tile should have a border of at least ½ inch. • You will start with a ¾ inch slab, cut your tile, and allow it to dry overnight. • Your carved design will illustrate a “vignette”. You will design your own, NO CARTOONS!!! You must make an original picture. • You may choose a picture that is your own but it must be your own photograph.
You will illustrate a single vignette, being sure to include a foreground, middle ground, and background. • When your design sketch is completed, you will transfer your design to your leather hard clay tile. • After bisque firing, you will decorate your tile with liquid underglaze colors. You may apply a clear gloss glaze or leave the matte finish of the underglazes.
Step 1 • Roll a ¾ inch slab and cut to size; Store, covered, on a board. If you want your tile to hang on a wall, you will need to drill holes or create a slot on the back to capture a wall hanger.
Step 2 Design your illustration, being sure to allow for a border of at least ½ inch. Shade to differentiate the foreground, middle ground, and background areas. Include interesting patterns within the design, to be carved as textures in your clay slab.
Step 3 • Transfer your design to your leather hard slab. You can lay your design directly on the slab and pierce through the paper with a needle tool, making very shallow evenly spaced dots to guide you in drawing your design on the clay.
Step 4 • Refer to your sketch as you carve, keeping in mind the three distinct levels of foreground, middle ground, and background. Keep each level in a single plane. Differentiate areas of your design using varied textures on the clay surface.
Step 5 • Allow your tile to dry on your open wire shelf to allow air to circulate and prevent warping.
Step 6 • After firing, you will paint your tile.
Grading • Flat clean Slab • Smooth edges, the corners are square • A clear Foreground, Middle Ground and Background • Size is 6x9 or 8x8 • ½ Inch boarders • Neatness & Craftsmanship • Time spent well • Proper use of glazing Techniques!