Download
1 / 6
0 likes | 10 Views
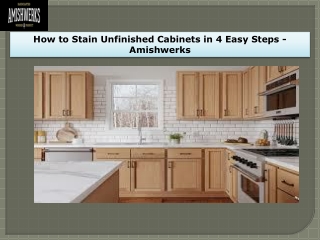
Stainingu00a0unfinished kitchen cabinetsu00a0can breathe new life into your space, enhancing its beauty and warmth. Whether youu2019re looking to update an outdated look or simply want to showcase the natural grain of the wood, staining is an accessible DIY project that yields stunning results.

E N D
How to Stain Unfinished Cabinets in 4 Easy Steps - Amishwerks
Unfinished Kitchen Cabinets Staining unfinished kitchen cabinets can breathe new life into your space, enhancing its beauty and warmth. Whether you’re looking to update an outdated look or simply want to showcase the natural grain of the wood, staining is an accessible DIY project that yields stunning results. This guide will walk you through the essential steps to properly stain your wood cabinets, ensuring a professional finish that lasts.Learn How to Stain Wood Cabinets in 4 Easy Steps: 1. How to Prepare Cabinets for Staining Before you begin, it’s crucial to prepare the cabinet surfaces properly. This preparation ensures even stain application and long-lasting results. Here are the essential prep steps: Protecting Surfaces Protect surrounding surfaces by covering countertops, floors, and appliances with drop cloths or plastic sheets to prevent any accidental staining.
Cleaning the Cabinets For a smooth and even finish, wipe down each and every part of the cabinet with a tack cloth. A tack cloth is essential for removing any remaining dust particles left after sanding, ensuring a smooth and even stain application without blemishes or imperfections. When doing this, be sure to run your hand over the cleaned spots to make sure all the debris is gone and the finish is smooth.2. How to Stain Wood Cabinets Now that your cabinets are prepped, it’s time to apply the stain and showcase the wood’s natural beauty. Follow these steps for a successful application: Applying Pre-Stain Wood Conditioner To promote even stain absorption and minimize blotching, apply a thin layer of pre-stain wood conditioner with a paintbrush. Let it dry according to the manufacturer’s instructions. This prepares wood for staining by preventing the stain from penetrating too deeply into the wood creating an even finish throughout your cabinets.
Choosing and Applying the Stain Select a stain that complements the wood type and desired color tone. Lighter stains reveal the natural grain, while darker stains create a more dramatic effect. Test the stain on a small, inconspicuous area to ensure you’re satisfied with the color. We provide 6” x 6” door samples for all our cabinet finishes so testing on these pieces is always helpful when choosing your stain. Staining Unfinished Wood Cabinets Use a foam paintbrush or a clean, soft rag to apply the stain, working in the direction of the wood grain. Apply a thin and even coat, allowing the stain to penetrate for the recommended time (typically 5-15 minutes). Wipe off any excess stain with a soft rag. For a darker finish, you can apply a second coat after the recommended drying time.3. How to Protect Stained Cabinets To safeguard the stained wood and enhance its durability, apply a protective finish, such as polyurethane sealer. Using a clean paintbrush, apply a thin coat to all stained surfaces. Follow the manufacturer’s instructions for drying times between coats. After the first coat dries, lightly sand the cabinets with 220-grit sandpaper, then apply a second coat and let it dry completely.
4. Finishing Touches and Clean Up With the cabinets stained and sealed, it’s time to reassemble and admire your work! Reattaching Hardware Once fully dried, reattach the hardware, ensuring everything is securely fastened. Consider updating your hardware to complement your newly stained cabinets. If you are staining ourunfinished cabinets then the only hardware to reattach will be the door hinges. Admire Your Stained Wood Cabinets Now for the fun part, at least the most rewarding part. Step back and appreciate the transformation that you just created. Notice how the new color enhances the natural grain, bringing warmth and character to your space. Final Thoughts About How to Stain Unfinished Cabinets Staining wood cabinets is a rewarding and cost-effective way to refresh your kitchen or bathroom’s look. By following this step-by-step guide, you can achieve beautiful, professional-quality results without hiring a contractor.
Thank You For more details visit our website: https://amishwerks.com/