Download
1 / 10
100 likes | 238 Views
Best Practices and How To’s for Webinar Speakers. Introduction. Welcome to ReadyTalk! This slide deck has been designed for you to easily understand how the platform works. All you need are the basics, and if you’d like, some additional advanced tips. . Table of Contents

E N D
Best Practices and How To’s for Webinar Speakers
Introduction Welcome to ReadyTalk! This slide deck has been designed for you to easily understand how the platform works. All you need are the basics, and if you’d like, some additional advanced tips. . Table of Contents Test Your Computer………………………………….Slide 3 ReadyTalk Interface………………………………….Slide 4 The Basics ……………………………………………….Slide 5 More Advanced Features…………………………Slide 8 Customer Care…………………………………………Slide 10
Test your Computer What is it? Test the ReadyTalk platform to make sure it is compatible with your computer. • How do you use it? • Click the link below: • http://www.readytalk.com/rt/test-computer.php • Best Practices: • If you are not familiar with, or have not used ReadyTalk in the past, this quick test will verify that your computer is compatible with the system. • Choose the “Chairperson/Presenter” option • Then select “Run”. • Once the test is complete, you willsee the “The Test Was Successful” green checkmark.* • Make sure to conduct this test a few days before your webinar, to ensure compatibility. • *If your test is unsuccessful, please contact ReadyTalk Customer Care for help – 1. 800.843.9166
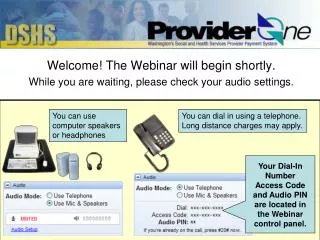
The ReadyTalk Interface Sharing (Screen or Applications) Web Participants Audio Participants Chat Insert (Polls, Slides, Videos) Pushing Slides Markup Tools
The Basics: Pushing Slides • What is it? • If you are running your webinar from prepared slides, they were probably uploaded prior to your webinar. From here, you can push your slides at the speed of your presentation. You can also bring focus or highlight details with the Markup Tool. • How do you use it? • The controls in the center allow you to push the slides. Click once on “Next” to move forward, and “Previous” to go back. Click “Full Screen” to enter into full screen mode. • You can also double click on any of the thumbnails to select a slide. When the slide is highlighted (shown in blue) that slide is then being shown live to the audience. • To preview a slide or your presentation in a separate window, hover your cursor in the right hand of a slide. A magnifying glass will appear allowing you to click and open the slide separately. • Best Practices: • To exit from full screen mode, press the Escape key (ESC) on your keyboard at any time. • If you plan on jumping around in your presentation frequently, double clicking will be the easiest option. ReadyTalk TIP: Use the Markup Tools to highlight important features, or to steer focus to a particular place during your presentation. Choose arrows, highlighters, markers or an eraser.
The Basics: Share Mode • What is it? • ReadyTalk provides the functionality to share your screen, or your applications, for a robust collaboration experience. • How do you use it? • Click the “Share” button from the ribbon at the top of the screen. When the dialog box opens, select either “Share Desktop” or “Share Applications.” • Best Practices: • If your PowerPoint presentation has already been uploaded, then you areready to go. • ReadyTalk does not support PowerPoint animations, so if you have a presentation that has transitions or other designs, use application share instead of uploading the presentation. • You also have the option to build out each slide to create the animation effect and continue to use slide share mode. • ReadyTalk supports application and desktop sharing for up to 1,200 participants. Share Button
The Basics: Chat Feature • What is it? • Use chat to communicate with co-presenters, individual audience members or broadcast to everyone. • How do you use it? • Click the on the chat box to the lower left side of the screen. You are able to select the types of conversations you would like using the drop down menu: • Broadcast to All • Chat between co-presenters • Chat to individual participants • Best Practices: • Create a private chat window to help better manage chat with specific groups or an individual. Simply hover over any chat message, right click and select “new window.” • Having a prepared list of questions is a good backup plan. In case of a shy audience, it helps to start the conversation and eventual participation. Multiple Chat Windows The screen to the upper left is a private chat window
More Advanced: Uploading Slides and Video • What is it? • If you have a great video, upload it directly into your ReadyTalk presentation. • How do you use it? • Click on “Video”, under the “Insert & Manage” section of the toolbar • Select “Add New Video” • When the video has finished uploading, click “Insert” under the Video Management tab • Follow the prompts to upload the video. When ready to watch, simply click the slide with the video and hit play. • Best Practices: • The maximum size for a video is 100MB. • Depending on the size and length of the video, processing could take some time. Please allow yourself enough time if you have larger video files. • Videos are excellent for: • Sales demos • Trainings • Promotional materials • Company publicity • …and more! Click the “Video” button and follow the prompts to upload a video into your presentation. When a video is uploaded, the participant will see a screen similar to this. (Note: This screenshot is of a video in participant mode).
More Advanced: Polling What is it? Do you have a question for your audience? Want instant feedback? Insert a poll directly into your webinar! Inserting a poll is just a few easy clicks. • How do you use it? • Click on “Polls”, under the Insert & Manage section of the toolbar • Select “Create New Poll” from the options at the bottom of the dialogue box. • Type a question into the “Question text” bar. Then select the type of question (multiple choice, open text box, etc.) • Hit “Save” when finished configuring your questions • Once finished, select your poll from the Media Management dialogue box by clicking “Insert Selected.” • Click the slide that contains your poll. When it is ready, your audience will be able to answer the poll. The screen seen by the speaker. • Best Practices: • You can allow participants to see the polling responses by selecting the “Display Results to Participants” box under poll results. • Easily track your responses. Ask your organizer to pull a report of the responses directly from Conference Center after the webinar. The screen seen by the participant.
Know Your Tools: Pushing Slides Questions? Need more help? Contact ReadyTalk Customer Care at anytime: 1.800.843.9166 www.ReadyTalk.com