Download
1 / 32
320 likes | 615 Views
Welcome to SAPS Webmail. Things we will learn about :. Login to mail. Login to webmail from our homepage www.stephenson.k12.mi.us. After hitting enter or clicking Saps mail logon. Things we will learn about :. Login to mail Read mail / Reply.

E N D
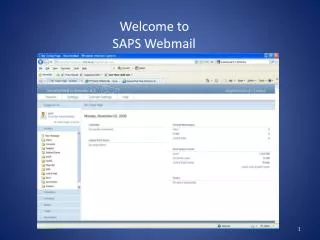
Welcome to SAPS Webmail
Things we will learn about: Login to mail
Login to webmail from our homepage www.stephenson.k12.mi.us
After hitting enter or clicking Saps mail logon
Things we will learn about: Login to mail Read mail / Reply
With the inbox highlighted select a message by double clicking a message in the upper right pane. Double Click
Replying to an email After Reading an email you may choose to answer the email by clicking reply.
Replying to an email After clicking on reply – notice the address of the sender is automatically inserted into the To: Line. At this point simply enter the information that you want and click send.
Things we will learn about: Login to mail Read mail / Reply Create mail
New message will appear just above the inbox icon. Single click on new message
New mail message – Enter email address In the To: box, Add Subject , Body and click Send. We will discuss adding attachments later Enter text body
Things we will learn about: Login to mail Read mail / Reply Create mail Send attachments
Adding Attachments Click on Add files
Click on Browse to access the attachment which you will insert. Click Browse
Double click the file you would like to attach or highlight and click open.
Notice the location of the file now shows next to the browse button. Attachment location
Upload Attachment Click upload
Enter the recipient’s address and click send Notice the attachment is now lodged in the email
Things we will learn about: Login to mail Read mail / Reply Create mail Send attachments Create contact groups
Click the Contacts tab on the left menu bar and select new contact Contacts tab
Fill out contact information just as you would for an individual except add multiple addresses separated by a semi-colon in the box next to email address.
Things we will learn about: Login to mail Read mail / Reply Create mail Send attachments Create contact groups Calendar
Calendar Setup Click on the calendar tab
Calendar Setup Click on My Calendar
Calendar Setup Click on a date
Calendar Setup Click on the time that best reflects your meeting or appointment.
Calendar Setup Enter the appropriate information for your scheduled task. **Remember to Save**
You can share your calendar by following these simple steps: • Click settings from the top bar • Click My Shared Resources • Add Share • Click My Calendar & click next • Click Users • Add the person or persons email address that you would like to share your calendar with into the provided box separated by a carriage return. • Give either read only access or Full control. Full control will allow others to add information to your calendar. • *After you share your calendar the user must attach to your shared calendar. • Follow these simple steps to attach to a users shared calendar: • Click settings from the top bar • Click My Mapped Resources • Attach to resource • A list of available shared resources are listed. • Attach to the desired calendar. • The calendar will now show up underneath your personal calendar.
Difference Between Reply and Reply All If you click Reply, your reply will only go to the sender of the original message. This is the email address that appears in the From: header line of the message you are replying to. If you click Reply All, your reply will be addressed to the sender of the original message and all other recipients of that message. Your message will go to the address in the From: header and to all addresses in the To: and Cc: header lines — except for your own address.
If you have questions feel free to contact me at ext. 128. Or Better yet contact me at jimb@stephenson.k12.mi.us This presentation can be accessed @ http://www.stephenson.k12.mi.us/teacher_resources.html