Selecting Your Milling Bit
20 likes | 39 Views
End mills, also known as milling bits, are among the most commonly-used bits used with CNC machines. They are designed to cut horizontally (laterally) across an area. (Drill bits are cut through an object.) End mills are available in a variety of styles and can be customized to achieve the results you desire for your project.<br><br>The following info will assist you in understanding the various bits and their strengths for those who are not familiar with carving and CNC machines. Understanding the functions of different bits and how they operate can help you pick the most appropriate one for your p

Selecting Your Milling Bit
E N D
Presentation Transcript
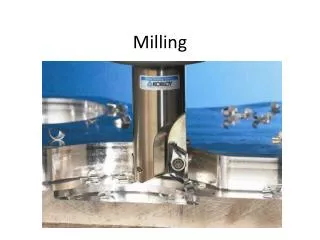
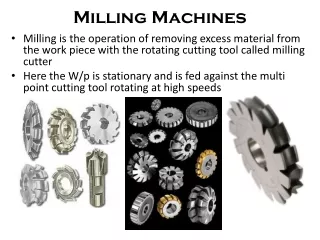
How To Choose The Milling Bit That Is Right For You End mills, also called milling bits, are among the most frequently-used bits that are used on CNC machines. They are utilized to cut horizontally (or laterally) across the surface. Drill bits are used to drill into or through materials. End mills are available in many styles and can be customized to produce the results you desire for your particular project. The following information will help you understand the different bits and their advantages when you're new to carving and CNC machines. Understanding what different bits do and how they work can help you choose the most appropriate one for your task. Be aware that the kind of material that you're using with your tool is the most crucial factor in determining what bits you'll need. Different materials have distinct characteristics that impact your carving and the behavior of your bit. You can learn more about what bits to use with your material here. Shank Diameter vs. Cutting Diameter The shank's diameter is the diameter of the part that isn't used for cutting. It is the last part of the bit you put into the router. Many routers are able to accommodate bits of a certain diameter. The DeWalt 611 router can hold bits with a shank size of 1/4". If you wish to use bits with a smaller shanks it is necessary to purchase the collet and nut adapter for your router. Our 1/8" collet for the DeWalt 611 is a standard upgrade that many of our customers make as they start doing more complicated and detailed work. Whether you really need to learn detailed information on end mill bits, you have to browse https://www.sundicuttingtools.com/products/carbide-milling-cutter/ site. The cutting dimeter is the cut-to-length of your bit. The cutting diameter of a bit can vary from a few inches for levelling surfaces to 1/34" and 1/32" for fine details. When selecting the right bit for your task make sure you select the most powerful possible cutting diameter to suit the task at hand. It is recommended to select smaller bits for projects that contain intricate elements that cannot easily be cut by your chosen bit. Shank diameters and cutting diameters aren't always the identical. It is important to ensure that the bit you choose fits your spindle/router (shank diameter) and then pick the correct bit for the job. Up-Cut, Down-Cut, and Compression The cutting technique of a milling piece identifies how the materials chips are eliminated from your work, in addition to which cutting surface is smoothed. The bits that are cut up will push the material upwards, and smooth the surface of the cut passes. They draw heat away from the part and is an excellent choice for plastics, metals or other materials susceptible to melting or burning. But due to the bit's design and upward-pulling
movement, it could interfere with the clamping system you use with your material especially if your material is not very thick. Down-cut bits force the chips downward (towards the material). This method of cutting can melt or burn your material especially if you need to do many passes. This bit has the advantage of pressing down on the material to help thin materials stay secured to the cutting surface. Also, you will see a smoother top edge if you use an upward-cutting tool. Compression bits feature a "neutral" cutting style that smooths the bottom and top edge of the cut. This is achieved by the lower part of the bit using the up-cut design, and the upper section of the bit using the down-cut design. The bits are ideal for materials that are thicker and will be fully cut. If your work requires shallow cuts, this might not be the best choice because only the lower (up-cut) part of the bit will be used and the top (down-cut) portion of the bit won't be used to finish the smoothing. Flutes Flutes are the cutting edges of the bit. The name of a fluted bit is based on how many flutes are located at the bottom of the bit. Our 2-flute bits come with two cutting edges. Generally speaking, greater number of flutes on the end mill means a smoother edge finish. The more flutes means that there's a smaller area that can be used to discharge cutting chips from your stock material. You will need to feed the bit slower to remove the cut material. It is possible to remove materials faster however your cuts will be less smooth when you have fewer flutes. Certain materials are more difficult to eliminate from a bit than other. For example, a soft plastic such as HDPE can melt when chips aren't removed from the bit fast enough. In order to work with a material like this, you'll require one or two flutes for your endmill. For more durable materials that are less susceptible to melt, you could make use of more flutes. Just be cautious with your cut depth, so you don't damage the piece by cutting too deeply into the material. V-Bits V-bits, also known as v-carve bits, create a pass shaped like a "v" and are commonly used for detailed engraving. You can use v-bits in Easel Pro to create intricate v-carved designs. Anyone who has an Easel account is able to design projects with Easel Pro features at no cost. For carving, you'll require signing to a Pro account. Fishtail Bits, Ballnose Bits, and Speciality Bits The point of a milling piece helps determine its purpose. Your cut will have a flat bottom thanks to fishtail bits. Your cut will have a rounded bottom thanks to ballnose bits. Since the tip is rounded they can be used to create contours or step layers. A variety of bits are also available to be used for specific tasks. We also offer bits that are specifically designed for engraving, fine-details, or working with PCB.