Download
1 / 7
70 likes | 168 Views
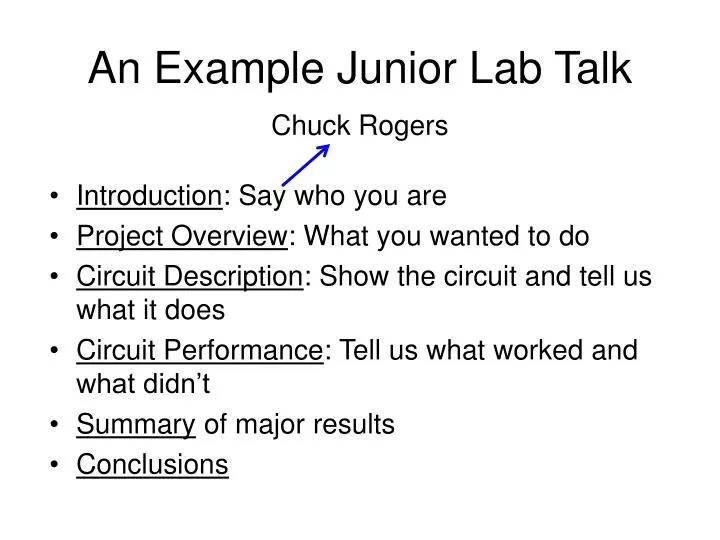
An Example Junior Lab Talk. Chuck Rogers. Introduction : Say who you are Project Overview : What you wanted to do Circuit Description : Show the circuit and tell us what it does Circuit Performance : Tell us what worked and what didn’t Summary of major results Conclusions.

E N D
An Example Junior Lab Talk Chuck Rogers • Introduction: Say who you are • Project Overview: What you wanted to do • Circuit Description: Show the circuit and tell us what it does • Circuit Performance: Tell us what worked and what didn’t • Summary of major results • Conclusions
Project Overview (1) You want to describe what attracted you to the project, the circuitry that you tried to build, whether it worked or not, and any other noteworthy or interesting things that you discovered. You have 10 min., say 8 min. to talk and 2 min. for questions. It flies by. You should expect that 1min. per slide is needed. You should practice your talk. Keep it inside the time limit. Toss material if necessary. Practice the talk again.
Project Overview (2) This talk has more text than is typical. Your’s should have more pictures and data. Here’s an example of a project overview: “H&H suggested that the ‘Bad Idea’ circuits at the end of the chapters had some pretty funny examples. We decided to make one to see why it didn’t work (it looked OK to us) and to see if it was actually funny.”
C Vin + Vout - R1 R2 Circuit Description Here’s a ‘Bad Idea’ circuit from the op-amp chapter. It claims to be an ac-coupled, non-inverting amp. Looks good to us! Gain = 1 + R1/R2 It’s good to include some circuit theory and take the time to explain how you think the circuit should work. Use a couple of slides if needed.
Circuit Performance • Describe how you built the circuit • What did it do correctly/wrong during the process? • Did you get it to work properly? Why or why not • Give us some numbers to explain why you think it’s working or not. Scope traces, Bode plots, response to test signals are worth MUCH MORE than qualitative impressions.
Summary • The circuit failed to work, just like H&H said. • It was painful to figure out why. • Prof. Price suggested that input bias currents might be an issue. • 100 kohm to ground on the input fixed the problem by allowing the op-amp input bias current to flow in from ground without charging the input up to the rail. • Gain of 100x easily observed for frequencies above 0.1 Hz.
Conclusions • It’s still not that funny. • Unless it happens to someone else. • Junior lab has increased my effectiveness at parties. • I’m buying my own oscilloscope immediately. REMEMBER: PRACTICE THE TALK AND FIND A WAY TO FIT IT INTO 10 MIN, ASSUMING A FEW QUESTIONS. Have fun!