Download

1 / 27
320 likes | 819 Views
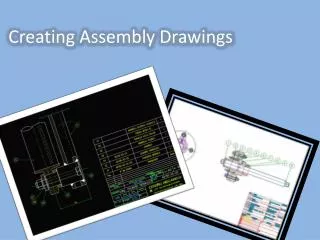
Assembly Drawings. Components in Assembly Drawings. Exploded View Collapsed View Item Balloons Parts List. Exploded View. A good exploded view… Shows all components clearly Labels each component with an item balloon. A good Collapsed View shows.

E N D
Components in Assembly Drawings • Exploded View • Collapsed View • Item Balloons • Parts List
Exploded View • A good exploded view… • Shows all components clearly • Labels each component with an item balloon
A good Collapsed View shows • How the assembly looks when all parts are assembled
Item Balloons • Use ANSI Standard • Font should be ARIAL 12 pt • Use BENT Leader
Parts List AKA BOM AKA Bill of Materials • Verify that Document Properties are set to ANSI
To create an Exploded View • Must be an Assembly File • Must use the Configuration Manager • Create an Exploded View • Right click on configuration • On the Assembly Ribbon • On the Insert Menu
To position components • Use the Gizmo • Use the Dialog
Exploded Views • You can have more than one exploded view • To edit or change an exploded view, select it in the Configuration Manager, right click and select Edit Feature • To delete, right click and select Delete
To collapse an Exploded View • Highlight the Exploded View, right click and select Collapse
To Create an Assembly Drawing • You must first define the exploded view in your ASSEMBLY file • You should have filled in the DESCRIPTION for all parts used in the assembly • To change or add the DESCRIPTION, open the PART file and go to File->Properties
File Properties • Go to the Custom Tab • Set the Property Name to Description • Type the Value in ALL CAPITAL LETTERS
Open a Blank Drawing • You should have two isometric views- one exploded and one collapsed • Place a collapsed view and an exploded view on the sheet
Scale the views and position on the sheet Both views should clearly show all components Do not overlap any components in the exploded view
To change a Collapsed View to Exploded • Highlight the view, right click and select Properties • Under Configuration Information, ENABLE Show in exploded state
Add Item Balloons • Add Balloon from the Annotation Ribbon • From the Insert menu • From the right click menu (Right click anywhere on the sheet)
Placing Balloons • Place balloons close the part • Place them so they are easy to read
Don’t Do this! • Don’t place balloons far away from the part • Cross balloons over the part or another balloon leader
If you have more than one part • Instead of labeling each part, add a Note to indicate the Qty
Parts List • From the Annotation Ribbon->Tables->Bill of Materials • From the Insert menu,Tables->Bills of Materials • Right click anywhere on the sheet and go to menu, Tables->Bills of Materials
Select the Exploded View • Enable Top-level only • Green Check FIRST and THEN place the table
BOM Format • Use the Table Header tool to set the headers to the BOTTOM of the BOM • BOM should be placed on top of the title block • BOM should have ITEM NO, PART NUMBER, DESCRIPTION, AND QTY • USE ALL CAPITAL LETTERS • NO BLANK COLUMNS
Save Your BOM Format • You can save the format of your BOM so you don’t have to reformat it each time • Right click on the Move icon and select Save As • Save the BOM format to your Templates folder
To use a BOM Template • Select the Star icon next to the Table Template Name and browse for your saved BOM Template
A Good Assembly Drawing Example Use a Checklist • Exploded View • Collapsed View • Item Balloons • BOM • Easy to Read • BOM in correct location • BOM Header on the Bottom