Download
1 / 17
180 likes | 477 Views
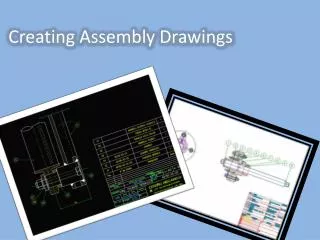
Chapter 11 Assembly Drawings and Blocks. Learning Objectives: Create an Assembly Drawing from Part files. Using AutoCAD with the Internet. Load Multiple Drawings into a single AutoCAD session. Define a Block. Create multiple copies using BLOCKS. Copy and paste with the Windows Clipboard.

E N D
Chapter 11 Assembly Drawings and Blocks Learning Objectives: • Create an Assembly Drawing from Part files. • Using AutoCAD with the Internet. • Load Multiple Drawings into a single AutoCAD session. • Define a Block. • Create multiple copies using BLOCKS. • Copy and paste with the Windows Clipboard. • Use the MOVE and ROTATE commands.
Assembly Drawings An assembly drawing is, as its name implies, a drawing of the design put together, showing the relative positions of the different parts. The assembly drawing of a finalized design is generally done after the detail drawings are completed. The assembly drawing can be made by tracing from the detail drawings. The assembly drawing can also be drawn from the dimensions of the detail drawings; this provides a valuable check on the correctness of the detail drawings. The assembly drawing sometimes gives the overall dimensions and dimensions that can be used to aid the assembly of the design. However, many assembly drawings need no dimensions. An assembly drawing should not be overloaded with detail, particularly hidden detail. Unnecessary dashed lines (hidden lines) should not be used on any drawing, this is even more critical on assembly drawings.
Balloons Assembly drawings usually have reference letters or numbers designating the different parts. These “numbers” are typically enclosed in circles (“balloons”) with a leader pointing to the part; these numbers are used in connection with the parts list and bill of material.
Bill of Materials (BOM) and Parts List A bill of materials (BOM) is a table that contains information about the parts within an assembly. The BOM can include information such as part names, quantities, costs, vendors, and all of the other information related to building the part. The parts list, which is used in an assembly drawing, is usually a partial list of the associated BOM.
Drawing Sheet Borders and Revisions Block The drawing sheet borders are generally drawn at a distance parallel to the edges of the sheet, typically with distance varying from 0.25” to 0.5” or 5 mm to 10 mm. Once a drawing has been released to the shop, any alterations or changes should be recorded on the drawing and new prints be issued to the production facilities. In general, the upper right corner of a working drawing sheet is the designated area for such records, this is known as the revisions block.
Title Blocks The title of a working drawing is usually placed in the lower right corner of the sheet. The spacing and arrangement of the space depend on the information to be given. In general, the title of a working drawing should contain the following information: Name of the company and its location. Name of the part represented. Signature of the person who made the drawing and the date. Signature of the checker and the date of completion. Signature of the approving personnel and the date of approval. Scale of the drawing. Drawing number. Other information may also be given in the title blocks area, such as material, heat treatment, finish, hardness, general tolerances, depends on the company and the peculiarities of the design.