Download

1 / 35
350 likes | 466 Views
Kin 260. Microsoft Excel Part I by Daniel Frankl, Ph.D. Rev. 10/07 by Jackie Kiwata. Overview. Interface Getting Started Worksheets Common actions Open/Close/Save Entering data Print Formatting data Columns/Rows Sorting Data Functions Named Nameless.

E N D
Kin 260 Microsoft Excel Part I by Daniel Frankl, Ph.D. Rev. 10/07 by Jackie Kiwata
Overview • Interface • Getting Started • Worksheets • Common actions • Open/Close/Save • Entering data • Print • Formatting data • Columns/Rows • Sorting Data • Functions • Named • Nameless
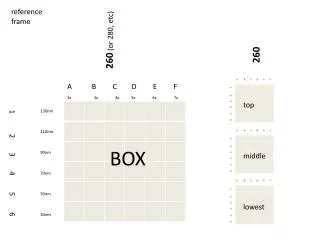
Microsoft Excel Interface Title Bar Menu Bar Active Cell Column Heading Vertical Scroll Bar Row Heading Sheet Tabs Horizontal Scroll Bar Tab Scroll Buttons
Interface - Toolbars • The Formatting Toolbar includes functions used to modify the worksheet’s appearance • The Formula Bar includes functions used to perform calculation tasks • The Name Box displays the cell address of the active cell Formatting Toolbar Standard Toolbar Excel Close Button File Close Button Name Box Formula Bar
Getting Started • As is the case with MS Word and MS PPT, a new document (Workbook) in MS Excel is created by selecting “New” off the “Standard Toolbar.” • An existing Workbook is reopened by selecting the “open” button and following standard MS Office procedures
Worksheets & Workbooks • A worksheet is a new Excel document; it has 256 columns and 65,536 rows • Worksheet data is stored in a workbook • A Row X Column intersection forms a cell • A cell with thick black borders is an “active cell.” • Data is entered into or edited in an active cell
Saving and Closing Workbook • Using standard MS Office procedures you may • Save your Workbook • Close a Workbook or close Excel • You may use the close buttons to close a Workbook or Excel Close Buttons Save Button
Entering Data Into Your Workbook • Data may be text or numbers • Numeric data should include numbers only • Numbers may be used as independent values or may be used in formulas to compute other numbers • To enter text or numerical data • Click in a cell • Type the text or numbers • Press the Enter key
Editing Data in a Cell Column Heather Formula box Name Box • Once entered in a cell, data may be manipulated by the edit, delete, copy, cut, and paste functions. • To edit data in a cell: • Double click the cell • Edit cell content in cell or in the formula box • Undo and Redo allow the restoration or reversal of the previous action Undo Redo Active Cell
Cell Ranges • A group of selected cells is called a range • To select a range • Click the first cell • Place pointer in center of cell until thick cross appears • While holding left mouse pointer down drag pointer to last cell • At the time of release of pointer the range of cells should be highlighted
Printing Your Worksheet • Once done with your work you may preview and then print your worksheet. • To preview a worksheet • From the Menu toolbar click File • Select Print Preview Click close when done reviewing and ready to print • To print your worksheet • From standard toolbar click the Print button
Page Setup: Page Orientation • Spreadsheets with numerous columns are better if printed in “Landscape” mode.
Page Setup: Page margins • To control the printed area on the page you may reset the page margins See margins as it will appear once adjusted Adjust margin by typing or clicking up/down arrows
Page Setup: Printing with or without Gridlines • The Excel default prints gridlines but you may print your worksheets without gridlines To select or deselect gridlines click box
Printing with the Print Dialog Box • The Print dialog box allows the selection of a desired range of cells for printing. Also, the printing of selected pages or multiple copies is possible. Type in or use the up or down arrows assign the number of copies to be printed Click To specify the pages to be printed, then type page numbers
Looks Count: Formatting Your Worksheet • Selecting the font size, style and color Merge & Center Font size list Fill Color Font Styles Borders Currency Style Font Color Font List Align
Looks Count: Formatting Your Worksheet II • Align, center, merge, select decimal… Decrease/Increase Indent Merge & Center Comma Style Percent Style Font Color Font List Align Increase/Decrease Decimal
Formatting Cells: Numbers Assign the number of decimal places to display (0-30) • Right Click inside a cell and select the “Format Cells…” option Add commas between 100s & 1000s Select negative numbers preceded by a minus sign, in red, in parentheses, or both in red and in parentheses
Columns and Rows • The default column width is 8.43 characters but a cell can accommodate up to 32,000. Row width and height may be adjusted to display larger characters. • To select a row click on the Row Header’s number • To select a column click on the Column Header’s number
Inserting Columns and Rows • To insert a column • Select column header • Click the Insert menu • Select Column • To insert a row • Select the row header • Click the insert menu • Select row Column Header Row Header
Changing Column Width and Row Height • To modify column width • Position pointer between column headers • Pointer changes to double arrow • Hold down left mouse button and drag to the left or to the right • To modify row Height • Position pointer between row headers • Pointer changes to double arrow • Hold down left mouse button and drag Up or Down
Deleting Columns and Rows • To delete columns and rows • Select either the column or the row • Click on Edit in the menu bar • Click on Delete • OR • Right-click the mouse button on the column or row heading • Select Delete
Sorting Data • Data > Sort • 3 sort orders • Ascending: low to high • Descending: high to low • Header Row • Use if columns are named for ease in sorting • e.g. Age, Height, Weight
Ex 1: Sorting data • Enter the following data in columns A, B & C: A B C Subject Reps Miles 1 8 0.25 2 20 0.50 3 34 0.75 4 2 0.10 2. Sort the data set from lowest to highest reps.
Functions The many hundreds of Excel functions may be activated by typing the sign “=“ in the “Fx” window followed by the function NAME and one or more ARGUMENTS.
Functions, con’t. • 2 types: • Named • Calls Excel’s library of functions • =SUM(A1:A5) • Nameless • Generally used for simple arithmetic • =(A1+A2+A3+A4+A5)
Function Syntax =SUM(A1:A5) Tells Excel you are creating a function Function Name Parentheses enclosing arguments Arguments =(A1+A2+A3+A4+A5)
Using Functions • Named SUM(n1,n2,…), AVERAGE(n1,n2,…) • Use Function button • Type in directly 2. Nameless =N1+N2 =(N1+N2)/2
Ex 2: Named vs. Nameless • Using the data in column B 8 20 34 2 2a. Find the MEAN using a named function 2b. Find the MEAN using a nameless function
Using Named Functions SUM(n1,n2,…), AVERAGE(n1,n2,…) Method #1: • Click fx button
Method #1 (con’t.) • Once a function is selected, Excel displays the Function Dialog Box thus prompting the user to either enter or select the appropriate argument.
Named Functions, Method #2 • If already know fx name, just type directly into cell or function bar • Can also select range of cells instead of typing out arguments
Ex 3: Named Function • Using the data you entered in Col B, 8 20 34 2 2. Find the standard deviation of the data set.
Inserting Nameless Functions • Type function directly into cell or function bar
Ex 4: Nameless Function • Convert Miles (Col C) to Meters (Col D) • Meters should have 2 decimal places NOTE: • You may not use the CONVERT function • The following equivalence may be helpful: 1 mile = 1.61 * 103 meters