Download
1 / 59
620 likes | 817 Views
Vowels, part 1. March 6, 2008. Round-up. Mid-terms look good so far. Back to you on Tuesday Also: the Korean stops homeworks As far as the future is concerned: Let’s make a deal! A new homework: Fourier Analysis practice Calculating your own vocal tract length Oh yeah:

E N D
Vowels, part 1 March 6, 2008
Round-up • Mid-terms look good so far. • Back to you on Tuesday • Also: the Korean stops homeworks • As far as the future is concerned: • Let’s make a deal! • A new homework: • Fourier Analysis practice • Calculating your own vocal tract length • Oh yeah: • Explosions and filters
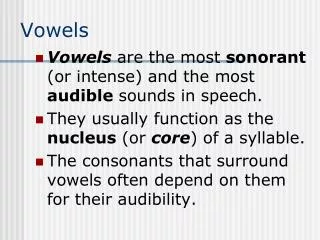
Where Were We? • Speech starts out with a periodic sound source: the vibrating vocal folds • which generate a series of harmonics at integer multiples of the fundamental frequency (of the glottal waveform)
Vowel Resonances • The series of harmonics flows into the vocal tract. • Those harmonics at the “right” frequencies will resonate in the vocal tract. • The vocal tract filters the source sound • fn = (2n - 1) * c • 4L
“Filters” • In speech, the filter = the vocal tract • This graph represents how much the vocal tract would resonate for sinewaves at every possible frequency: • The resonant frequencies are called formants
Source + Filter = Output + This is the source/filter theory of speech production. =
Source + Filter(s) F1 F2 F4 F3 Note: F0 160 Hz
Schwa at different pitches 100 Hz 120 Hz 150 Hz
Source + Filter(s) • Formants appear as dark bands in a (wide-band) spectrogram F3 formants F2 F1
More Than Schwa • Formant frequencies differ between vowels… • because vowels are produced with different articulatory configurations
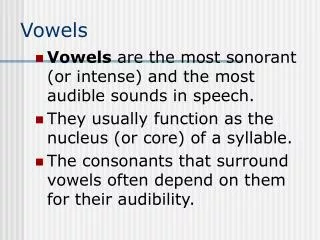
Remember… • Vowels are articulated with characteristic tongue and lip shapes.
Vowel Dimensions • For this reason, vowels have traditionally been described according to four (pseudo-)articulatory parameters: • Height (of tongue) • Front/Back (of tongue) • Rounding (of lips) • Tense/Lax = amount of effort? = muscle tension?
The Vowel Space The Vowel Space o
Formants and the Vowel Space • It turns out that we can get to the same diagram in a different way… • Acoustically, vowels are primarily distinguished by their first two formant frequencies: F1 and F2 • F1 corresponds to vowel height: • lower F1 = higher vowel • higher F1 = lower vowel • F2 corresponds to front/backness: • higher F2 = fronter vowel • lower F2 = backer vowel
[i] [u] [æ] (From my phonetics class last year)
[i] [u] [æ] (From my phonetics class last year)
Women and Men • Both source and filter characteristics differ reliably between men and women • F0: depends on length of vocal folds • shorter in women higher average F0 • longer in men lower average F0 • Formants: depend on length of vocal tract • shorter in women higher formant frequencies • longer in men lower formant frequencies
Prototypical Voices • Andre the Giant: (very) low F0, low formant frequencies • Goldie Hawn: high F0, high formant frequencies
F0/Formant mismatches • The fact that source and filter characteristics are independent of each other… • means that there can sometimes be source and filter “mismatches” in men and women: • Julia Child: high F0, low formant frequencies • Popeye: low F0, high formant frequencies
A Source/Filter Breakdown Sound source Sound filter vocal folds vocal tract fundamental frequency resonant frequencies (formants) F0 F1, F2, F3 harmonics standing waves narrow-band spectrograms wide-band spectrograms in a (wide-band) spectrogram: vertical striations horizontal dark bands pitch of voice vowel quality
Back to Vowels • A vowel space is defined by a speaker’s range of first formant (F1) and second formant (F2) frequencies. • …but everybody’s vowel space is different. • Vowels contrast with each other in terms of their relationships within that acoustic space. • F1 determines the “height” of vowels. • F2 determines the “front/backness” of vowels. • Question: • How does the way that vowels are produced… • Determine their acoustic characteristics?
Articulation to Acoustics • Last time, we calculated the formant values for “schwa”, or a neutral vowel. • Theoretical values (vocal tract length = 17.5 cm) • F1 = 500 Hz • F2 = 1500 Hz • F3 = 2500 Hz • My values: • F1 = 500 Hz • F2 = 1533 Hz • F3 = 2681 Hz • F4 = 3498 Hz
With a neutral vowel, we’re somewhere in the middle of the acoustic vowel space. Q: How do we get to the corners of the space?
Perturbation Theory • There are two important theories that answer this question. • The first of these is Perturbation Theory. • Remember: formants are resonances of the vocal tract. • These resonances are the product of standing waves in the resonating tube of the articulatory tract. glottis lips
What’s the Big Idea? • Chiba and Kajiyama (1941): • Formant frequencies can be changed by perturbing the airflow of the standing waves in the vocal tract • Idea #1: velocity of standing waves is inversely related to pressure • Sort of like the Bernoulli effect
Standing Waves in the Vocal Tract • Remember: • Vocal tract is a tube with one open end at the lips. • So: • Pressure node at the lips • Pressure anti-node at the glottis • …for all potential standing waves • This translates into: • Velocity anti-node at the lips • Velocity node at the glottis
Standing Waves in the Vocal Tract • Diagrammed in terms of velocity: F1 F2
The Big Idea, part 2 • Idea #2: constriction at a velocity anti-nodedecreases frequency • The constriction slows the velocity down • = constriction at a pressure node decreases frequency • Idea #3: constriction at a velocity nodeincreases frequency • The constriction increases the pressure • This enhances airflow • = constriction at a pressure anti-node increases frequency
Here’s the goal • Let’s figure out how we can perturb the airflow in the articulatory tract to get to the corners of the vowel space. • We need to: • Lower F1 and raise F2 --> high, front vowels • Lower F1 and lower F2 --> high, back vowels • Raise F1 and raise F2 --> low, front vowels • Raise F1 and lower F2 --> low, back vowels • Let’s consider them each in turn…
F1 • Velocity node at glottis • Velocity anti-node at lips • To lower F1: • make a constriction closer to the lips than to the glottis • To raise F1: • make a constriction closer to the glottis than to the lips
F2 • Velocity nodes at: • palate • glottis • Velocity anti-nodes at: • lips • pharynx
F2 • To raise F2, make a constriction at the: • palate • glottis • To lower F2, make a constriction at the: • lips • pharynx
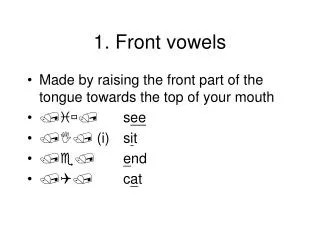
1. High, Front Vowels • Lower F1 and raise F2 • Where should we make a constriction(s)?
1. High, Front Vowels • Lower F1 and raise F2 • Where should we make a constriction(s)? • To lower F1:
1. High, Front Vowels • Lower F1 and raise F2 • Where should we make a constriction(s)? • To lower F1: • constrict close to lips
1. High, Front Vowels • Lower F1 and raise F2 • Where should we make a constriction(s)? • To lower F1: • constrict close to lips • To raise F2:
1. High, Front Vowels • Lower F1 and raise F2 • Where should we make a constriction(s)? • To lower F1: • constrict close to lips • To raise F2: • constrict at palate
2. High, Back Vowels • = Lower F1 and lower F2 • Where should we make a constriction(s)?
2. High, Back Vowels • = Lower F1 and lower F2 • Where should we make a constriction(s)? • To lower F1:
2. High, Back Vowels • = Lower F1 and lower F2 • Where should we make a constriction(s)? • To lower F1: • constrict at lips
2. High, Back Vowels • = Lower F1 and lower F2 • Where should we make a constriction(s)? • To lower F1: • constrict at lips • To lower F2:
2. High, Back Vowels • = Lower F1 and lower F2 • Where should we make a constriction(s)? • To lower F1: • constrict at lips • To lower F2: • constrict at lips • constrict at “pharynx” • Note: these vowels are usually rounded
3. Low, Front Vowels • Raise F1 and raise F2 • Where should we make constriction(s)?
3. Low, Front Vowels • Raise F1 and raise F2 • Where should we make constriction(s)? • To raise F1:
3. Low, Front Vowels • Raise F1 and raise F2 • Where should we make constriction(s)? • To raise F1: • constrict close to glottis
3. Low, Front Vowels • Raise F1 and raise F2 • Where should we make constriction(s)? • To raise F1: • constrict close to glottis • To raise F2:
3. Low, Front Vowels • Raise F1 and raise F2 • Where should we make constriction(s)? • To raise F1: • constrict close to glottis • To raise F2: • constrict close to glottis • constrict at palate
4. Low, Back Vowels • Raise F1 and lower F2 • Where should we make constriction(s)?
4. Low, Back Vowels • Raise F1 and lower F2 • Where should we make constriction(s)? • To raise F1: