Download
1 / 13
130 likes | 227 Views
Microsoft Word Basics: Font Group and Rulers. Computer Information Technology – Section 4-3. Some text and examples used with permission from: http://www.jegsworks.com. Word Toolbars: Format. Objectives: The Student will: Understand the buttons in the Font group of the Home tab

E N D
Microsoft Word Basics:Font Group and Rulers Computer Information Technology – Section 4-3 Some text and examples used with permission from: http://www.jegsworks.com
Word Toolbars: Format • Objectives: • The Student will: • Understand the buttons in the Font group of the Home tab • Understand the function and use of the rulers
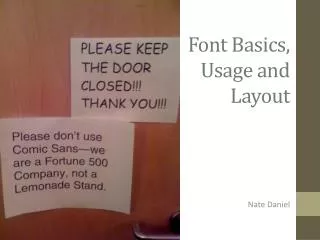
Word Home Groups: Font • Font group allows you to change the font, font size, clear formatting, set the font style, highlight the text and change font color.
Word Home Groups: Font FONT: Displays a list of all the fonts installed on your computer. At the top of the list are the most recently used fonts. Font list shows how each font will look. To apply a font to text, you select the text and then select the font you want from the list. The symbol that appears to the left of a font name indicates that the font is a TrueType font. Such fonts include both screen and printer versions of the characters and can be scaled to any size so what you see on the screen is what will be printed.
Word Home Groups: Font FONT SIZE: Displays a list of font sizes from 8 to 72 points. You can type in the box for other sizes. Maximum size is 1637 pt. To change the font size of text you select the text and then select, or type in, the desired font size. INCREASE, DECREASE FONT SIZE: Increases or decreases the font size by 1 step in the Font Size list. CLEAR FORMATTING: Clears all formatting leaving just the plain text. BOLD, ITALICS, UNDERLINE: Set font styles. These buttons toggle their styles on and off. You can have all of them on at the same time. The dropdown menu on the underline allows you to pick the line style. STRIKETHROUGH, SUBSCRIPT, and SUPERSCRIPT: Strikethrough draws a line thought the text. Subscript shrinks the font and lowers it1 (used for footnotes, etc.). Superscript shrinks the text and moves it up (like x2).
Word Home Groups: Font • Change the capitalization of words, sentences, or paragraphs • To capitalize the first letter of a sentence and leave all other letters as lowercase, click Sentence case. • To exclude capital letters from your text, click lowercase. • To capitalize all of the letters, click UPPERCASE. • To capitalize the first letter of each word and leave the other letters lowercase, click Capitalize Each Word. • To shift between two case views (for example, to shift between Capitalize Each Word and the opposite, cAPITALIZEeACHwORD), click tOGGLEcASE.
Word Home Groups: Font HIGHLIGHT: Does what any good highlighter does. It applies a color over your text. This is often used when marking up documents for others to review or to show where you made changes. Dark colors are good only if the text is a light color. The arrow drops a palette of colors to choose from, including None. FONT COLOR: Sets the color of the selected text to the color of the bar under the A. The arrow drops a palette of colors to choose from.
Toolbars – Clearing Formating CTRL + SHIFT + Z will get rid of all the formatting and go back to the underlying paragraph style. Select the text and hit CTRL + SHIFT + Z
Rulers Rulers are controlled by clicking on the ruler button at the top of the right hand scroll bar (under the split window button) or on the View tab
Rulers The horizontal ruler is used for more than just measuring the width of your page. With it you can set page margins, paragraph indents, tab stops, and column widths. If your pointer hovers over a part of the ruler, a popup tip will show you what the part does The vertical ruler allows you to adjust top and bottom margins and row height in tables.
Toolbars – Rulers MARGINS: Margins are set with a ruler by dragging the boundary between the gray and white. INDENT:Paragraph indentions are set by dragging the pointers. The upper one, on the left of the ruler, sets the first line indent (the amount the first line of a paragraph is indented). The bottom pointer on the left of the ruler sets the left indent of other lines. Dragging the box below the pointer moves both pointers at the same time.
Toolbars – Rulers TAB STOPS: A tab stop is a spot the cursor goes to when you press the TAB key. These are very useful for lining things up without having to create a table. Tab stops are set by default at a half inch, or 1.25 cm. These are shown by tiny gray marks below the ruler marks. When you insert your own tab stop, the default ones to the left of yours are erased. To insert your own tab stop, first select the type by clicking the at the far left of the ruler to toggle it through the choices: Then click on the ruler in the white space at the point where you want your tab stop. You can move it by dragging it. Remove a tab stop that you inserted by dragging it off the ruler.
Rest of Today • Review your grade – Make sure you have turned everything in. • Do Mavis Beacon for the remainder of the day.