Download
1 / 28
280 likes | 287 Views
First Aid for Divers O2 Provider (scuba-doo)

E N D
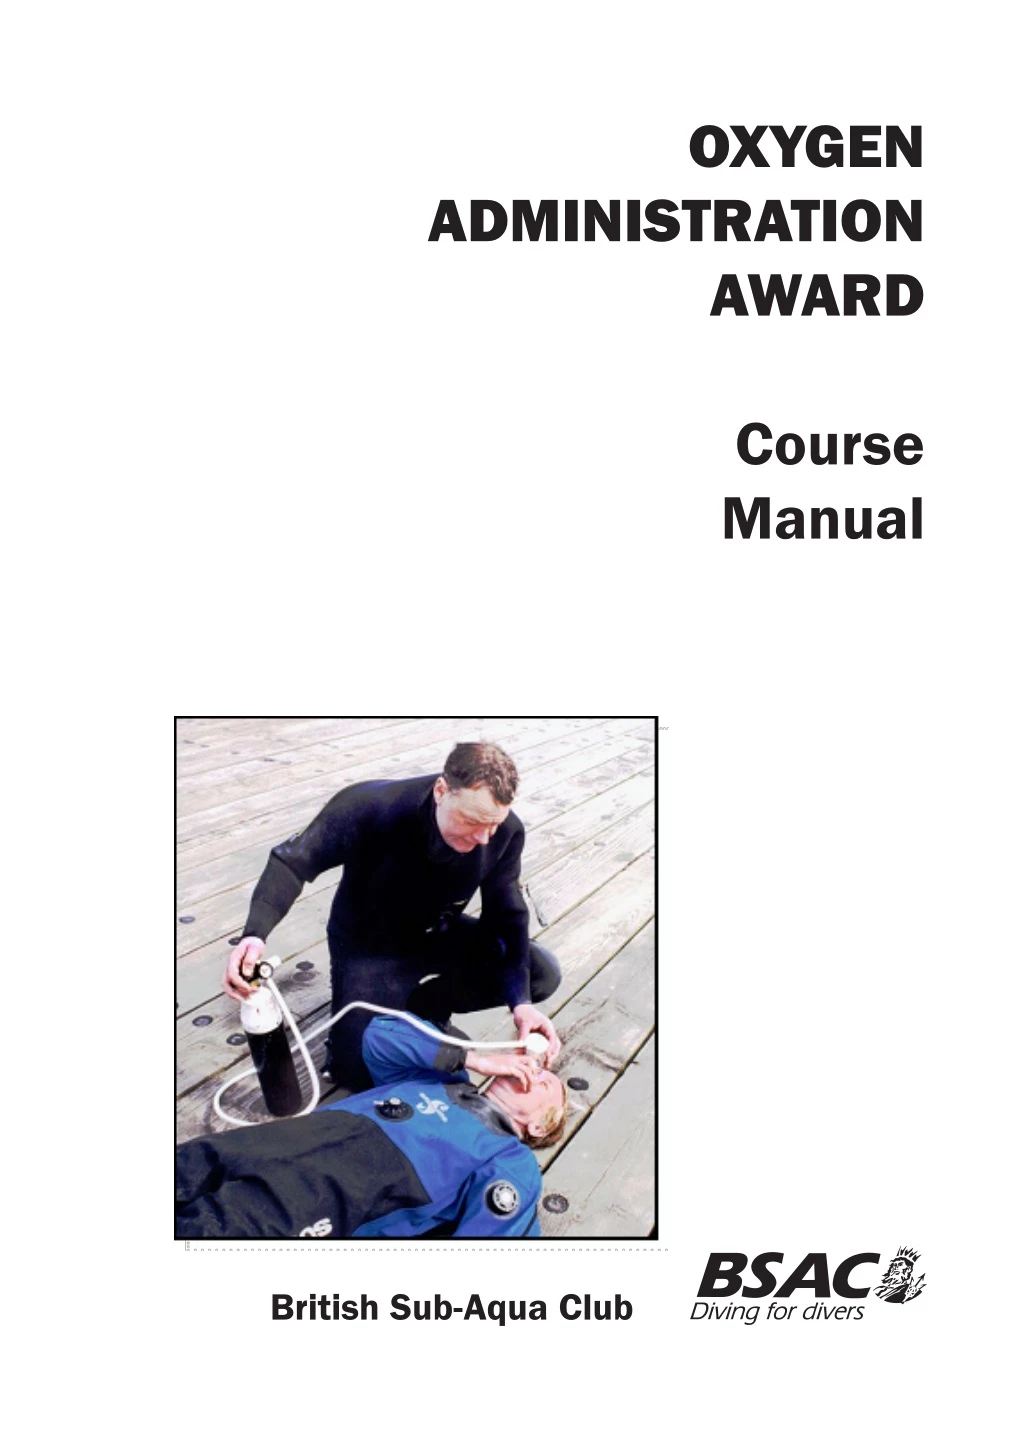
OXYGEN ADMINISTRATION AWARD Course Manual British Sub-Aqua Club
Contents Page BasicLife Support (BLS) .............................................................................................................. 3 Oxygen and Diving Incidents....................................................................................................... 7 Casualty Assessment ................................................................................................................ 13 Oxygen Administration Equipment ........................................................................................... 15 Oxygen Administration in Practice ............................................................................................ 19 Use of Oxygen Administration Equipment ............................................................................... 23 Incident Procedure and Casualty Assessment forms ....................................................... 25/26 January 2009 Copyright © British Sub-Aqua Club 2009 British Sub-Aqua Club, Telford's Quay, South Pier Road, Ellesmere Port, Cheshire CH65 4FL Telephone: +44 (0) 151-350 6200 Fax: +44 (0) 151-350 6215 bsac.org This Course Manual may not, in whole or part, be copied, photocopied, reproduced or translated, or converted to any electronic or readable form without prior written consent of The British Sub-Aqua Club.
Oxygen Administration – Course Manual Basic Life Support (BLS) Rescue skills are, fortunately, the skills least frequently used by you as a diver. The downside of this is that they deteriorate the fastest. They may no longer be ade- quate if required in a real emergency. Periodic refresher training is therefore essen- tial to keep these skills practiced. BLS skills were learned during your Sports Diver training. Time will have elapsed since then, so these notes provide a refresher as well as extending BLS skills to include the use of the 'Pocket' mask. INTRODUCTION Basic resuscitation skills are an essential res- cue skill in any water-based activity. A good grounding in BLS skills is therefore essential for divers. Any skill not frequently exercised will deterio- rate. Practical skills in particular will deteriorate in as little as six months. Once learned BLS skills need regular practice to counter this. Advice given and techniques used will evolve from time to time. Periodic refresher training will also enable skills and knowledge to be updated. BLS skills form the basis on which oxygen- enriched RB is based. BLS skills will always be required to be used initially, while oxygen or other equipment is obtained and readied for use. First remove both the rescuer and casualty from danger, then check the level of response from the casualty. R = RESPONSE ●A Is the casualty Alert? ●V Does the casualty respond to Voice? - e.g. "Can you hear me?" ●P Does the casualty respond to Pain? - e.g. gentle pressure on shoulders, pinch of ear lobe ●U Is the casualty Unresponsive? CLEAR AIRWAY A useful mnemonic to help you remember the priority here is A B C ● Airway ● Breathing ● Circulation Action is needed to clear the airway from one of, or both sources of obstruction, these are: ● Remove any foreign objects from within the mouth, loosen clothing from around the neck and remove loose dentures - well fitting dentures can remain in place. ● In an unconscious casualty laid flat on their back, the relaxed muscles of the tongue will allow it to sag downwards and block the airway at the back of the throat. An effective neck extension and jaw lift will raise the tongue and clear the airway, however, don't overdo the head tilt and jaw lift as overextension can injure the casualty's neck. ASSESSING THE NEED The following signs and symptoms should be monitored to know whether a casualty is breath- ing or not: ● No response from the casualty ● Lack of chest movement ● No feel of air movement Note: Indicators such as coughing, attempts to breathe or any form of muscular movement should be monitored for this purpose. PRIORITIES Priorities need to be considered in the context of the normal diving situation where there are almost inevitably other divers around to help. Use the sequence (remembered by the mne- monic DR A B C) of: Danger - Response - Airway - Breathing - Circulation D = DANGER 3 © BSAC 2009
Oxygen Administration – Course Manual Airway blocked by tongue Head tilt/chin lift clears airway airway Breathing Having ensured a clear airway, check for breath- ing for 10 seconds and finally, Circulation Check for responsiveness such as coughing, attempts to breath or any form of muscular activity. 4. Keeping the airway open, look, listen and feel for normal breathing ● Look for chest movement. ● Listen at the casualty's mouth for breath sounds. ● Feel for air on your cheek. ● In the first few minutes after cardiac arrest, a victim may be barely breathing, or taking infrequent, noisy gasps. Do not confuse this with normal breathing. Look, listen, and feel for no more than 10 sec- onds to determine whether the victim is breathing normally. If you have any doubt whether breathing is normal, act as if it is not normal. Basic Life Support Sequence 1. Make sure you, the casualty and any other divers or bystanders are safe. 2. Check the casualty for a response ● Gently shake casualty's shoulders and ask loudly: ''Are you all right?'' 3a. If casualty responds ● leave casualty in the position found pro- vided there is no further danger ● try to find out what is wrong with the casualty and get help if needed ● reassess casualty regularly 5a. If the casualty is breathing normally ● turn into the recovery position ● send or go for help/call for an ambu- lance ● check for continued breathing 5b. If the casualty is not breathing normally ● send someone for help or, if you are on your own, leave the casualty and do this yourself; return and start chest compres- sion as follows: • kneel by the side of the victim • place the heel of one hand in the centre of the casualty's chest • place the heel of your other hand on top of the first hand 3b. If casualty does not respond ● shout for help ● turn the casualty onto his back and then open the airway by placing your hand on the forehead and gently tilting the head back, keeping your thumb and index finger free to close the nose if rescue breathing is required ● with your fingertips under the point of the casualty's chin, lift the chin to open the © BSAC 2009 4
Oxygen Administration – Course Manual • interlock the fingers of your hands and ensure that pressure is not applied over the casualty's ribs. Do not apply any pressure over the upper abdomen or the bottom end of the bony sternum (breastbone) • position yourself vertically above the victim's chest and, with your arms straight, press down on the sternum 4-5 cm • after each compression, release all the pressure on the chest without losing contact between your hands and the sternum • repeat at a rate of about 100/min (a little less than 2 compressions per second) • compression and release should take equal amounts of time chest rise as in normal breathing, then before your next attempt: ● check the casualty's mouth and remove any obstruction ● recheck that there is adequate head tilt and chin lift ● do not attempt more than two breaths each time before returning to chest com- pressions If there is more than one rescuer present, another should take over BLS every 1-2 min to prevent fatigue. Ensure the minimum of delay during the changeover of rescuers. Students to practice BLS for at least 5 minutes ACTION FOR REGURGITATION OF STOMACH CONTENTS/VOMIT The casualty will not necessarily vomit in the normally expected sense. While unconscious the muscles of the stomach and oesophagus can, like other muscles, relax. In a casualty laid flat, as for BLS, this can allow the stomach contents to trickle back up the oesophagus and pool at the back of the throat. If not detected, attempts at RB can then force this fluid into the lungs. ● It is important to monitor the sound of the exhalations to detect regurgitation of the stomach contents - don't necessarily expect the casualty to vomit in the more traditional sense. ● The actions for regurgitation of the stom- ach contents/vomit are: • Quick roll of casualty onto side • Protection of head during the roll • Head angled downwards to allow fluid to drain • Initial check that fluid has drained • Casualty rolled onto their back, head protected ● Further check that the airway is clear before recommencing BLS 6. Combine chest compression with rescue breaths ● After 30 compressions open the airway again using head tilt and chin lift ● Pinch the soft part of the nose closed, using the index finger and thumb of your hand on the forehead ● Allow the mouth to open, but maintain chin lift ● Take a normal breath and place your lips around the mouth, making sure that you have a good seal ● Blow steadily into the mouth while watch- ing for the chest to rise, taking about 1 second as in normal breathing; this is an effective rescue breath ● Maintaining head tilt and chin lift, take your mouth away from the victim and watch for the chest to fall as air passes out ● Take another normal breath and blow into the victim's mouth once more, to achieve a total of two effective rescue breaths Then return your hands without delay to the correct position on the sternum and give a further 30 chest compressions ● Continue with chest compressions and rescue breaths in a ratio of 30:2 ● Stop to recheck the victim only if he starts breathing normally; otherwise do not interrupt resuscitation If your initial rescue breath does not make the RECOVERY POSITION There are two recovery positions, the 'how' posi- tion and a more stable position with the lower arm behind the casualty. The added stability of the second position is beneficial in circum- stances where the casualty is subject to the motion of a boat. 5 © BSAC 2009
Oxygen Administration – Course Manual Placing an unconscious, breathing casualty in a recovery position is more important than the precise details of which position it is. The steps used to place a casualty into the recovery position are: ● Casualty's right arm placed either in the 'how' position or underneath the casual- ty's buttock (note: ensure that the hand is placed well underneath the soft part of the buttock - not under the point of the pelvic bone - and that the palm is against the buttock, not flat on the floor) ● Casualty's left leg bent at the knee and used as lever to roll the casualty ● Head protected during the roll ● Left arm/leg keep pressure off chest ● Head angled downward to ensure drain- age of any fluid There is no hard rule as to which side the casu- alty should be rolled on to. There is a theory that for decompression illness it is better to lay the casualty on the left side (ie. heart low- est) although this is only theoretical. For other conditions it is less clear. Casualties placed in the 'how' position should in any event not be left lying on the same side for more than 30 mins. This is due to pressure on the lower arm affecting its nerves and blood circulation. If in that position for any extended period, casual- ties should be periodically rolled on to the other side. USE OF THE 'POCKET' MASK The 'Pocket' mask is an effective aid to rescue breathing. It can be used during one-person RB or two-person BLS, but is not really practical in one-person BLS. The 'Pocket' mask is used as follows: ● The rescuer is positioned above the casu- alty's head ● An appropriate neck extension is achieved ● The mask is positioned over the casual- ty’s mouth and nose ● The mask is gripped using the thumb and first finger around the periphery, other fingers hooked under the jaw bone, clear of windpipe. People with different sized hands may need to grip the mask differently. An effective seal is the main criterion ● The seal is effected by your grip, not by pressing down onto the casualty's face SUMMARY BLS skills are essential skills for all divers and they need to be maintained in practice. The emphasis in a rescue should be on effec- tiveness rather than dogmatic adherence to rates or detail of technique. In reality, BLS is not a precise science, hence the importance of effectiveness cannot be over emphasised enough. The ‘how' position A more stable position for boats © BSAC 2009 6
Oxygen Administration – Course Manual Oxygen and Diving Incidents If oxygen administration is to be effective, it is necessary to understand what con- ditions can benefit from it and how to recognise them. Understanding how oxygen benefits each condition will also aid the understanding of equipment requirements. OXYGEN A description of oxy- gen and its charac- teristics are: ● It is colourless, tasteless and odourless ● It comprises approx 21%, by volume, of the atmos- phere ● It is essential in keeping us alive ● It has two mechanisms of transport in the blood: • Under normal circumstances, the haemoglobin (in the red blood cells) is combined with virtually as much oxygen as it possibly can hold • Some additional oxygen is dissolved in the blood fluid (plasma), but the plasma has the capacity to carry a lot more oxygen. In administering oxygen we take advantage of this unused capacity to carry additional oxygen around the body ● Oxygen itself does not burn, it does how- ever support the combustion of other materials, the more oxygen present the more vigorously those materials will burn pressure reduction including such minor con- ditions as barotrauma of the ears and teeth. The most commonly accepted use of the term is, however, to include only those injuries, which result in bubbles entering the circulation or forming inside the tissues. Other aspects of burst lung, where air escapes in between tissues, are thus covered separately. CAUSES The various causes of decompression illness can be described as: ● Inadequate elimination of nitrogen from the body during the ascent, causing nitro- gen to come out of solution and form bubbles mainly, but not exclusively, in the venous circulation or in the tissues ● Physical damage to the lung tissues due to overextension (from over pressurisa- tion) resulting in bubbles of air being drawn into the arterial circulation. Being in the arterial circulation, these bubbles can quickly find their way to the vital organs ● Either of the above can interfere with blood flow, either by bubbles physically blocking blood vessels, or by bubbles causing tissues to distort (with attendant damage) and constrict blood vessels. Tissues downstream will thus receive a reduced blood flow and hence reduced oxygen supply ● A patent foramen ovale (PFO) is a hole in the central dividing wall of the heart, present in all unborn children, and which normally seals up after birth. In a small percentage of the population this may not seal fully. It can allow bubbles that have formed in the blood to by-pass the very fine blood vessels in the lungs, which would normally act as a filter, and enter the arterial circulation (this is known as a cardiac shunt) and hence find their way to the vital organs DECOMPRESSION ILLNESS In the past decompression illnesses (DCI) have typically been referred to as forms of either decompression sickness (due to adverse effects of gas absorption) or air embolism (due to physical damage of the lung tissue). Because for the first aider it is often impossible to differ- entiate between them, the current emphasis is not to try but to simply describe what the appar- ent signs and symptoms are and their rate of progression. Note: Terminology on this subject is not uni- versal and the term decompression illness is sometimes used to include all effects of 7 © BSAC 2009
Oxygen Administration – Course Manual Administration of 100% oxygen benefits the condition in two ways: ● The reduction of the level of nitrogen in the blood provides an increased nitrogen pressure gradient to assist nitrogen elimi- nation from bubbles (nitrogen or breath- ing gas) in the circulation or tissues. The higher the percentage of oxygen, the lower will be the level of nitrogen in the blood and hence the greater the pressure gradient to drive nitrogen out of the body. Hence administer 100% oxygen when- ever possible ● The increased level of oxygen dissolved in the blood increases the oxygen sup- ply to tissues where the blood supply is reduced due to bubble blockage The effects of shock will inevitably be present to a greater or lesser extent, and this is addressed in its own right later in this lesson. The above is however only first aid to limit the impact of the condition. It is imperative that the casualty is quickly evacuated to specialist medi- cal aid, as only therapeutic recompression can effectively resolve the condition. Therapeutic recompression should only be carried out in a recompression chamber where appropriate medical personnel can accompany the casu- alty. Because of the duration of such treatment, many hours, and the special equipment that would be required to do so, in-water recompres- sion is very inadvisable. SIGNS AND SYMPTOMS The signs and symptoms of decompression illness are a combination of those due to the physical presence of bubbles, and those due to the impact of the reduced blood flow (and hence oxygen supply) downstream. The signs and symptoms are therefore not purely physical but can also include a range of effects on the central nervous system. A very common form of the latter is that the casualty may refuse to believe that there is anything wrong! Denial is of course always a factor, in that many people will always want to believe that there is nothing wrong with them, even when they really suspect that there is. Symptoms can range from minor itches and rashes through to quite severe effects. Interpretation of the symptoms is, however, something that should be left to specialist medical personnel. Divers should just record what is apparent. Any abnormality after a dive should be regard- ed as potential decompression illness and treated accordingly. This is particularly true where the dive circumstances (depth/duration, rapid ascent etc.) indicate that this is likely. It should also be remembered that, because of the nature of decompression illness, no decom- pression table or computer guarantees that it will not occur, even where dives have been car- ried out within the limits they indicate. While some signs and symptoms may become apparent within seconds of the casualty surfac- ing, others may be delayed for a considerable period of time. BURST LUNG CAUSE Burst lung is a condition of physical dam- age to the lung tissues, due to over-extension (from over pressurisation), which results in gas escaping from the lungs into the lung cavity and between the organs of the chest (mediastinal emphysema and pneumothorax). Expansion of this gas on ascent exerts pressure on the sur- rounding organs (lungs, heart, voice box, etc.) impeding their function. These forms of burst lung are often accompanied by gas embolism. ON SITE FIRST AID On-site first aid measures for decompression illness are intended to minimise the spread of any bubbles by keeping the casualty laid flat and as quiet as possible, to minimise the demands on the circulation. Signs and symptoms of decompression illness: Denial! - itches, rashes - numbness, tin- gling, joint pains - vision disturbances - dizziness, nausea, headaches, confu- sion - weakness, paralysis, loss of blad- der/bowel control - shortness of breath - shock, unconsciousness - Any abnormal- ity after a dive. Signs and symptoms appear from sec- onds to many hours after surfacing. SIGNS AND SYMPTOMS The symptoms of burst lung are due to the physical effect of the presence of the bubbles or volumes of gas on the surrounding organs - typically the lungs, heart and organs of the lower neck. Many of the signs and symptoms are the same as those of decompression ill- © BSAC 2009 8
Oxygen Administration – Course Manual ness. The symptoms of burst lung typically manifest themselves almost immediately the casualty surfaces. ON SITE FIRST AID The objective of first aid for burst lung is the same as for decompression illness, and hence the same procedure is followed. Because of this it is not necessary to try to differentiate between the two conditions. Administration of 100% oxygen benefits the condition by: ● Reducing of level of nitrogen in the blood, avoided. Physical obstruction of the gas supply to the lungs causes oxygen starvation and hence the respiratory nerve centre of the brain ceases to function. This results in the paralysis of the muscles involved in respiration and thus respi- ration ceases. Signs and symptoms of a burst lung include: Chest discomfort/pain, bloody froth - shortness of breath - changes to vocal tone, crepitation - shock - unconscious- ness, death Signs and symptoms of burst lung are fre- quently accompanied by those for decom- pression illness SIGNS AND SYMPTOMS In the case of near drowning, the casualty will not be breathing and may not have a circula- tion. The circumstances are a significant factor in the diagnosis to differentiate casualties due to near drowning from other causes. hence assisting re-absorption of the nitro- gen content of the escaped gas ● Increasing the concentration of oxygen in the lungs allows more effective use of undamaged areas of the lungs and off- sets any reduction in lung surface area available for gas transfer due to collapse of a lung The effects of shock will again inevitably be present to a greater or lesser extent. As for decompression illness, urgent evacuation to specialist medical aid at a recompression facility is essential for the ultimate resolution of the condition. In some cases, particularly where burst lung is not accompanied by decompres- sion illness, therapeutic recompression may not always be necessary. This, however, is a decision that only specialist medical personnel can make. ON SITE FIRST AID The prime on-site first aid measure for near drowning is rescue breathing or, where neces- sary, BLS. If breathing is re-established the casualty should be placed in the recovery posi- tion while awaiting medical aid. Oxygen-enriched artificial ventilation provides an increased partial pressure of oxygen in the gas ventilating the casualty's lungs and hence an increased supply of oxygen to the casualty's tissues and organs. Even if the casualty apparently fully recovers, it is essential that they receive medical atten- tion. This is because the entry of water into the casualty's lungs irritates the lung lining, and can result in the discharge of fluid into the lungs (oedema). The effects of this, which can be quite dramatic and are known as secondary drowning, do not become apparent for some time after the event. Medical attention is essen- tial to check for, and treat this condition. NEAR DROWNING CAUSES Technically, a drowned person has been certi- fied dead, by a doctor, as a result of fluid inha- lation. A near drowning casualty has suffered respiratory interruption due to fluid inhalation and is in dire need of first aid if death is to be SHOCK CAUSES Shock can be defined as an inadequate circu- lation, even when at rest. This leads to tissue 9 © BSAC 2009
Oxygen Administration – Course Manual damage due to inadequate tissue oxygenation and waste removal. It is present to a greater or lesser degree in all injuries. Any condition, which affects the body's circulation, therefore causes shock. This can happen via a number of mechanisms: ● Reduction in the amount of fluid avail- able in the circulation either due to blood loss from bleeding, or loss of fluid from the plasma such as into blisters due to burns or oedema due to near drowning ● Changes in blood vessel tone reducing the efficiency of the blood circulation, such as massive dilation of the blood ves- sels increasing their volume and drawing blood volume from more vital organs as in fainting ● Impaired pumping by the heart such as due to heart attack ● Allergic reactions, such as to drugs, food, animal bites or stings, placing additional demands on the circulation ● Keep the casualty warm and comfort- able ● Administer oxygen - this results in more oxygen being transported dissolved in the blood to offset the impaired circulation ● Monitor the casualty's condition ● Give the casualty nothing by mouth - except in the case of decompression ill- ness where fluids are beneficial ● Evacuate the casualty to medical atten- tion SIGNS AND SYMPTOMS IMMERSION SHOCK Signs and symptoms of shock include: Weakness, dizziness - inadequate oxygena- tion - Pallor, sweating - diversion of blood to vital organs - Faster breathing, rapid pulse, feeling breathless, unconsciousness - reduced blood supply to vital organs CAUSES Immersion shock is a very extreme example of reduced muscle tone. During long periods of immersion (e.g. lost divers) the casualty's mus- cle tone relaxes (including those in the walls of the blood vessels) due to the support from the water countering the effects of gravity. If removed from the water in an upright posture, gravity causes the casualty's blood to descend towards the lower limbs. The relaxed muscle tone is unable to counter this, with the result that the vital organs are starved of a blood sup- ply, with potentially fatal consequences. Instances have occurred of casualties being recovered by helicopter, who were able to talk to the winchman when he first reached them, but were dead by the time they had been winched into the helicopter. In the UK a double strop lift is now used to keep such casualties horizontal while being winched into the helicopter. The signs and symptoms can be related to the above mechanisms. ON SITE FIRST AID Shock itself cannot be addressed directly, but by administering first aid to the prime cause and then doing what we can to make the casu- alty more comfortable: ● Reassure the casualty (TLC - tender lov- ing care) - the impact of the casualty's mental well being on their overall condi- tion should not be underestimated. A positive mental attitude can often have a beneficial effect on recovery ● Keep the casualty quiet (reduce the requirement for cardiac output) ● Lay the casualty down (improve the blood supply to the brain) ● Lift the casualty's legs (increase the heart pump priming) - but not in the case of decompression illness TREATMENT Casualties who have been subject to prolonged immersion should therefore always be recov- ered from the water in a horizontal position. The casualty should also be discouraged from any activity or movement, as this will place addi- tional demands on their already compromised circulation. © BSAC 2009 10
Oxygen Administration – Course Manual ON SITE FIRST AID On-site first aid measures commence with removing the casualty from the contaminat- ed breathing supply and then countering the effects of the carbon monoxide poisoning. Treating the casualty for shock will reduce the demands on their circulation while administra- tion of 100% oxygen will further assist by: ● increasing the amount of oxygen trans- ported dissolved in the blood, thus mak- ing more efficient use of the lesser used mechanism for oxygen transport ● providing some assistance in eliminating the carbon monoxide from the haemo- globin. This effect is much more pro- nounced when oxygen is administered in a hyperbaric chamber which is the ultimate treatment for severe cases ● helping to restore normal cellular func- tion CARBON MONOXIDE POISONING CAUSES In diving, the cause of carbon monoxide poison- ing is contaminated breathing gas; from either exhaust fumes being drawn into a compressor or contaminants produced from the lubricants within an overheating compressor. Carbon monoxide affects the body in a number of ways: ● It combines more readily with haemo- globin than does oxygen thus reducing the blood's ability to transport oxygen to the tissues and organs ● carbon monoxide may also act as a cel- lular poison in its own right SUMMARY For all the more life threatening diving disorders (decompression illness, burst lung, near drown- ing, shock and carbon monoxide poisoning) the administration of oxygen is very beneficial. To provide the maximum benefit, as near to 100% oxygen as possible should be supplied. Lower concentrations will clearly also be of benefit but not to the same extent. The benefit will also be greater the earlier that administration is commenced. Oxygen supplements other first aid measures to increase their effectiveness. If oxygen is not available the other first aid measures are still appropriate. Because of the nature of the conditions being addressed, the casualty must always be evacu- ated to appropriate medical aid as soon as possible and irrespective of any apparent reso- lution of their condition. SIGNS AND SYMPTOMS Signs and symptoms of carbon monoxide poisoning include: Headache - pale or greyish appearance - weakness - dizziness, nausia - tunnel vision - vomiting - rapid pulse - rapid breathing - coma - convulsions While signs and symptoms can be wide ranging, because of the standards of breathing gas pro- duction, it is unusual for anything but the more minor effects to be encountered, and even these occur only rarely. Generally, if a number of divers are complaining of a headache after a dive, the gas supply should be suspected. Underwater, or on someone who is cold, the normal signs and symptoms may be difficult to observe until their physical capabilities become impaired. Note: The classic 'cherry red lips and nail- beds' sign is not included in the list as it is unlikely to be apparent unless the casualty is close to death. 11 © BSAC 2009
Oxygen Administration – Course Manual © BSAC 2009 12
Oxygen Administration – Course Manual Casualty Assessment These notes supplement the earlier notes which covered diving incidents with a structured and practical approach to assessing a casualty's condition. They reinforce the need to recognise the subtle signs and symptoms of diving incidents and and provides a basis against which to judge them. CASUALTY ASSESSMENT A prompt and accurate assessment of the casualty's injuries will enable the correct first aid treatment to be applied and could be the difference between life and death. A structured means of doing this is provided by the Incident Procedure which functions both as a means of acting as a memory jogger for the procedures and as a means of recording casu- alty assessment information. tion must also be continuously monitored so that subsequent changes in condition can be recorded. Space is provided to record this longer-term information, together with details of any first aid given, which may provide vital information to the personnel at the medi- cal facility receiving the casualty. The sheets should therefore accompany the casualty to the medical aid. In addition to recording the casualty's personal details, dive details, the time to the onset of any signs or symptoms and the time of the assess- ment, the following assessment should be car- ried out and the details also recorded. ●Level of response - is the casualty fully conscious, semi-conscious or uncon- scious? ●Orientation - does the casualty know who he/she is, where he/she is and what day it is? ●Personality - is the casualty acting in character or showing any unusual atti- tudes? ●Chest pains - does the casualty have any chest pains? ●Respiration and circulation - record the casualty's breathing and pulse rates. (Note: unlike when determining the need for BLS, under these circumstances it will be known that the casualty does have a pulse, and the rescuer has the time to find it) ●Vision - can the casualty see normally or is he/she suffering from tunnel, blurred or double vision? ●Tingling or numbness - does the casualty feel any tingling on any part of the body? Gently run your hands over the casualty's body and ask the casualty to tell you when they can and cannot feel the con- tact Record the area of the body where any tingling or numbness is present INCIDENT PROCEDURE SHEET The sheet is subdivided into three main areas: ● An outline of the overall Incident Procedure, including contact details for the emergency services ● The procedure for dealing with a casu- alty suffering from decompression illness (the most likely occurrence) ● Space for recording dive history details Contacting the emergency services and evacu- ating the casualty will be addressed in more detail later in this course. Note: Outside the UK the local emergency evacuation activation procedures may differ and local procedures should be adhered to. INCIDENT PROCEDURE SHEET This sheet can be used for any casualty evalua- tion and covers the assessment of the casualty forming the major focus of these notes. This is not an exhaustive assessment, but includes those essential elements that can be performed by a diver under conditions, such as boat motion or engine noise, likely to be encountered when diving. This sheet has been developed in conjunc- tion with the Maritime and Coastguard Agency (MCA) and covers the vital information, which will be required to be communicated to the emergency services. The initial condition is, however, not the whole story and consequently the casualty's condi- 13 © BSAC 20098
Oxygen Administration – Course Manual ●Weakness - take hold of the casualty's hands, one in each of yours, and ask the casualty to first pull and then push. Compare the force exerted by their left and right arms and note any weakness of one relative to the other. Starting with the casualty's legs slightly flexed, hold the soles of the casualty's feet, one in each hand, and ask the casualty to first straighten and then pull back the legs. Again note any weakness of one leg rela- tive to the other ●Smile/swallow - ask the casualty to smile and then swallow. Compare the left and right sides of the casualty's face and neck for asymmetry of smile or activity of the throat muscles ●Co-ordination - ask the casualty to watch your finger as you move it around in their field of view. Monitor whether the casualty's eyes track your finger and whether they do so smoothly. Ask the casualty to extend one arm out to one side and then, with the eyes closed, bend their arm to bring their index finger to touch their nose. Repeat with the other arm. Again while moving a finger slowly around the casualty's field of view ask him/her to alternately touch your finger with one hand and then touch their own nose. Monitor how easily and accurately they touch both your finger and their own nose. Repeat for the casualty's other hand ●Oxygen and fluid administration - Note the times relevant times of oxygen admin- istration and if administered, the quantity of fluid ●Monitoring - Continually monitor the cas- ualty for any changes in condition, noting whether they are improving or deteriorat- ing and the corresponding times Incident Procedure Sheet Casualty Assessment Sheet See larger copies of these forms at the back of this booklet © BSAC 2009 14
Oxygen Administration – Course Manual Oxygen Administration Equipment There are many different types of oxygen administration equipment available. Not all equipment is suitable both for recreational diver use and for use in the diving environment. These notes explain the configuration of oxygen administration equipment, which is appropriate for sport diving use and some of the associated operating considerations. ●Colour coding - all gas cylinders must be coloured in compliance with a European Standard to identify their contents (BS EN 1089-3). For oxygen this is a white shoulder. The body may be any colour but preferably avoiding those used to identify specific classifications of gases (yellow, red, light blue or bright green). For histori- cal reasons, most are likely to have black cylinder bodies in the UK ●Pillar valve connections - in order to avoid equipment being connected to cyl- inders containing the wrong gas, pillar valve connections are unique to each gas. These connections are again defined in a European Standard (BS EN 850). For oxygen this comprises holes for a par- ticular two-pin index configuration. Unlike a SCUBA cylinder, there is a female gas outlet, which has no 'O' ring. Some pillar valves are fitted with a knurled operating knob. Others have only a profiled spindle, to which is fitted a separate hand wheel or lever which is kept separately (usually attached to the regulator). The configuration of oxygen administration equipment suitable for recreational diver emer- gency use comprises the following compo- nents: ● Gas cylinder ● Regulator ● Demand valve and mask ● ‘Pocket’ style mask ● Storage case Note: For courses run outside the UK, some of the applicable standards may differ from those in the UK (e.g. colour coding). REGULATORS Regulators perform the same function as a SCUBA unit first stage; they reduce the cylinder pressure to a level compatible with the ultimate means of delivery to the casualty. There are, however, again a number of detail differences. ● Outlet pressure - unlike SCUBA regula- tors, which maintain a constant differ- ential above ambient pressure, oxygen regulators are only designed to be used at the surface, and hence deliver a fixed output pressure. This will generally be around 4 bar, although, depending upon the manufacturer, may be around 10 bar. If therefore an oxygen regulator were taken underwater, the flow of oxygen would gradually reduce until it ceased GAS CYLINDERS Oxygen cylinders are in many respects similar to those used in SCUBA units, but have some signifi- cant differences: ●Capacities - oxygen cylinders come in a range of capacities, each identified by a letter. 'D' size cylinders are the most con- venient for stowage/portability. They hold between 370 and 540 litres of oxygen depending upon their working pressure (136 to 210 bar). Larger cylinders are available, but often a number of small cylinders are easier to stow than one large one, particularly on a small boat. ●Materials - cylinders may be made from either steel or aluminium 15 © BSAC 2009
Oxygen Administration – Course Manual completely when the ambient pressure equalled its delivery pressure (30m in the case of a regulator delivering 4 bar) ●Inlet - to match the cylinder pillar valve this is also a two-pin register configura- tion. To match the cylinder pillar valve, the gas orifice is a male inlet (i.e. fits inside the orifice on the pillar valve), and is fitted with a special sealing washer known as a 'Bodok' seal ●Pressure gauge - mounted on the body of the regulator, this indicates cylinder contents against an often fairly coarse scale ●Outlets - usually there are a minimum of two outlets, including the following: • At least one outlet capable of supplying a demand valve. This will typically provide a flow rate of 100-160 litres min. The delivery hose may be either permanently attached or fitted with a quick disconnect. Some equipment may have more than one of the latter connections to allow a second demand valve to be connected • A constant flow outlet delivering a minimum of 10 litres/min, for use with a 'Pocket' style or other simple mask • Oro-nasal masks are made from a transparent material to enable monitoring of the casualty's airway/ breathing and have either inflated or double face seals. They are supplied in a number of sizes - large/adult and small/child sizes. Small sizes often provide the best fit on adults with narrow faces DEMAND/RESUSCITATION VALVES In addition to a demand capability for breathing casualties, some valves provide a resuscitation capability for non-breathing casualties. This resuscitation capability (know as positive pres- sure resuscitation) can be effected in a number of ways, not all of which are suitable for recrea- tional diver use. Systems offering automatically controlled posi- tive pressure ventilation are available which would be suitable for recreational diver use, but these are generally very expensive, may not be suitable for use in the diving environment and require unit specific training. Simpler types relying on the operator to manu- ally control the flow of oxygen by use of a trig- ger or button are also available. The most cost effective standard of valve suitable for recrea- tional diving use: ● Is manually controlled ● Will deliver 100-160 litres/min on demand ● Will have a resuscitation control limited to a maximum flow rate of 40 litres/ min. Ventilating a non-breathing casualty at greater flow rates risks inflating the casualty's stomach, with the attendant prejudice to resuscitation, as some of the stomach contents are displaced back up the oesophagus and into the throat (just as in ventilating too aggressively in RB) ● Will be equipped with pressure relief DEMAND VALVES Just like on a SCUBA unit, these valves oper- ate only when the casualty breathes in (i.e. demands oxygen): ●Flow rate - to meet the peak flow rates which could be needed to satisfy the cas- ualty's breathing, demand valves need to be able to deliver 100-160 litres/min. ●Mask - unlike SCUBA units these are fitted with oro-nasal masks, not a mouth- piece, because • A casualty suffering from nausea, a common symptom of decompression illness, is unlikely to tolerate a mouthpiece • Unless a nose clip is used with a mouthpiece, again unlikely to be tolerated by a nauseous casualty, some air will be inhaled through the nose, thus diluting the oxygen inhaled through the mouth • An oro-nasal mask will be more tolerable and also enables as near to 100% oxygen as possible to be inhaled © BSAC 2009 16
Oxygen Administration – Course Manual valves, set to a pressure of approx. 45cm water, to avoid over-pressurising the cas- ualty's lungs a rapidly breathing diving casualty the concen- tration is very likely to be lower. • Not as high as demand mask Because the concentration of inspired oxygen is dependent on the breathing rate of the casualty and is likely to be less than 100%, this equipment is not a substitute for the demand valve and mask which should always be used whenever possible. ● Parts • Oxygen tubing To attach to the outlet on the oxygen regulator • Reservoir The oxygen from the cylinder fills the reservoir even when the casualty is exhaling, so this is continuously filling • Mask Fits to the casualty’s face like the other masks used in the course • Exhaust Valves Expired air is able to escape from the mask through these and they prevent entry of atmos- pheric air ● Flow 10-15L/min The oxygen concentration in the inspired gas is dependent on the flow rate of oxygen supplied by the regulator and the breathing rate of the casualty. The regulator should be able to sup- ply oxygen at a rate matching the breathing rate of the casualty to be confident that the concen- tration of oxygen inspired is close to 100%. In practice this should be at least 15L/min and preferably higher. ● Fill bag before use The oxygen tubing should be attached to the mask and the gas exit from the reservoir closed with a finger until the reservoir is filled, then the mask can be put on the casualty. 'POCKET' MASKS These were introduced in the practical BLS les- son. They: ● Have a central ventilation orifice for both inflating the lungs and for the casualty's exhalations ● May be fitted with a porous splash guard to protect the rescuer from the casualty's body fluids ● May also be supplied with a push fit com- bined non-return/exhalation valve ● Are made from a transparent material for airway monitoring. ● Generally have an inflated face seal For oxygen enriched RB, they must also be fit- ted with a connection (including a non-return valve) for the constant flow oxygen tubing (Note: 'Pocket' masks without such connections are also available). casualty's RESERVOIR MASK ● aka Hudson/non-rebreathing These are normally disposable pieces of equip- ment. If you plan to purchase one, be aware that suppliers may list it under a variety of different names: Hudson mask, non-rebreathing mask, or reservoir mask. ● For second DCI casualty The standard pocket mask with an oxygen tube attached gives an increased concentra- tion of oxygen in the inspired gas to a breathing casualty, but concentrations are unlikely to be above 40-50% oxygen. To a casualty with DCI higher concentrations may have significant advantages. ● Gives oxygen concentration • Higher than pocket mask The manufacturers and other sources indicate that under optimal conditions the reservoir mask can deliver between 85 and 100% oxygen to a breathing casualty, although in the case of STORAGE CASE Oxygen equipment needs to be kept as close to the scene of diving operations as possible, and will hence be subject to a demanding envi- ronment, particularly in a small boat. Suitable storage is therefore essential to protect it from both the elements and from damage. Storage cases should be: ● Robust to protect the equipment ● Waterproof ● Ideally large enough to store the equip- ment in fully assembled state 17 © BSAC 2009
Oxygen Administration – Course Manual PRECAUTIONS IN USE The handling of oxygen equipment requires more attention than for breathing gas systems. The risks of spontaneous combustion in the presence of certain greases, and the fire haz- ard when oxygen equipment becomes exposed to dirt and contamination, dictate that absolute cleanliness is a necessity when handling oxy- gen equipment. Because it is rarely used, regular checking and maintenance is essential to ensure that the equipment will work properly when needed. The design and maintenance of oxygen equip- ment is a specialist discipline which is far more complex than for breathing gas systems. Amateurs should therefore not attempt to main- tain, build or modify oxygen equipment them- selves. Always use only the proper oxygen equipment, to avoid the sort of confusion where, should non-standard cylinders be used, a casualty could be mistakenly treated with air, or worse still, a diver could dive using a cylinder filled with oxygen. SUMMARY This lesson has looked at the configuration of equipment most suitable for recreational diver use comprising: ● Gas cylinders ● Regulator ● Demand valve or demand/resuscitation valve and mask ● 'Pocket' masks ● Storage cases Because of the specialist nature of oxygen sys- tem design, only use equipment produced by recognised specialists. Oxygen equipment will however only be of use if it can be relied upon on the rare occasions that it will be needed. It is therefore essential that it is kept clean and well maintained. So that it is available with the minimum delay when needed, keep equipment assembled ready for instant use. © BSAC 2009 18
Oxygen Administration – Course Manual Oxygen Administration in Practice Administering oxygen to a casualty is not just a question of operating the necessary equipment. There are other considerations that need to be taken into account to ensure that the maximum benefit is achieved. These notes present guidance on these wider aspects of oxygen administration, complementary procedures and overall safety considerations. CASUALTIES The BSAC maintains a database of incidents, which occur in the UK. Analysis of this database is used when formulating training recommenda- tions. Statistics from this analysis show that the majority of casualties requiring oxygen adminis- tration will be breathing, conscious and suffer- ing from decompression illness. The demand mask and oro-nasal mask are therefore most likely to be used, in order to provide the maxi- mum oxygen concentration to the casualty. In comparison, the incidence of casualties requiring rescue breathing is, fortunately, very much lower - by a factor of eight or ten to one. If there is any suspicion at all of burst lung or decompression illness, lay the casualty flat on his/her back. Otherwise, the legs may be raised to counter the effects of shock, although the casualty should be monitored for any signs that this is adversely affecting their breathing. If this happens lower the casualty's legs to lay them flat again. ADMINISTERING OXYGEN The earlier that the administration of oxygen is commenced the greater its benefit: ● Nitrogen elimination from the body is maximised due to the higher nitrogen pressure gradient ● Any reduction in tissue oxygenation (hypoxia) due to impaired blood flow is countered as soon as possible Because oxygen has greater benefits the earlier it is administered, where supplies are limited it is more beneficial to use up the oxygen early, rather than try to ration it. Although addressing a physical need, the casu- alty's mental condition should not be over- looked and copious amounts of tender loving care (TLC) should be administered along with the oxygen. Where a second casualty is involved ● Use a second demand valve and oro- nasal mask if available ● Otherwise use a 'Pocket' or reservoir mask for the second casualty ● Accept the more rapid depletion of the oxygen supply. Be prepared for a possible transient worsen- ing of symptoms when oxygen administration is commenced due to the initial reaction of the brain to the increased partial pressure of oxygen. A further contributory factor is the passage of oxygen into the nitrogen bubbles in the blood. Because it is not very soluble in blood, even POSTURE 19 © BSAC 2009
Oxygen Administration – Course Manual when 100% oxygen is administered, only a small amount of oxygen passes into the bub- bles before equilibrium is re-established. This causes only a marginal increase in bubble size which is quickly offset by the more rapid elimi- nation of the nitrogen from the bubbles. Because we are considering only administer- ing oxygen on the surface, short term (acute) oxygen toxicity is not a problem. Longer term (chronic) oxygen toxicity is also not a problem because of the short timescales involved. Where casualties have been recovered to the surface after experiencing oxygen toxicity underwater, oxygen can be administered once any signs and symptoms (typically convulsions resembling an epileptic fit) of oxygen toxicity have disappeared. Pain killers should not be administered because they can potentially confuse the symptoms, making subsequent treatment by medical per- sonnel more difficult. should be administered as a first aid measure for decompression illness. EVACUATION Evacuation to medical attention should be arranged at the earliest opportunity, irrespec- tive of any apparent improvement in the casu- alty's condition when breathing oxygen. ● At sea via the Coastguard on VHF chan- nel 16 ● On land in England, Wales and Northern Ireland by telephoning the British Hyperbaric Association/Royal Navy (BHA/ RN) Diver Helpline on 07831 151 523 ● On land in Scotland by telephoning British Hyperbaric Association/Royal Navy (BHA/ RN) Diver Helpline on 0845 408 6008 ● For casualties not suffering from DCI or burst lung, contact either the Coastguard if at sea (VHF channel 16) or the ambu- lance service if on land (999 telephone call). Note: Outside the UK the appropriate local procedures should be followed). Some instances of DCI have occurred where the call to the emergency services has been delayed to see whether oxygen administration resolves the condition. When this has appar- ently occurred, the casualty has not been evacuated, only to have the signs/symptoms reappear rather more severely some time later. This has not only made the treatment of DCI more difficult, but also increases the likelihood of the casualty being left with some permanent and possibly crippling damage. Where the buddy of a casualty suffering from decompression illness has accompanied the casualty on the same sequence of dives, the buddy should also accompany the casualty to the recompression chamber as a precaution, in case he/she subsequently also develops symp- toms. Note: in the case of helicopter evacua- tion, payload/range constraints may preclude this and other arrangements may be required. The above contact details, and a reminder of the sort of information to have ready to hand, are included in the Incident Procedure used in the Casualty Assessment lesson. This, and all other relevant information must accompany any casualty when they are evacu- ated. ADMINISTERING FLUIDS Dehydration is a pre-disposing factor to decom- pression illness. This is not just a factor in warmer climates but equally occurs in temper- ate climates. Rehydration using appropriate fluids is, therefore, important: ● Still isotonic drinks are preferable, but failing these water/squash drinks can be used ● do not administer caffeinated or fizzy drinks (eg. coffee, tea, cola) ● the fluid should be administered in small quantities at a rate totalling approximate- ly 1 litre/hour With a nauseous casualty, care should be taken to ensure that drinking the fluid does not make them vomit, as the resultant fluid loss would further aggravate their condition. Administration of fluids should not, however, be allowed to impede or delay either the admin- istration of oxygen or the evacuation of the casualty to a recompression facility. Fluids should not be administered in the following circumstances: ● If the casualty is likely to vomit ● If the casualty is likely to inhale the fluid ● If the casualty has a condition which may subsequently require a general anaes- thetic Even where oxygen is not available, fluids © BSAC 2009 20
Oxygen Administration – Course Manual OXYGEN SUPPLY EXHAUSTED? While dedicated oxygen administration equip- ment is the preferred mechanism, oxygen sup- plies may become exhausted. In these circum- stances it is possible that a number of alterna- tives, giving varying degrees of benefit, will be available. Closed Circuit Rebreathers contain a supply of 100% oxygen and can be set to deliver this. How this is done depends upon the particular type of rebreather. For this reason, and because of other considerations when using these units for this purpose, this should only be undertaken by someone trained in the use of the particular type of rebreather. the casualty with a facemask or nose clip - although these may not be tolerated by the casualty MISSED DECOMPRESSION If a diver misses decompression stops for any reason, or suffers a rapid ascent, a decision on their on-site first aid treatment has to be made for which there is no black and white answer. A judgement, which is beyond the knowledge and expertise of the recreational diver, is required. In these circumstances: ● Do not wait for signs and symptoms to appear but assume that the diver may be suffering from DCI ● Lay the casualty down and keep them quiet ● Administer 100% oxygen and fluids ● Obtain specialist medical advice from the BHA/RN Diver Helplines. These Helplines are there to give this sort of advice, not just to assist with evacuation arrange- ments if required. Have all the relevant information ready and fol- low the advice received. Note: Outside the UK, the local procedures for obtaining medical advice should be fol- lowed. ENTONOX Many emergency transport vehicles carry a mixture of nitrous oxide and oxygen known as 'Entonox'. Entonox cylinders can be recognised by the col- ours white and blue which can be applied: ● As two distinct bands around the shoul- der ● As three distinct bands around the shoul- der (i.e. white in the top and bottom bands, blue in the central band) or ● As alternating quarters on the shoulder Note: Outside the UK Entonox may be known by other names and be identified by other col- our codes. Instructors should substitute the local terminology and identification. The nitrous oxide is far more soluble in blood than is oxygen, and consequently significant amounts of nitrous oxide pass into the nitrogen bubbles in the blood causing them to grow before equilibrium is re-established. This preju- dices the casualty's condition. Nitrox will also provide a degree of benefit and may be available from either a SCUBA (open circuit) unit or Semi Closed Circuit rebreather. This will reduce the amount of nitrogen in the inspired gas but, because of the lower percent- age of oxygen delivered to the casualty, this will be by no means as effective as 100% oxygen. It will, however, be more beneficial than breath- ing air - the higher the oxygen content of the mixture, the greater the benefit. There are some practical considerations com- mon to the above alternatives: ● Administration via a normal mouthpiece may not be tolerated by a nauseous casu- alty. Should this cause any discomfort the casualty should breathe air ● Breathing via a mouthpiece will in any event result in the percentage of oxygen delivered to the casualty (and hence the benefit) being further reduced due to air also being taken in through the nose. This could only be precluded by fitting 21 © BSAC 2009
Oxygen Administration – Course Manual SUMMARY These notes have considered the wider practi- calities of oxygen administration including: ● The types of casualties ● How to maximise the efficacy of oxygen administration by posture, early com- mencement and fluid administration ● How to contact the emergency services for assistance with evacuation or for advice on missed decompression ● Alternative gas supplies for use once oxy- gen administration equipment is exhaust- ed ● Ensuring that Entonox is not adminis- tered to a casualty suffering from DCI ● Safety precautions and limitations Entonox should never be administered to a casualty suffering from decompression illness, and this must be made clear to emergency personnel - tactfully. Even if administered for a non-diving injury (e.g. broken leg) after diving, this could precipitate decompression illness in an 'unbent' diver. SAFETY CONSIDERATIONS Because the casualty's exhalations will largely be composed of oxygen, when administering oxygen it is vital that the area is well ventilated. In an enclosed space the level of oxygen in the atmosphere could be raised significantly, thus increasing the fire risk from sources of combustion of any sort. These need not neces- sarily be the obvious ones of cigarettes or gas stoves, but could include less obvious sources of combustion such as sparks from electrical or electronic equipment. LIMITATIONS People with conditions such as chronic lung diseases may suffer adversely, possibly to a fatal extent, by the administration of oxygen. As these people would be precluded from diving, divers should restrict themselves to admin- istering oxygen only to other divers. Under most circumstances, nurses are not allowed to administer oxygen to patients without specific instructions from a doctor. Divers would be neg- ligent to assume that they can do otherwise, unless the casualty is a diver suffering a diving related problem. Oxygen is, however, only a first aid measure and, irrespective of any improvement in the casualty's condition, its administration should always be accompanied by evacuation of the casualty to the appropriate treatment facility. © BSAC 2009 22
Oxygen Administration – Course Manual Use of Oxygen Administration Equipment These notes provide practical information on the use of oxygen administration equipment for both breathing and non-breathing casualties. ADMINISTRATION TO A BREATHING CASUALTY The following sequence is recommended when acting as as solo rescuer: ● Lie the casualty down and make them comfortable ● Talk to the casualty, giving reassurance and question the casualty for symptoms ● Assemble the oxygen set, while talking to the casualty ● Make a point of taking a couple of test breaths from the set to demonstrate its use to the casualty ● Instruct the casualty in the use of the demand oro-nasal mask - encourage the casualty to hold the mask against their face as this gives them something positive to do, and also allows them to quickly remove it if they feel that they need to be sick ● Continually monitor the casualty's overall condition ● Continue administering TLC (tender lov- ing care) able, send someone to summon the emergency services ● With the equipment assembled and the oxygen flowing, your assistant should position the oro-nasal mask above the casualty's head ready to take over the RB ● Immediately after you complete a cycle of ventilations, and during the period of chest compressions, your assistant should position the ‘Pocket’ mask on the casualty's face ● On completion of the sequence of com- pressions, your assistant should ventilate the casualty (with oxygen-enriched RB) twice, following which you should con- tinue with the next sequence of compres- sions ● Continue the sequence of ventilations and compressions the same as for non- oxygen two-person BLS ● Remember, ‘less haste, more speed' when swapping roles valve and the POSITIVE PRESSURE VENTILATION The following procedure is recommended for administering positive pressure ventilation should suitable equipment be available: ● From a position above the casualty's head, extend the casualty's neck suffi- ciently to achieve a clear airway ● Position the mask on the casualty's face and secure it by gripping around the periphery of the mask and under the casualty’s jaw bone. Maintain the neck extension ● Progressively operate the ventilation con- trol while watching the casualty's chest. The objective is not to inflate the casu- alty's chest until it is full, but to achieve the same level of inflation as in a normal breath ● Once a definite rise in the casualty's chest is observed, release the control ADMINISTRATION TO A NON- BREATHING CASUALTY WITH CARDIAC ARREST If there are two rescuers available it is recom- mended that you work as a team as follows, bearing in mind you may have to prompt your helper: ● Assess the casualty using the 'DRABC' sequence ● As soon as you have identified no breath- ing, instruct your assistant to get the oxygen equipment ready ● Complete the 'DRABC' sequence and assuming that the casualty has no circu- lation, and commence BLS ● Your assistant should get the oxygen equipment (in its container) and prepare it for use. If sufficient people are avail- 23 © BSAC 2009
Oxygen Administration – Course Manual and watch the chest fall ● Once chest movement has ceased repeat the cycle ● Continue ventilating the casualty, allow- ing the rise and fall of the chest to dictate the depth and rate of inflations © BSAC 2009 24
Oxygen Administration – Course Manual Incident Procedure Sheet 25 © BSAC 2009
Oxygen Administration – Course Manual Casualty Assessment Sheet © BSAC 2009 26
British Sub-Aqua Club, Telford's Quay, South Pier Road, Ellesmere Port, Cheshire CH65 4FL Telephone: +44 (0) 151-350 6200 Fax: +44 (0) 151-350 6215 bsac.org