Download
1 / 3
30 likes | 34 Views
Some artists can make portraits but it requires extra skills to make it realistic. So learn some tips in this pdf.<br>Also, you can buy different sketches, paintings, portraits, etc from the link below:<br>https://www.showflipper.com/fine-art/drawing <br>

E N D
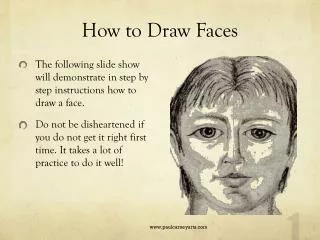
How to Draw Realistic Portraits Step By Step Being able to draw portraits is one thing but being able to actually make them resemble the subject is a whole another thing. And as a portrait artist, the one question that you could be found consistently asking yourself is “How to draw realistic portraits?” You might start off with a perfect stroke and be sure about the results but it can happen that by the time you finish drawing, the outcome is not quite what you would have expected it to be. You could be baffled because it really was not your fault. But there are certain things that you must keep at the back of your mind to learn how to draw a perfect portrait. Sites like ShowFlipper sell drawings online and you can visit these sites to gain an idea of what you need to do to draw well. This article brings to you some useful and easy to follow drawing portraits tips. These step by step portrait drawing tips for beginners as well as professionals help you figure out how to draw portraits with pencil and how to give a defining shape to your subjects while drawing. I hope you had a good learning while reading these watercolor painting techniques. A step by step guide on How to Draw Realistic Portraits Study the Subject Carefully Each person is different from the other, so are their facial features. You should always make it a point to study these features carefully before you actually start to draw. Look into the tiniest nuances of each and every facial expression of your subject. Like how they smile, or how their eye expressions change with different emotions. This study helps you capture the real essence of the personality of the person sitting on the stool and you can do justice to their portrayal on your canvas only then. Draw the Outline The outline of an image serves as the boundary region to which your drawing will stay confined. It helps you stay put in your assigned area and does not let the size of your drawing stray away from the pre-defined specifications. You could use a grid to draw an outline or you could freehand if comfortable with it. Grids are known to be more precise but the choice will really be yours. An HB pencil should be used to draw an outline. Always take into account the shape of the person’s face and stick to it when defining an outline. It is very crucial to be accurate with the face shape otherwise it’s highly unlikely that you
final drawing will resemble the real person and you will be a step closer to draw realistic portraits. Start With the Hairline You should always start with the hairline of a person when sketching a portrait. Notice the flow of the air and always take your strokes in the direction of the flow. Also, note the hair color and use a dark or a light pencil accordingly. A 3B and a 7B pencil could be used for a good color combination. The 3B pencil helps you define the basics and the 7B helps in addition to details and contrast to the drawing. Always follow the flow of the person’s hair and start with the dark shade, gradually shifting to an intermediate tone, and then lighter shades. The lighter shades act as a highlight. The strokes in the hair are mostly tone-dependent and not defined by lines. Don’t rush through it and work on each stroke well. Define the Forehead Forehead, cheeks, lower chin, and the nose tip are the regions on a person’s face with highlights. You can define these highlights by putting in some H graphite around the highlight region and then blend it with the area around with a tissue to draw realistic portraits. The highlights very much depend on the tone of a person’s skin. Notice the tone of your subject’s skin and then put the H graphite in the highlight region accordingly. Identify the highlights on your subject’s forehead and then very carefully work them out with some graphite and a tissue. Use more graphite if the skin tone is lighter than the highlights and lesser if the skin tone is darker. Blend in the highlights minutely to create a light gradient. Take breaks in between to avoid being overworked. Then begin again when you feel like it. The color gets darker as you move away from the highlights. Eyes Eyes are relatively easy to draw if you keep the eye color in your mind. A lot of highlights are used around the eyes, especially for the eyelid shadows beneath the eyebrows and the pupil region. Blend in some graphite for the iris region and then carefully mix it to a dark shade that grows lighter towards the outer circle of the iris. The pupil is kept darker with a small white to reflect the sparkle.
The whites of the eye should not be left completely white. Shade them with a light graphite pencil highlighting where necessary. Look into the reference photo of the subject, collect hints, and work accordingly. Cheeks and Nose The cheeks of a person pretty much define the shape of the person’s face. Identify the lightest tone on the cheeks and start with these tones. Put some graphite in the region and lightly blend it out towards the outside of the face. The shade gets darker as we leave the face. The cheekbones should be highlighted to bring out the shape of the face. This will depend a lot on the person’s face shape and cheekbone projection. The shape of the nose is very crucial in deciding the resemblance, too. Take care of the crook of the nose and highlight the tip by blending in some graphite, leaving the tip light. Chin, Jawline, and Lips The face will be finished by defining the jawline and chin. Put some H and B graphite over the highlight region and gradually blend them in. The lips are usually graphite dabbed without any highlights. Just mind the shape and it will be fine. Proceed to the neck next and use shadows effectively to make the portrait look real. After having finished the portrait just use a retractable eraser to highlight the main areas more and then fix it with a spray. And voila! There you have it. You can also search for drawing portraits online on e-store like Showflipper that sell drawings online to gain more knowledge of the subject. We hope the article was helpful. You can search other online tutorials for drawing portraits and start learning and practicing. So go ahead and start drawing. We will see you in the next article.