Download

1 / 18
180 likes | 322 Views
New Web Appearance (NWA). Configuration of the masterpage settings. Configuration of the masterpage settings. Difference between masterpage settings and page settings Masterpage Settings Here the settings for publishing pages and content publishing pages are made.

E N D
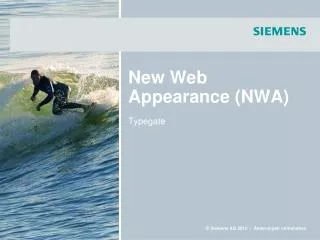
New Web Appearance (NWA) Configuration of the masterpage settings
Configuration of the masterpage settings • Difference between masterpage settings and page settings • Masterpage Settings • Here the settings for publishing pages and content publishing pages are made. • This includes, for example title, welcome image, website layout and general contact information. • Page Settings • These are settings for pages. (Pages are always embedded in publishing sites and content-publishing sites). • This includes for example page title, URL, page layout and the • author of a page. • The page settings are not addressed in this document
Configuration of the masterpage settings • Masterpage settings in detail Welcome Image, Layout and Stylesheet (Coloring) Title and description Elements of the toolbar Navigation Start Links
Configuration of the masterpage settings • Configuration of the masterpage settings Siemens NWA Masterpage settings Site Actions Site settings Modify all site settings
Configuration of the masterpage settings • Masterpage Settings • Settings only for publishing pages(except site title) • Settings only forcontent-publishing pages • General settings(for both websitetypes)
Configuration of the masterpage settings • Change title of a website • If no text is specified,the text of the site above will be taken over. • Furthermore, the text you enter here, is used for underlying websites too, if a text is not explicitly typed in. • For pages directly below the site, the title will be transferred unchanged.
Configuration of the masterpage settings • Change Site description (only publishing sites) • If no text is specified, the text of the site above will be taken over. • Furthermore, the text you enter here, is used for underlying websites too, if a text is not explicitly typed in. • For pages directly below the site, the title will be transferred unchanged. • The site description is displayed only on publishing pages. It will not appear on content publishing pages.
Configuration of the masterpage settings • Select welcome image (only publishing sites) • If no image is specified, the image of the site above will be taken over. • The selected image is used as a standard image for underlying websites, but can be changed there. • It should be noted, that the selected image is displayed only on publishing pages. • For content-publishing pages, see below. Size: 638 x 393 px
Configuration of the masterpage settings • Change homepage-type (only publishing sites) • If the empty field is selected, the homepage type of the overlying site is taken over. • At „1“, the welcome image is reduced to width 362 pixels. • At „2“ the welcome image will be displayed in original size. • At „3“ the welcome image is reduced to height 196 pixels. Size: 362 x 393 Size: 638 x 393 Size: 638 x 196
Configuration of the masterpage settings • Navigation columns • Changing the value of this drop-down list has no effect.
Configuration of the masterpage settings • Select a page visual (only content-publishing-sites) • If no image is selected, the image of the overlying website will be taken over. • By default, the selected picture is also the standard picture of the underlying websites, but can be changed there.
Configuration of the masterpage settings • Modify the site identifier • Here a link (Site identifier link) can be placed with associated text (Site identifier). • You can specify absolute URLs (see picture) and relative URLs. Relative URLs only can be specified with pages, that are located directly below the site. • Note: Currently will be checked, whether Site Identifier and Site Identifier Link get predefined values.
Configuration of the masterpage settings • Modify the Site contact • With the box SiteContact, the contact information can be integrated to the website. • In this field, the relative path of an HTML page can be filled in. • Ideally, the HTML document and images are in the documents folder of the website. • Templates for the contact pages can be accessed here.
Configuration of the masterpage settings • Modify the stylesheet • With this drop-down list, the color of a website can be varied. • The selected colors will be taken over by the underlying pages, but can be changed there. • With the setting „default“, the colors of the overlying site are taken over. • Note: Once the stylesheet of the overlying page has been overwritten, it only can manually be set to the desired value. Default Cool Grey
Configuration of the masterpage settings • Hide elements of a website • With the help of this text field, elements of the website can be hidden. • If more elements of the website need to be hidden, they have to be separated with semicolon („;“). • Note: This setting is inherited to underlying sites. If hidden elements need to be displayed again on underlying sites, they have to be hidden on the site below and then they have to be explicitly re-enabled. (by removing the text from the textbox) Before After
Configuration of the masterpage settings • Hide elements of a website • Possible inputs for the hidden-elements-textfield are: • Toolbar.Forms • Toolbar.Services • Toolbar.Contact • Toolbar.SiteExplorer • Breadcrumb.Root • LeftMenu.Heading • Note: The fields „Services“ and „Forms“ are hidden in the sector industry, because they have no meaning here. The fields „Contact“ and „Site Explorer“ are required.
Configuration of the masterpage settings • Service Content and Forms Content • In both fields a text or a relative link to an HTML site (stored in the documents folder of the website) can be placed here. • The fields are not necessary for the industry sector (see previous slide).
Configuration of the masterpage settings • Change the Navigation Start Links • With the field „NavigationStart Links“, more links can be placed on top of the breadcrumb navigation. • With this way, a site collection can be attached to an other site-collection. • The input for this field looks like:[<Link-text1>|<Link-URL1>][<Link-text2>|<Link-URL2>] (Separation by blanks) Before After