Download
1 / 42

E N D
2. What you need for this training: Memory key
Class list
Multiple choice test
Note taking material
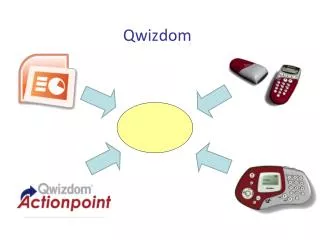
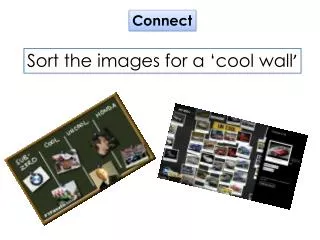
3. Qwizdom Connect
4. Locate the Qwizdom Connect shortcut on your desktop.
Double click to open
5. Click here to create a user account
Follow the online directions
6. Actionpoint Part II
7. What is Actionpoint? Actionpoint is PowerPoint, but with this additional set of tools.
These tools allow you to create an assessment to use with the clickers.
8. Actionpoint Find the Actionpoint shortcut on your desktop
Double click to open it
9. Name the Test Create a title slide.
Name the test something that will help you identify it.
10. Question: Click the down arrow to view the options for the types of questions
Select the type of test you want to create
For today�s training we will be creating a multiple choice test
Select the number of choices you want to present
11. Type: Click on the down arrow to show the answer type you want.
Click on your choice
12. Create the Test Question Suggestion: Number your questions so you can keep track of where you are in your presentation.
Type the question
Type the multiple choice answers
13. Answer: What is the correct answer?
Select the letter that represents the correct answer for the question on this slide.
14. Points: If you want to score your test results, select the number of points assigned to this question.
I have 10 questions so I will make each question worth 10 points.
15. Timer: Do you want this question to time-out after a certain number of seconds? If you do, select the amount of time students have to answer the question.
If you do not want a time limitation assigned, skip this part. We�ll see more about timers later when we set up the presentation.
16. Create a Class List Part III
17. Participant Wizard On the Actionpoint toolbar, find the icon showing two people.
Click once on this Participant Wizard.
18. Participant Wizard You can Create New Participant List (ok if you use only one computer)
Browse and Modify Existing List (better to use if you travel room to room)
Import a CSV file (better to use if you travel room to room)
19. Another way to do the same thing�
20. Step 1 Insert the host into the USB port on the SMART Board
Let the computer install the new hardware the first time you use it
21. Step 2 Locate the Actionpoint icon on the Qwizdom toolbar in Powerpoint.
Click on it once.
22. Step 3 The Presentation Setup box will appear.
Click the down arrow next to Participant List.
1. You can create your list in this location (the list will be saved to the computer).
2. You can import a class list that you have already created (better if you use different computers).
23. Presentation Setup Part IV
24. Results Select how and where you want your results to be saved.
If you are using only one computer (not going room to room) you can Auto Save to Results Manager - recommended
25. Type of Presentation The presentation can be normal, self paced, or game mode. Students prefer Game Mode.
26. General Tab 1st Box - Recommendation: Do not send Right/Wrong Feedback to Remotes
2nd Box - Recommendation: Allow participants to change answers.
3rd Box - Unless you want to change your point value, do not click this box.
No Timer: Remember before we discussed the Timer when we were using the Actionpoint toolbar? Here is where you can select No Timer.
No Virtual Remotes
27. Login Tab Leave as set by default.
28. Display Tab Leave as set by default.
29. Chart Tab Select how you want the class answers to be presented.
Bar graph is default graph and works very well.
30. Ready? When everything is selected, click OK.
31. Start the Presentation Part V
32. Please wait� After you click OK, the presentation will prepare to launch.
33. Go! I selected to have the students play baseball (odd remotes vs. even remotes).
As the program launches, the animation to the right is shown.
34. Turn on Remotes When the students turn on the Q2 remotes, a U (User) might appear in this box.
If the U appears, students must send their remote number to the host.
Press 2, send (assuming I�m using the #2 remote).
35. Polling When students select their answer and send it (to the host), the white box that corresponds with their remote numbers will turn gray indicating that their answer was received.
36. View Question Results When all answers are in, click on the icon of the bar graph to show the class results.
Click on the icon of the joystick to show the baseball game results for that question.
37. Results Part VI
38. How to Retrieve Your Class Results Double click on the Qwizdom Connect icon on your desktop.
39. View Your Class Results Click on the Results tab
You will see a tree with your different classes set up
40. View Your Class Results Expand the group whose results you want to view.
Click once on the test you want to view.
The Participant ID (remote #), Participant Name, Correct, Points, and Score are shown.
41. Options You can
Print
Save or
View as Print Layout
42. Let�s Play!