Download
1 / 33
330 likes | 542 Views
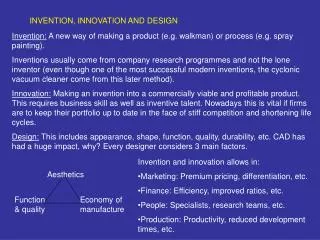
Design, Invention, and Technological Problem Solving. The Design Loop. The design loop is a guide that helps make design problem solving a more effective learning tool for students. A structure for thinking and doing—the essence of design problem solving

E N D
The Design Loop • The design loop is a guide that helps make design problem solving a more effective learning tool for students. • A structure for thinking and doing—the essence of design problem solving • You should understand that designing is not a linear process • When you design and make something, you do not think and act in separate, sequential steps.
The Design Loop • Step 1. Identifying Problems andOpportunities: • Analyzing Real-World Situations: Central to the process of designing is the identification of a problem in need of a solution. On the surface, this appears to be a simple task, but it requires careful observation and a critical eye.
The Design Loop • Step 2. Clarifying the Design Problem:Here the student designer attempts to clarify, understand the specifications, and detail exactly what it is that they intend to do. At this point, the student begins to ask a number of questions. • What are my limits? • How much time do I have? • What materials do I have access to?
The Design Loop • Step 3. Investigating and Conducting Research: In order to solve problems, all pertinent information must be gathered and documented for possible future reference. • The importance of investigation and research cannot be overemphasized. • Few solutions are new. Most new inventions involve many previously known principles and concepts.
The Design Loop • Step 4. Generation of Alternative Solutions: Generating a number of alternative solutions is one of the most important steps and often the most difficult to do. Although it seems to be human nature to latch on to your first idea and try and make it work, more ideas = better solutions. • Techniques: Brainstorming, sketching, doodling, attribute listing, and forced connection.
The Design Loop • Step 5. Choosing a Solution: Choosing the best among a number of ideas is less straightforward than it may appear. • Two strategies: 1) Listing the attributes (good and bad points) of the ideas and comparing them, 2) Developing a decision matrix that compares attributes to design criteria. • The evaluation process may indicate a way to combine features of several solutions into an optimum solution.
The Design Loop • Step 6. Developmental Work: The student designer begins working on the myriad of sub-problems that need solutions. This involves modeling, experimentation with different materials, and fastening techniques, shapes, and other things that need to be done before actual construction of the final design is undertaken.
The Design Loop • Step 7. Modeling and Prototyping:Construction: At this point the student designer begins to develop models and prototypes that represent their idea. • Two-dimensional and Three-dimensional models, computer models, and mathematical models are commonly used.
The Design Loop • Step 8. Testing and Evaluating:This may be as simple as applying the specifications to the end product to see if it does all the things that it is supposed to do. But more often it is performance testing, as in the case of a practical device.
The Design Loop • Step 9. Re-designing and Improving:After evaluating the design, student designers begin implementing what they have learned from the evaluation—an effort to improve the product.
The Design Loop • Step 10. Presenting & Producing:All design problems should end with a culminating event. This could be a formal presentation of the production of the product or system.
A Real Sample:Clipboard Design Laura L. Morford
Define the problem • Pencil holder does not work • More than one sheet of paper comes out at a time • Identifies the holder as a “nerd” • It is not modern looking • Not adaptable to multiple sizes of paper • Not multifunctional
Identify Criteria/Specify Constraints • Incorporate materials similar to the original • Attract the attention of various age groups • Functional in educational and business settings • Multifunctional • Accommodate various sizes of paper • Better pencil holder • Fashionable and contemporary
Research: What is already out there? • What is fashionable? What are the designs? http://www.acp.com/printables_unisub_awards_gifts.html http://www.all-personalized-gifts.com/gift/9219X http://www.top-personalized-gifts.com/unique_gift/7551X
Research continued • What types of clips are used? http://www.promote24-7.com/catalog/office/keepit-clipboards-5-x-8.htm http://www.elliotlee.com/corporate.html http://www.nau.edu/stores/products/pics/Office%20Products/clipboards%20&%20form%20holder.jpg
Research continued • How have they been made more comfortable to hold? http://office-supply.realemall.com/OIC/OICR-Portable-Clipboard-Storage-Case.asp http://www.capricelimoges.com/pages/clipboard.html http://www.printablepromotions.com/Articles/Meetings.htm
Research continued • What pencil holders are out there? http://www.islinecanada.com/Clipboards_section/%23qvClipboardsItems.html http://www.printablepromotions.com/Articles/Meetings.htm
Research continued • What accessories do they already have? Calculators, stop watches, suction cups http://doitbest.com/shop/dept.asp?dept_id=4630 http://www.justincentives.com/Calculators.html http://www.tcracecars.com/Merchant2/merchant.mvc?Screen=CTGY&Store_Code=TRC&Category_Code=pit_accessories
Brainstorming Session: Idea Generation • Have an MP3 player attached • Shape it so it is easy to hold for anyone • Pencil pocket or strap instead of clip • Colorful • Something to hold the paper in unless it is purposefully removed • Make it adjust size to hold any paper • Have a calculator on it • Make it out of a material that grips onto paper to keep the paper from slipping
Select an Approach/Solution • I am going to put an MP3 player on the clip board along with a calculator. There will be a pen/ pencil pouch rather than a clip. In order to keep all of the papers from falling out when you un-clip a paper there will be a pocket at the bottom of the clip board to catch the other papers if they slide out. It can also hold them down if it is there is a strong breeze where the clip board is being used.
Develop a Plan of Action • I will select the design that I feel will improve the clip board the most. • I will build a prototype out of cardboard and test it. • After testing the prototype I will make the adjustments needed and build the final product.
Make a Prototype/ Model This is the mock up. It has a calculator, pencil pouch, mp3 player and a pocket to catch slipping papers.
Test and Evaluate It does not hold enough paper. The pouch causes the papers to curve creating a bump in them. It does not hold legal sized paper People like the idea of an MP3 player so they can listen to music while they are working. The design appeals to young people who have to finish their school work on the buss, and they can listen to music while they are working. The pencil holder works
Refine the Design • The pocket at the bottom did not help. It limited the amount of paper you could hold at a time. I think instead of the pocket I will use a material that grips onto the bottom sheet. • This clip board did not change length to accommodate different sizes of paper. I will use a part of a different design to make an extension for legal sized papers.
Create the Final Product This is the final clip board. It consists of a calculator, mp3 player, pencil pouch, a large clip and is very colorful.
Below: You can see the hinge in the center used to swing out the extension. There are two magnetic strips to hold the extension to the board when it is not being used. Left: The clip board is fully extended to accommodate legal sized papers.
Side view of the clip board fully extended. The bump under top of the clip board is the mp3 player and stuff for the sound system.
Communicate the ResultsEvaluation/Assessment • The final solution worked a lot better. It was able to accommodate different sizes of paper, however the problem with paper slippage was not completely solved. The magnets used to hold the extension in place while it is folded out of the way no longer seems like a good idea if it is near a calculator and MP3 player. Perhaps a hook or Velcro would be better.