Download
1 / 34
750 likes | 1.54k Views
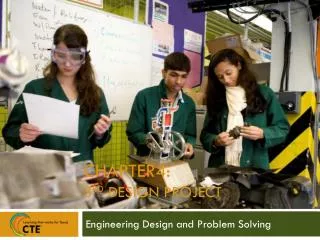
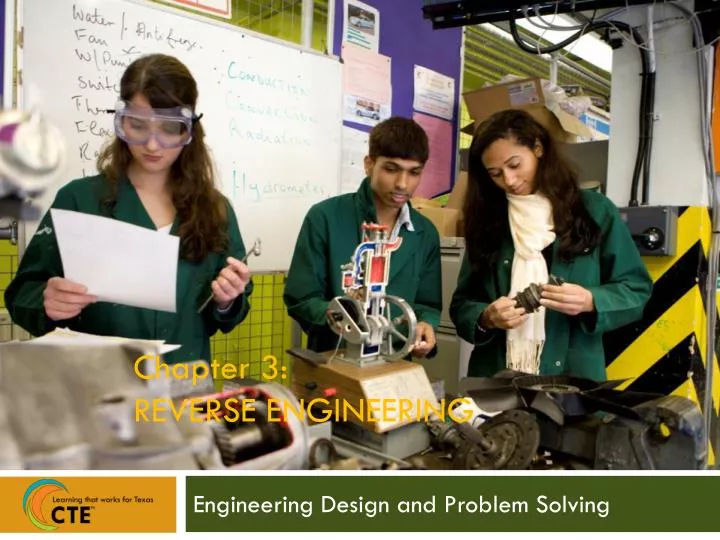
Chapter 3: REVERSE ENGINEERING. Engineering Design and Problem Solving. Introduction/Description. The 2nd Design Project will introduce the 9-step reverse engineering process through guided practice and examples.

E N D
Chapter 3: REVERSE ENGINEERING Engineering Design and Problem Solving
Introduction/Description • The 2nd Design Project will introduce the 9-step reverse engineering process through guided practice and examples. • You will select an item and complete the reverse engineering process on that item, document the steps of the reverse engineering process, and present their findings to the class.
Chapter 3: Outline Introduction to Reverse Engineering Using the Reverse Engineering Process
Objectives and Results Objectives • Individually, students will complete the “Points to Ponder” handouts. • Working in teams of 2-3, students will go through the reverse engineering design process for the product and complete the Mini Reverse Engineering Notebook. • Students will present their product and process to the class following the rubric provided.
Objectives and Results, cont. Results • Students will be able to work in teams of 2-3 and apply all of the knowledge and skills they have learned to come up with a workable solution to problem: reverse engineering a manual can opener. • Students will create a written explanation of the problem, solution, and processes, and then present their design to the class. Refer to the handouts to guide you through the process and use the rubric and/or examples provided.
Reverse vs. Forward Engineering • Reverse engineering (REP) is the methodical examination of a device, product, or process in order to understand about its material, manufacture, function, and use. • Forward engineering (EDP) is using the engineering design process to solve a problem. • Where the purpose of the EDP is to develop an innovative solution to a problem, REP is used to understand the solutions that have already been designed.
Legal/Ethical Uses of RE • Researching an existing process or product to improve it • Determining the source of a systematic problem • Decreasing cost of producing a product or running a process • Ensuring that the product or process is compatible with an existing product or process
Legal/Ethical Uses of RE, cont. • Determining the cost of developing a product similar to a competitor’s product • Understanding how the engineering design process works • Determining if patent or license agreements have been violated by a competitor
Illegal/Unethical Uses of REP • Copying a competitor’s technology and using it to make a profit • Copying a classified piece of equipment or software to sell • Stealing another’s idea to claim as one’s own Are all of the legal uses always ethical? Under what circumstances would they not be? Points to Ponder
Step 1: Goal of the REP • When you first begin a reverse engineering project, it is necessary to determine what you are looking to learn by reverse engineering a product. • What do you intend to learn? • The function of the product • How the product is constructed • How a particular part of the product functions • The materials from which the product is made • What and where a flaw might be Determine Goal of the Project
Step 2: Reverse Engineering Parameters • Every engineering project has parameters that describe the restrictions and requirements of the project. • Any parameter, if not addressed, can prevent a project from reaching completion. • Parameters often include the following: • time, • money, • personnel, and • facilities. Determine Parameters of the Project
Step 3: Determine What to RE • You need to choose which parts of the product you will be reverse engineering. • You may choose to disassemble and analyze an entire product. • You may choose only to look at a specific component of the product. • Consider the project goals and parameters. Determine What to Reverse Engineer
Step 4: Determine the Function • Determining the function of the product is only necessary, if you do not already know the purpose for which the product or part is used. • Knowing the function of the product is crucial to understanding other aspects of the product. • It may involve brainstorming about the function, running tests and experiments on the product, and even taking the product apart. Determine Function of Product
Step 5: Disassemble the Product • It is necessary to take the product apart in order to assess how its components work together. • When analyzing a part that is a component in a larger product or process, look at how the part contributes to the overall function of the product. • It is important to make detailed drawings and notes of where each component of the part is located and how it connects with other components. Disassemble the Product
Step 6: Analyze Product Components Engineers analyze each component to determine various properties and functions of the product. • For physical devices, the engineer may analyze the function of different assembly parts as well as the materials from which each component is made. • For software programs or processes, the engineer may analyze how the different parts of code or process components work together to function as a system. Analyze Each Component
Step 7: Infer the Construction Process • Brainstorming about how the product was constructed can provide useful information about the function and composition of the product components. • The information that the engineer gathers during the disassembly and analysis process can be used to infer the process by which the product was initially constructed. Infer the Process to Construct Product
Step 8: Look for Possible Improvements • Consider materials, efficiency, and function. • Consider whether the construction process could be streamlined, whether it would be possible to make the product easier to use, or if there is another function that the product or process was not initially designed to do. Look for Possible Improvements
Step 9: Document and Communicate • Document your REP in detail with notes and drawings. • This allows others to review the process and determine if any mistakes were made. • It is crucial to communicate the results of the reverse engineering process, so that the information obtained can be applied by others. Document and Communicate Results
Things to Consider • You will create your own descriptions of each step of the reverse engineering process. • Some people refer to reverse engineering as an engineering design process; others refer to it as an application of a scientific method. In what ways is it a design process? In what ways does it use a scientific method? Points to Ponder
Engineering in Reverse! • Reverse engineering an existing product provides you with exposure to engineering designs and the engineering design process. • Reverse engineering can be used • as a discovery tool, • to explore design principles, • to learn about a specific product, or • to figure out how to improve a product. Engineering in Reverse!
Research on Reverse Engineering Research at Purdue University on the use of reverse engineering to teach engineering concepts showed that “Significantly more of the students who learned about the interconnectedness of the camera components from the reverse engineering activity were able to describe reasonable redesign solutions than those that learned about the camera’s design in the lecture.” Researching Reverse Engineering
Uses of Reverse Engineering • Looking for product flaws and improvements • Reproducing an existing product • Conducting espionage (including corporate espionage) • Learning about a subject When Osama Bin Laden was killed by the U. S. military, a Marine Corps helicopter crashed in Pakistan. The U. S. government insisted that the wreckage be returned to the United States. Why would the U.S. want a broken helicopter back? Point to Ponder
Examples of Reverse Engineering • Software engineers use the REP to identify and correct any security vulnerabilities in computer programs. • Drug companies often reverse engineer drugs with patents that have recently expired. • Many electronic products are reverse engineered to gain information about how their competitors engineered a specific product. • Students often use the REP, to learn about systems such as engines, appliances, HVAC, and computers.
Reverse Engineering the Human Brain • One of the grand challenges posed by the National Academy of Engineering (NAE) is the reverse engineering of the human brain. • Understanding how the brain works will provide valuable information and allow humans to • build smarter machines, • create better biotechnology products, • design more accurate computer simulations of human systems, and • better understand how brain injuries, mental illness, and mental and physical disabilities can be treated.
Reverse Engineer a Brain? In a literal sense, we cannot disassemble the brain to see how it functions, but there are several different approaches to reverse engineering the brain: • Developing computer simulations to emulate brain function • Using non-invasive monitoring of the brain with electrodes, CT scans, and MRIs • Developing super computers, such as IBM’s “Watson,” which has beaten Jeopardy champions
Guided Practice Student Challenge • In your team of 2-3 students, you will perform a reverse engineering case study on a product that has many “exposed” components that you can observe and disassemble easily: a manual can opener. • The disassembly process itself will be brief, but going through the rest of the reverse engineering process will take longer.
Practice Student Challenge, cont. • When taking the can openers apart to see how they were constructed, do you see any hidden components? • You will determine what improvements you could make to the can opener. • You will create a design (drawing) for that new product.
Reverse Engineering Student Challenge • The next step is to apply the reverse engineering process, so that you can truly understand it. • To start, be sure to choose something in which you are interested and would not have trouble taking apart. • After choosing what you will reverse engineer, go through the reverse engineering process.
Logistics of RE Student Challenge • Make sure you have plenty of room to disassemble the product and can lay out/store all of the components. • Make sure you practice good time management. • Do a quick run through the reverse engineering steps and rubric, before you begin. • Make sure you have all the tools and materials you need. • Consider the problems that the engineers encountered, when developing the product and propose alternative solutions to this.
Credits • ClipArt; http://www.clipart.com/en/