Download
1 / 36
400 likes | 605 Views
NUR 142: skill 33-1. INSERTION OF A STRAIGHT OR AN INDWELLING URINARY CATHETER. EXAMPLE OF A FOLEY CATHETER. SKILL 33-1: INSERTION OF A STRAIGHT OR AN INDWELLING URINARY CATHETER.

E N D
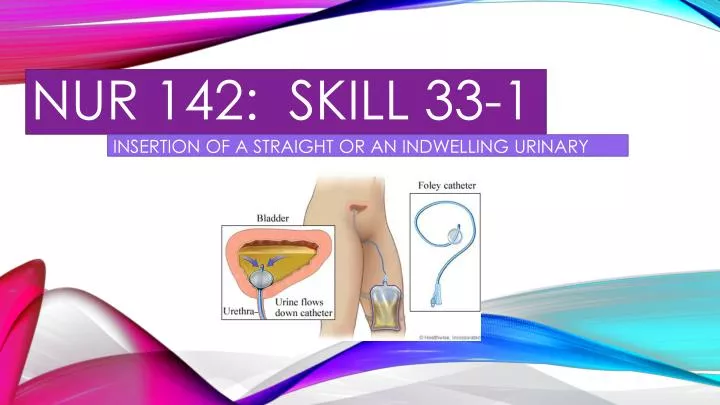
NUR 142: skill 33-1 INSERTION OF A STRAIGHT OR AN INDWELLING URINARY CATHETER
SKILL 33-1: INSERTION OF A STRAIGHT OR AN INDWELLING URINARY CATHETER • A urinary catheterization is the placement of a tube through the urethra into the bladder to drain urine. This is an invasive procedure that requires a medical order and aseptic technique in institutional settings. • Urinary catheterization may be short term (2 weeks or less) or long term (more than 1 month). • Excessive accumulation of urine in the bladder is painful for a patient; increases the risk for urinary tract infections (UTI); and can cause backward flow or urine up to the ureters to the kidneys, causing kidney damage. • Urinary incontinence, an involuntary leakage of urine, may require indwelling catheterization if the leaking urine interferes with wound healing.
SKILL 33-1 : CONT’D • The steps for inserting an indwelling and a single-use straight / intermittent catheter are the same. The difference lies in the inflation of a balloon to keep the indwelling catheter in place and the presence of a closed drainage system. • Urinary catheters are made with one to three lumens. • Single-lumen catheters are used for intermittent catheterization (i.e., the insertion of a catheter for one time bladder emptying). • Double-lumen catheters, designed for indwelling catheters, provide one lumen for urinary drainage and a second lumen to inflate a balloon that keeps the catheter in place. • Triple-lumen catheters are used for continuous bladder irrigation or when it becomes necessary to instill medications into the bladder. • One lumen drains the bladder, a second lumen is used to inflate the balloon, and a third lumen delivers irrigation fluid into the bladder.
SKILL 33-1 : CONT’D • Indwelling catheters come in a variety of balloon sizes from 3 mL (for a child) to 30 mL for continuous bladder irrigation. • The size of the balloon is usually printed on the catheter port. • The recommended balloon size for an adult is a 5 mL balloon (filled with 10 mL). • Long-term use of larger balloons (30 mL) has been associated with increased patient discomfort, irritation, and trauma; increased risk of catheter expulsion; and incomplete emptying of the bladder because of urine that pools below the level of the catheter drainage lumen.
SKILL 33-1 : CONT’D • An indwelling catheter is attached to a urinary drainage bag to collect the continuous flow of urine. Always hang the bag below the level of the bladder on the bed frame or a chair so urine drains down, out of the bladder. • The bag should never touch the floor. • When a patient ambulates, carry the bag below the level of their bladder. • The only exception to this rule is when a catheter is attached to a specially designed drainage bag (belly bag) that is worn across the abdomen. • A one-way valve prevents the back flow of urine into the bladder.
ASSESSMENT • Review patient’s medical record, including health care provider’s order and nurses’ notes. Note previous catheterization, including catheter size, response of patient, and time of catheterization. • Review medical record for any pathologic condition that may impair passage of the catheter (e.g., enlarged prostate gland in men, urethral strictures). • Ask patient and check for allergies. • Assess patient’s weight, level of consciousness, developmental level, ability to cooperate, and mobility. • Assess patient’s gender and age. • Assess patient’s knowledge, prior experience with catheterization, and feelings about the procedure.
ASSESSMENT – CONT’D • Clinical Decision Point: Large catheters can damage the urethra and urinary meatus, increase bladder irritability, and can cause urine to leak around the catheter because of spasm . Use the smallest-size catheter possible to minimize trauma and patient discomfort. • Assess for pain and bladder fullness. Palpate bladder over symphysis pubis or use bladder scanner (if available). • Perform hand hygiene and apply clean gloves. Inspect perineal region, observing for perineal anatomic landmarks, erythema, drainage or discharge, and odor. Remove gloves and perform hand hygiene.
PLANNING • Expected outcomes following completion of procedure: • Patient’s bladder is not palpable – bladder successfully emptied • Patient verbalizes absence of abdominal discomfort or bladder pressure / fullness • Catheterization and free flow of urine through catheter relieve bladder distention and discomfort • Patient verbalizes absence of abdominal discomfort or bladder pressure / fullness • Patient has urine output of at least 30 mL/hr as measured in urinary drainage bag. • Patient verbalizes purpose and expectations about procedure • Explain procedure to the patient • Arrange for extra personnel to help, if necessary – some patients are unable to assume positioning independently for procedure.
IMPLEMENTATION • 1. Identify patient using two identifiers • 2. check patient’s plan of care for size and type of catheter (if this is a reinsertion). Use smallest-size catheter possible. Collect all required equipment. • 3. Perform hand hygiene. • 4. Provide privacy by closing room door and bedside curtain. • 5. Raise bed to appropriate working height. If side rails are in use, raise side rail on opposite side of bed and lower side rail on working side – as this promotes safety. • 6. Place waterproof pad under patient. • Clinical decision point: obtain assistance to position and support weak, frail, obese, or confused patients from a co-worker.
IMPLEMENTATION – CONT’D • 7. Position the patient • A. Female patient • 1. Help to dorsal recumbent position (on back with knees flexed). Ask patient to relax thighs so you can rotate the patient’s hips. • 2. Alternate female position: Position side-lying (Sims’) position with upper leg flexed at knee and hip. Support patient with pillows if necessary to maintain position. • DON’T FORGET TO GIVE THE PATIENT AS MUCH PRIVACY AS POSSIBLE!
IMPLEMENTATION – CONT’D: THE MALE PATIENT • B. Male Patient: • Drape patient by covering upper part of the body with small sheet or towel; drape with separate sheet or bath blanket so only perineum is exposed
IMPLEMENTATION – CONT’D • 9. Apply clean gloves. Wash the perineal area with soap & water, rinse & dry. • Use gloves to examine patient and identify urinary meatus. Remove and discard gloves. • 10. Position light to illuminate genitals or have assistant available to hold light source to visualize urinary meatus. • 11. Perform hand hygiene. • 12. Open outer wrapping of catheterization kit. Place inner wrapped catheter kit tray on clean, accessible surface such as a bedside table, or if possible, between patient’s open legs. Patient size and positioning dictate the exact placement.
IMPLEMENTATION – CONT’D • 13. Open inner sterile wrap covering tray containing catheterization supplies, using sterile technique. Fold back each flap of sterile covering one at a time, with last flap opened toward the patient. • A. Indwelling catheterization open system: Open separate package containing drainage bag, check to make sure that clamp on drainage port is closed, and place drainage bag and tubing in an easily accessible location. Open outer package of sterile catheter, maintaining sterility of inner wrapper (see chapter 8). • B. Indwelling catheterization closed system: all supplies are in sterile tray and are arranged in sequence of use. • C. Straight catheterization: All needed supplies are in a sterile tray that contains supplies and can be used for urine collection.
IMPLEMENTATION – CONT’D • 14. Put on sterile gloves (Or apply sterile drape with ungloved hands when drape is packed as first item. Touch only edges of drape. Then apply clean gloves.) • 15. Drape perineum, keeping gloves sterile. • A: Drape the female: • 1. Pick up square sterile drape, touching only edges (2.5 cm {1 inch}). • 2. Allow drape to unfold without touching unsterile surfaces. Allow top edge of drape (2.5 to 5 cm {1 to 2 inches}) to form cuff over both hands. • 3. Place drape with shiny side down on bed between patient’s thighs. Slip cuffed edge just under buttocks as you ask the patient to lift their hips. Take care not to touch contaminated surfaces with sterile gloves. • 4. Pick up fenestrated sterile drape out of tray. Allow drape to unfold without touching unsterile surfaces. Allow top edge of drape to form cuff over both hands. Apply drape over perineum, exposing labia.
IMPLEMENTATION – CONT’D • B. Drape Male • 1. Use of square drape is optional; you may apply fenestrated drape instead. • 2. Pick up the edges of square drape and allow to unfold without touching unsterile surfaces. Place over thighs, with shiny side down, just below the penis. • 3. Place fenestrated drape with opening centered over penis.
IMPLEMENTATION – CONT’D • 16. Move tray closer to the patient. Arrange remaining supplies on sterile field, maintaining sterility of gloves. Place sterile tray with cleaning medium (pre-moistened swab sticks or cotton balls, forceps, and solution) lubricant, catheter, and prefilled syringe for inflating balloon (indwelling catheterization only) on sterile drape. • A. If the kit contains sterile cotton balls, open package of sterile antiseptic solution and pour over cotton balls. Some kits contain a package of pre-moistened swab sticks. Open end of package for easy access. • B. Open sterile specimen container if specimen is to be obtained. • C. For indwelling catheterization, open sterile wrapper of catheter and leave catheter on sterile field. If part of a closed system kit, remove tray with catheter and pre-attached drainage bag and place on sterile drape. Make sure that clamp on drainage port of the bag is closed. If needed and if part of the sterile tray, attach catheter to drainage tubing.
IMPLEMENTATION – CONT’D • D. Open packet of lubricant and squeeze out on sterile field. Lubricate catheter tip by dipping it into a water soluble gel 2.5 to 5 cm (1 to 2 inches) for women and 12.5 to 17.5 (5 to 7 inches) for men. • 17. CLEAN THE URETHRAL MEATUS – FEMALE PATIENT • 1. Separate labia with fingers of non-dominant hand (now contaminated) to fully expose urethral meatus. • 2. Maintain position of non-dominant hand throughout procedure. • 3. Holding forceps in dominant hand, pick up one moistened cotton ball or pick up one swab stick at a time. Clean labia and urinary meatus from clitoris toward anus. Use new cotton ball or swab for each area that you clean. Clean by wiping far labial fold, near labial fold, and directly over the center of the urethral meatus.
IMPLEMENTATION – CONT’D • B. Male Patient: • 1. With non-dominant hand (now contaminated) retract foreskin (if uncircumcised) and gently grasp penis at shaft just below glans. Hold shaft of penis at right angle to body. This hand remains in this position for remainder of the procedure. • 2. Using un-contaminated dominant hand, clean the meatus with cotton balls/swab sticks, using circular strokes, beginning at the meatus and working outward in a spiral motion. • 3. Repeat cleansing three times using clean cotton ball/swab stick each time.
IMPLEMENTATION – CONT’D • 18. Pick up and hold catheter 7.5 to 10 cm (3 to 4 inches) from catheter tip with catheter loosely coiled in palm of hand. If catheter is not attached to a drainage bag, make sure to position urine tray so end of catheter can be placed there once insertion begins. • 19. Insert Catheter: • FEMALE PATIENT: • 1. Ask patient to bear down gently and slowly insert the catheter through the urethral meatus. • 2. Advance catheter total of 5 to 7.5 (2 to 3 inches) or until urine flows out of the catheter. When urine appears, advance catheter another 2.5 to 5 cm (1 to 2 inches). Do not use force to insert catheter. • 3. Release labia and hold catheter securely with non-dominant hand. • Clinical Decision point: If no urine appears, catheter may be in the vagina. If misplaced, leave catheter in vagina as a landmark indicating where not to insert and insert another sterile catheter.
IMPLEMENTATION – CONT’D • MALE PATIENT: • 1. Lift penis to a position perpendicular (90 degrees) to patient’s body and apply gentle upward traction. • 2. Ask the patient to bear down as if to void and slowly insert the catheter through the urethral meatus. • 3. Advance catheter 17 to 22.5 cm (7 to 9 inches) or until urine flows out of the end of the catheter. • There are variations in length of male urethra. Flow of urine indicates that the tip of the catheter is in the bladder or the urethra but not necessarily that the balloon portion of and indwelling catheter is in the bladder. • 4. Stop advancing with a straight catheter. When urine appears in an indwelling catheter, advance it to bifurcation (inflation and deflation ports exposed) • 5. Lower the penis and hold the catheter securely in non-dominant hand.
IMPLEMENTATION – CONT’D • 20. Allow bladder to empty fully unless agency policy restricts maximum volume of urine drained. • 21. Collect urine specimen as needed. Fill specimen container to 20 to 30 mL by holding end of catheter over cup. • A. Label and bag specimen according to agency policy. Label specimen in front of patient. Send to laboratory as soon as possible.
Implementation – cont’d • 22. Straight catheterization: When urine stops flowing, withdraw catheter slowly and smoothly until removed. • 23. Inflate catheter balloon with amount of fluid designated by manufacturer. • A. Continue to hold catheter with non-dominant hand. • B. With free dominant hand, connect pre-filled syringe to injection port at the end of the catheter. • C. slowly inject total amount of the solution. • D. After inflating catheter balloon, release catheter from non-dominant hand. Gently pull the catheter until resistance is felt. Then advance the catheter slightly. • E. Connect drainage tubing to catheter if it is not already pre-connected.
IMPLEMENTATION – CONT’D • 24. Secure indwelling catheter with catheter strap or other securement device. Leave enough slack to allow leg movement. Attach securement device at tubing just above catheter bifurcation. • A. FEMALE PATIENT: • Secure catheter tubing to inner thigh, allowing enough slack to prevent tension. • B. MALE PATIENT: • 1. Secure the catheter tubing to upper thigh or lower abdomen (with penis directed toward the chest). Allow slack in catheter so movement does not create tension on catheter. • 2. If retracted, replace foreskin over glans penis.
IMPLEMENTATION – CONT’D • 25. Clip drainage tubing to edge of the mattress. Position drainage bag lower than bladder by attaching to the bed frame. Do not attach to the side rails of the bed. • Drainage bags that are below the level of the bladder ensure free flow of urine, thus decreasing risk for CAUTI • 26. Check to make sure that there is no obstruction to the urine flow. Coil excess tubing on the bed and fasten to the bottom sheet with a clip or other securement device. • 27. Provide hygiene as needed. Help the patient to a comfortable position. • 28. Dispose of supplies in the appropriate receptacles. • 29. Measure the amount of urine and record your findings. • 30. Remove your gloves and perform hand hygiene.
EVALUATION • 1. Palpate bladder for distention – This determines if distention is relieved. • 2. Ask the patient to describe their level of comfort – This determines if patient’s sensation of discomfort or fullness has been relieved. • 3. Indwelling catheter: Observe character and amount of urine in the drainage system: This determines if the urine is flowing adequately. • 4. Indwelling catheter: determine that there is no urine leaking from the catheter or tubing connection: this prevents injury to the patient’s skin and ensures a closed sterile system.
UNEXPECTED OUTCOMES • 1. Catheter goes into the vagina: • Leave catheter in the vagina • Clean urinary meatus again. Using another catheter kit, reinsert sterile catheter into the meatus (check the agency policy). Note: if gloves become contaminated, start the procedure over again.) • 2. Sterility is broken during catheterization by the nurse or by the patient. • Replace gloves if contaminated and start over. • If the patient touches the sterile field but equipment and supplies remain sterile, avoid touching that part of the sterile field. • If equipment and/or supplies become contaminated, replace with sterile items or start over with new sterile kit.
UNEXPECTED OUCTOMCES – CONT’D • 3. Patient complains of bladder discomfort, and catheter is patent as evidenced by adequate flow of urine. • Check catheter to ensure that there is no traction on it. • Notify the health care provider. Patient may be experiencing bladder spasms or symptoms of UTI (urinary tract infection). • Monitor catheter output for color, clarity, odor and amount
RECORDING & REPORTING • Record & report the reason for catheterization, type and size of catheter inserted, amount of fluid used to inflate balloon, specimen collection (if applicable), characteristics and amount of urine, patient’s response to procedure, and any education in nurses’ notes and electronic health record (EHR). • Record the amount of urine on intake and output (the I & O) flow sheet record. • Report persistent catheter-related pain, inadequate urine output, and discomfort to health care provider.
SPECIAL CONSIDERATIONS - TEACHING • Explain, to the patient, that a feeling of burning, pinching, and/or pressure may be experienced when the catheter is inserted into the urethra. This sensation is normal and will go away. • Discuss with the patient routine care of the catheter and drainage system that includes avoiding any kinking in the drainage tubing, keeping the drainage bag dependent, avoiding pulling on the catheter and daily hygiene. • Explain that adequate fluid intake helps prevent catheter blockage.
END OF THE SKILL • THIS IS THE END OF THIS SKILL • Your book has not provided a video for this skill, but I have picked one out for you on you tube. Again, please remember, I am not associated with the college, and this video was picked by me, and not the school. • Please feel free to watch this video, that I provided, and review the power-point presentation, as well. Remember though, if you don’t go and practice in the skills lab, you will not pass this skill. • FOLEY CATHETER INSERTION: • http://www.youtube.com/watch?v=isxawzzYfsk