Download

1 / 26
260 likes | 261 Views
Learn how to easily set up your digital signage network with this quick installation guide. Get started with the required components and create your first playlist. Follow the step-by-step instructions and access online tutorials for more information.

E N D
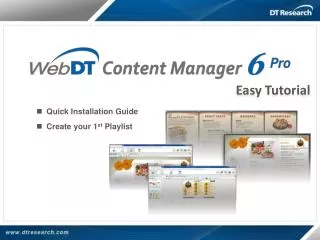
Easy Tutorial • Quick Installation Guide • Create your 1st Playlist
Getting Started Required components to set up your digital signage network: • WCM Server • Signage Player • PC/ Laptop • PC, Laptop as a WCM Server • One Signage Appliance as a Signage Player • One PC/ Laptop for designer or publish manager
Network Structure WebDT Content Manager Server (or an Integrated Player/ Server Appliance) Signage Appliance Designer or Publish Manager from remote site Multi Screen Appliance
WCM Server Installation • Choose “Quick Setup” to install
WCM Server Installation • Components InstallationThere are three components for WebDT Content Manager • Database Server • Content Server • Publish Server
WCM Server Installation • Database Information • Database Port • Superuser Name • Superuser Password • Data directory
WCM Server Installation • Web Server Information • SSL for Web Server • HTTPS Ports • CA-Key File and CA-Cert File • Web Server Port
WCM Server Installation • Check the Firewall Settings If third party firewall is used, please change the firewall settings as below:
WCM Server Installation • Installation Completed • After installation, the Start.html will launch to guide you through the next steps. • Please restart your system to complete the installation process.
Login to WCM by Browser • Launch a browser and input Server IP to logon • http://server IP address:(port number)/index.jspExample: • http://192.168.0.1/index.jsp (default port: 80) • http://192.168.0.12:81/index.jsp • http://localhost:(port number)Example: • http://localhost:81
Login to WCM by Browser • Input default login information • User ID: manager • Password: 123456 • Organization: my site
WCM User Interface 1 2 3 5 4 • Major function tabs • Global settings • Toolbar • Working area • Attributes window
Connect Player to LAN/ Internet • Connect Player to WCM Server in same LAN or Internet • The registration window will pop up automatically when the player is not registered • Or launch “Start > WebDT Digital Signage > WebDT Signage Player 6 > Register Player Again” manually
Register to WCM Server • Registration Information • Player name:Leave default name or give a new name • Group name:If you did not create a group in WCM server yet, leave it blank now • Organization name: my site (default) • Access Password: 123456 (default) • Publish Server URL:http://(server IP address):(port number)/publishor,http://localhost:(port number)/publish
Check Player Status from WCM Server 1 2 • Player/ Group list • Player/ Group status
Download a Suitable Template 2 1 • Under “Playlist” tab, select Download Online Templates • Select a desired template to download
Select the Downloaded Template to Edit Double click the downloaded template to enter the Playlist Editor
Import Media 1 2 3 1. Select media which you want to change 2. Click “Replace Media” button 3. Select preferred media
Publish 1 2 4 3 1. Click “Publish” button 2. Click “Add Group” button 3. Select Group 4. Select publish type 5. Click “Publish” button 5
Check Player Status from WCM Server 1 2 • Refresh snapshot • Player information
You have completed your 1st Playlist Visit WCM Online Tutorial to learn more http://www.signage.dtri.com/wcm6/tutorial.html