Download
1 / 29
300 likes | 539 Views
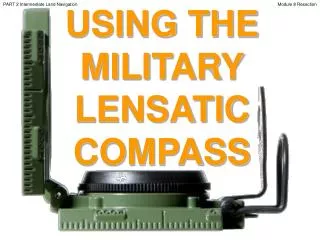
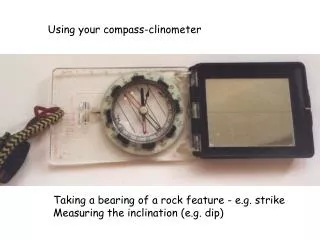
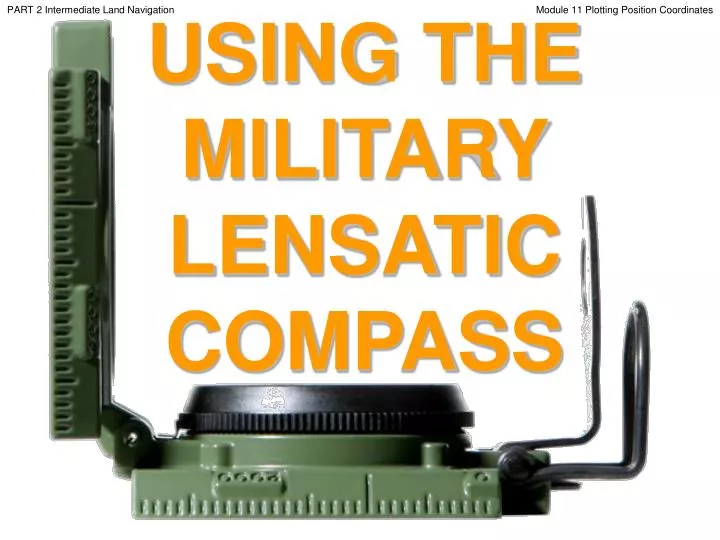
PART 2 Intermediate Land Navigation. USING THE MILITARY LENSATIC COMPASS. Module 11 Plotting Position Coordinates. PART 2 Intermediate Land Navigation. Module 11 Plotting Position Coordinates. WARNING.

E N D
PART 2 Intermediate Land Navigation USING THE MILITARY LENSATIC COMPASS Module 11 Plotting Position Coordinates
PART 2 Intermediate Land Navigation Module 11 Plotting Position Coordinates WARNING This presentation is intended as a quick summary, and not a comprehensive resource. If you want to learn Land Navigation in detail, either buy a book; or get someone, who has the knowledge and skills, to teach you in person.
PART 2 Intermediate Land Navigation Module 11 Plotting Position Coordinates NOTE To get the ideas across presented on these slides, many figures, pictures, and calculations may not be to scale and may be exaggerated for clarity.
PART 2 Intermediate Land Navigation Module 11 Plotting Position Coordinates Note: Prior to being issued any training *equipment, you will be required to sign a “statement of liability” agreeing to pay for anything you damage or lose. All items will be inspected and inventoried prior to your signature and at the end of the training day too. If you do not intend to sign this statement, then you may be denied training. *You may use your own equipment.
PART 2 Intermediate Land Navigation Module 11 Plotting Position Coordinates Any Questions?
PART 2 Intermediate Land Navigation Module 11 Plotting Position Coordinates LAND NAVIGATIONPRESENTATIONPART 2Module 11Plot Position Coordinate
PART 2 Intermediate Land Navigation Module 11 Plotting Position Coordinates . . . and now on with the . . . PRESENTATION
PART 2 Intermediate Land Navigation Module 11 Plotting Position Coordinates LAND NAVIGATION WITH MAP ANDLENSATIC COMPASS
PART 2 Intermediate Land Navigation Module 11 Plotting Position Coordinates LAND NAVIGATION • Why Learn Land Navigation? • Tracking present location • Determining Distance • Sense of direction • How to read a topographic map • Terrain and map association • Spatial skills • Planning safe, practical routes • And more Navigational skills • The best way to learnLAND NAVIGATION is to get "dirt time", that is, get out there with a map and compass! • Navigation is not about finding yourself after you are lost (although that’s what happens sometimes); it’s about keeping track of your position as you move away from a known point. As you move you have to remain cognizant of the terrain you are leaving, of the terrain you are passing, and of the terrain that is ahead. • Navigation in the wilderness means knowing your starting point, your destination, and your route to get there. • These skills will allow you to venture farther off the beaten path than you ever thought before. Training and practicing land navigation on foot provides the following everyday navigation (how not to get lost) benefits; (Where am I?) (How far is it and am I there yet ?) (Where do I want to go and where am I actually going ?) (Do I understand the map ?) (What hill or river am I looking at ?) (Can I mentally visualize the landscape in 3D ?) (Take a long safe route or a short risky route ?)
PART 2 Intermediate Land Navigation Module 11 Plotting Position Coordinates • THIS PRESENTATION IS DIVIDED INTO FOUR PARTS • ________________________________________________________________________________________________________________________________________________________ • PART 1 Basic Land Navigation • The Lensatic Compass module 1 • The Topographic Map modules 2, 3, 4, • The Land and Map Association modules 5, 6 • PART 2 Intermediate Land Navigation • Making Sense of Direction module 7 • Tracking Present Location modules 8, 9, 10, 11 • Determining Travel Distance modules 12, 13, 14 • PART 3 Advance Land Navigation • Navigation Methods to Stay On Course module 15 • Additional Skills of Land Navigation module 16 • Planning to Navigate module 17 • PART 4 Expert Land Navigation • Navigation in different types of Terrain module 18 • Night Navigation module 19 • Sustainment module 20
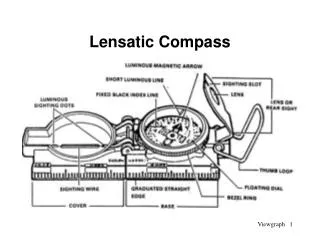
PART 2 Intermediate Land Navigation Module 11 Plotting Position Coordinates THESE ARE THE TRAINING MODULES Module 1 Lensatic Compass – parts and features, and how to sight the compass by two different methods. Module 2 Topo Map Margin – what map margin data represents, map care, and how to properly fold a map. Module 3 Topo Map Scale – map sizes and how it affects amount of detail that will be shown. Module 4 Topo Map Symbols – you must understand them; to read and speak map language to others. Module 5 Terrain Relief – shows elevation, indicates terrain features and heights of natural features. Module 6 Map Information – what a protractor is for and how a map provides four kinds of information. Module 7 Sense of Direction – lateral drift, current bearing, obstacles, back azimuth, deliberate offset. Module 8 Resection – locate position with map only. Modified resection is with a map or compass. Module 9 Intersection & Triangulation – two methods to locate position by compass. Module 10 Map Speaks Compass Language - there is no need to orient the map to find your position. Module 11 Plotting Position Coordinates – exact positioning, used to communicate to others with a map. Module 12 Route Measure – mapping straight-line distance, curvature distance, and slope distance. Module 13 Pace Count – using ranger pacing beads and estimating hiking speed. Module 14 Travel Distance Estimation – estimating by 100 meter rule, rule-of-thumb, and by time. Module 15 Plan to Navigate – in a group or alone, equipment, safety, responsibilities, route selection. Module 16 Stay on Course – advance reference points and advance baselines. Module 17 Additional Land Navigation Skills – estimate daylight, conserve energy, blisters, weather insight. Module 18 Navigating Different Terrain – special environments, featureless terrain, visibility, dense foilage. Module 19 Night Navigation – night adaptation, protecting night vision, navigate with lensatic compass. Module 20 Sustainment – maintaining skills, training others, setting up a land navigation course.
PART 2 Intermediate Land Navigation Module 11 Plotting Position Coordinates Any Questions?
PART 2 Intermediate Land Navigation Module 11 Plotting Position Coordinates PART 2INTERMEDIATE LAND NAVIGATION MODULE 11 • Tracking Present Location • Plotting Position Coordinates
PART 2 Intermediate Land Navigation Module 11 Plotting Position Coordinates TRACKING PRESENT LOCATIONDESCRIPTION Navigation is not about finding yourself after you are lost (although that’s what happens sometimes); navigation is about keeping track of your POSITIONas you move away from a known point. As you move you have to remain cognizant of the terrain you are leaving, of the terrain you are passing, and of the terrain that is ahead of you. • Make it a habit of keeping your map and compass handy and refer to them every hour or so to locate your position (more often in low visibility). Keep track of your starting time, rest breaks and general hiking pace. This will also give you an idea of how far you have traveled. • To find out where you are, you must relate your position to features you can see and identify on the map. • There are several techniques to find your position on a map. • RESECTION - With map only (no compass). • MODIFIED RESECTION – With map or One compass bearing. • INTERSECTION - Two compass bearings. • TRIANGULATION - Three compass bearings. • Plotting Location to record your position.
TRACKING PRESENT LOCATIONUTM GRID or GRID NORTH COORDINATES PART 2 Intermediate Land Navigation Module 11 Plotting Position Coordinates Below is the Universal Transverse Mercator (UTM) grid.
TRACKING PRESENT LOCATIONUTM GRID or GRID NORTH COORDINATES PART 2 Intermediate Land Navigation Module 11 Plotting Position Coordinates HERE IS A BETTER WAY OF LOOKING AT THE UTM GRID LAYOUT The world is divided into 60 zones. Here you can see ZONES 1 thru 60 at the top of the world map. 22 26 32 36 21 24 25 28 30 31 34 35 38 40 23 27 29 33 37 39 2 6 12 16 42 46 52 56 1 4 5 8 10 11 14 15 18 20 41 44 45 48 50 51 54 55 58 60 3 7 9 13 17 19 43 47 49 53 57 59 EQUATOR LINE
TRACKING PRESENT LOCATIONUTM GRID or GRID NORTH COORDINATES PART 2 Intermediate Land Navigation Module 11 Plotting Position Coordinates Close-up of UTM ZONES. Here we see zones 10 thru 19.
TRACKING PRESENT LOCATIONUTM GRID or GRID NORTH COORDINATES PART 2 Intermediate Land Navigation Module 11 Plotting Position Coordinates On the bottom left corner of the map is the Universal Transverse Mercator information. It will list the square area size covered and the ZONE the map represents. The ZONE number is represented in the front of a UTM coordinate. example Z12 559000m 4281000m UTM Coordinates are explained in the next slides.
TRACKING PRESENT LOCATIONUTM GRID or GRID NORTH COORDINATES PART 2 Intermediate Land Navigation Module 11 Plotting Position Coordinates UTM uses two coordinates – EASTING and NORTHING – to determine a location. Locations within a ZONE are measured in meters east and west from the central meridian (center of the zone), and north and south from the equator. North Pole EASTING coordinate The central meridian is an arbitrary line drawn down the center of each zone, and given a false easting value of 500,000 meters so that only positive eastings are measured anywhere in the zone. Eastings increase eastward and decrease westward from the central meridian. NORTHING coordinate Northing is the distance in meters north and south of the equator (measured along a line within the zone). If the point lies north (Northern Hemisphere) of the equator, coordinates always increase from south to north (bottom of map to the top) of the equator, with the equator given a value of 0 meters in the Northern Hemisphere.. For locations south (Southern Hemisphere) of the equator, the equator is given a false value of 10,000,000 meters in the Southern Hemisphere and values decrease from north to south (top of map to the bottom) of the equator. Northern Hemisphere Zone Equator 0m N 10,000,000m N 500,000 m E Southern Hemisphere South Pole
TRACKING PRESENT LOCATIONUTM GRID or GRID NORTH COORDINATES PART 2 Intermediate Land Navigation Module 11 Plotting Position Coordinates • UTM Z19 0297480E 4834360N (with a Northern Hemisphere map) • Coordinate 0297480E represents an east-west measurement and is the • easting. This coordinate is located 202,520 meters west of zone central meridian line. • The 202,520 meters was calculated by observing that 297,480E is smaller • than 500,000mE. Therefore, 500,000mE – 0297480E = 202,520. The coordinate is 202 thousand, 520 meters west of zonecentral meridian line. • NOTE: • If the Easting number is greater than 500,000mE, for example 574620E. The coordinate is located 74,620 meters east of zone central meridian line. • This number 74,620 meters was calculated by observing that 574620E is bigger than 500,000mE. 574620 E– 500000mE = 74,620. Therefore it is 74,620 meters east from the central meridian. • Coordinate 4834360N represents a north-south measurement and is the • northing. The location of this coordinate is 4,834,360 meters North of the equator in the zone, which starts at 0 meters. • Z19 0297480E 4834360N (with a Southern Hemisphere map) • 1. The coordinate 0297480E is the same as above. • The coordinate 4834360Nrepresents a north-south measurement and is the northing. The location of this coordinate is 5,165,640 meters South of the equator in the zone. The number 5,165,640 was calculated by Subtracting 4,834,360 from 10,000,000 m N. UTM Z19 0297480E 4834360N will be used for an example in a Northern Hemisphere map and a Southern Hemisphere map.
TRACKING PRESENT LOCATIONUTM GRID or GRID NORTH COORDINATES PART 2 Intermediate Land Navigation Module 11 Plotting Position Coordinates • A UTM coordinate includes the zone, easting coordinate, and northing coordinate; this coordinate describes a specific • location using meters. There are different ways that UTM coordinates are written, for example: • Z19 0297480E 4834360N • 19 0297480E 4834360N • 0297480mE 4834360mN (zone number is not used, because the hiking groups are all using the same maps and know • 297480mE 4834360mN what zone they are in for communicating their location to each other via radios.) • Coordinates are also abbreviated to the extent of location accuracy desired; for example, UTM Z19 0297480E 4834360N : • 19 297 4834 (1000 m by 1000 m square) • 19 2974 48343 (100 m by 100 m square) • 19 29748 483436 (10 m by 10 m square) • 19 297480 4834360 (1 m by 1 m square) NOTE: The more digits you include, the closer you get to the exact location. NOTE: More detail given in the following slides.
TRACKING PRESENT LOCATIONUTM GRID or GRID NORTH COORDINATES PART 2 Intermediate Land Navigation Module 11 Plotting Position Coordinates 82 42 60 59 E 5 5 000m 1000 north south 81 N 42 000m west east • UTM refers to the system grid that divides the world into sixty zones, 6º degree intervals. • The UTM grid is based on the METER SYSTEM, and grid lines are always one kilometer apart (1,000 meters), making it much easier to estimate distance on a map. • UTM numbers indicate east/west and north/south positions. The numbers along the left/right of margin are called Northing, numbers along the top/bottom are called Easting. Increasing numbers indicate you are traveling either north or east, decreasing numbers south or west. • A full UTM tick number along the margin of the map is as follows: tick 4281000mNand tick 4282000mN, the principle (large) digits 81and 82 indicates thousands of meters, and since a thousand meters equals one kilometer, the two ticks are one thousand meters or one kilometer apart ( 82 – 81 = 1 ). • The last three smaller numbers000mindicates hundreds of meters. If the ticks read 4281000mNand 4281500mN this would indicate the ticks were five hundred meters or ½ kilometer apart. • GN refers to the UTM grid. • The more digits you include, the closer you get to the exact location. • 559000m4281000m (4 digit) 1000m x 1000m area. • 559700m4281100m (6 digit) 100m x 100m area. • 559750m4281170m (8 digit) 10m x 10m area. • 559753m4281175m (10 digit) 1m x 1m area.
TRACKING PRESENT LOCATIONUTM GRID or GRID NORTH COORDINATES PART 2 Intermediate Land Navigation Module 11 Plotting Position Coordinates • This is good to use when navigators have the same maps • and need to communicate their location via walkie-talkies, • when they are separated for any reason. • Note which 1000 meter grid square your position is in (read from the bottom left corner). • Example ( ) is in 559000and 4082000. • Note that the Easting number (vertical grid line) is always read first, then the Northing (horizontal). Also note that two digits are large (principle digits) and the rest are small. This makes it easier to read. • Align the protractor within the grid square and see what small square your position ( ) is in. • Then include vertical and horizontal square numbers to get 559700and 4082100 GRID COORDINATE. • You can read the six digits as 597 821, 100 meter by 100 meter area (328FT x 328FT). You are somewhere in this square area.
TRACKING PRESENT LOCATIONUTM GRID or GRID NORTH COORDINATES PART 2 Intermediate Land Navigation Module 11 Plotting Position Coordinates 8217 5975 • This protractor is more accurate in your location. • Note which 1000 meter grid square your position is in (read from the bottom left corner). • Example ( ) is in 559000and 4082000. • Note that the Easting number (vertical grid line) is always read first, then Northing (horizontal). Also note that two digits are large (principle digits) and the rest are small. This makes it easier to read. • Align protractor horizontal scale with 82 horizontal grid line square and shift left or right till the vertical scale is aligned over your position ( ). • Then include the vertical and horizontal tick numbers to get 559750and 4082170 GRID COORDINATE numbers. • You can read the eight digits as 5975 8217, 10 meter by 10 meter area (33FT x 33FT). You are exactly here.
TRACKING PRESENT LOCATIONUTM GRID or GRID NORTH COORDINATES PART 2 Intermediate Land Navigation Module 11 Plotting Position Coordinates On this type of protractor you have a general location where you are. 100m x 100m area / 10,000m sq area 110y x 110y area / 12,100y sq area At which location are you? A. South west side of road, west side of hill? B. North east side of road, north west side of hill? C. Due north side of hill? D. On top of hill? E. Due south side of hill? On this type of protractor you have a more exact location where you are. 10m x 10m area / 100m sq area 3.3y x 3.3y area / 11y sq area You know you are exactly at location B. C B B D A E
PART 2 Intermediate Land Navigation Module 11 Plotting Position Coordinates Any Questions?
PART 2 Intermediate Land Navigation Module 11 Plotting Position Coordinates Note: Prior to being issued any training *equipment, you will be required to sign a “statement of liability” agreeing to pay for anything you damage or lose. All items will be inspected and inventoried prior to your signature and at the end of the training day too. If you do not intend to sign this statement, then you may be denied training. *You may use your own equipment.
PART 2 Intermediate Land Navigation Module 11 Plotting Position Coordinates TESTING Now it is time for the following . . . • Written exam • Hands-on / Outdoors exam
PART 2 Intermediate Land Navigation Module 11 Plotting Position Coordinates THE END OFLAND NAVIGATIONPRESENTATIONPART 2Module 11Plot Position Coordinate