Download
1 / 24
250 likes | 757 Views
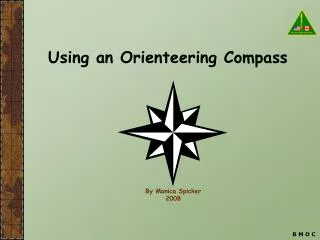
Using an Orienteering Compass. By Monica Spicker 2007. Objectives. Identify types and parts of a compass Determine a direction from a map. Transfer a reading onto a map Follow a reading in the field Take a reading in the field Determine position by resectioning in the field.

E N D
Using an Orienteering Compass By Monica Spicker 2007
Objectives • Identify types and parts of a compass • Determine a direction from a map. • Transfer a reading onto a map • Follow a reading in the field • Take a reading in the field • Determine position by resectioning in the field.
Compass parts Reading taken or set here From To Needle “Red Fred” Screw to set declination: No further calculations needed! Base lines
Magnetic Declination • Compass needle points to magnetic north • Maps oriented to true north • Difference must be calculated or preset on the compass itself. • True reading (map) = magnetic (needle) + dec • By convention east is always + and west is -
Make plans to buy one. OR Can draw lines of magnetic north onto your map to align your compass, rather than using true north (must change every so often or buy a new map) OR Can draw a line at the magnetic north position on your compass. If true (map reading) is on the dial, rotate that reading to the declination mark, and you have set magnetic to follow in the field. If magnetic is on the dial (field reading), then the reading at the declination mark is the true reading. Rotate that reading to the dial to plot lines on your map. Needs to be changed regularly, but easier than on the map. My compass cannot be set for declination!
Grid North The angle at which the UTM grid is oriented. UTM grid lines may be too far off for orienting the compass!
Determining Direction • Need a map • Best if there are grid lines that run north-south on it • Compass • The objective is to determine the setting needed to travel from Point A to Point B in the field.
Step 1 Compass edge is used like a ruler From From Lost Lake To To this campground
Turn dial so BASE lines are parallel to true north. North arrow will be skewed, because declination is set. But it is important that this arrow point north-ish. Step 2 Read direction here. No further calculations needed! Leave this reading set, if you want to travel this route.
Following a Set Direction: Step 1 Set the desired reading here
Following a Set Direction: Step 2 Turn yourself until “Red Fred is in the Shed” (The red needle is inside the outline arrow in the base plate.)
Step 3: Following a Set Direction • Hold the compass LEVEL in front of you. • Flip the mirror down so you see the dial in it. • The black line in the mirror should appear to go through the reading. • Make sure Red Fred is still in the shed! • The sighting notch in the black cover points to your target. Repeat when you reach your first target until you reach your destination. Count paces as needed.
Taking a Reading Look at target • Hold compass level in front of you • Flip down the mirror until you can see the dial. • Aim the sighting notch in the compass at the target • Turn the dial until Red Fred is in the Shed • The direction is read at the hinge end of the dial.
Resectioning • Intersection of two line features to determine position. • Road and elevation • Creek and road • One or more directions drawn on map and another line feature.
Resectioning Examples Intersection of trail and stream Intersection of stream and elevation 11400 Intersection of 2 trails
Plotting Directions • Compass readings to identified points can be used for resectioning. • Must be able to draw these reading lines onto a map.
B A X Your Location in Field Resectioning with compass directions Take compass readings on two prominent landmarks (A and B) that you can identify on a map.
First take a sighting on a point Step 1 At this heading FROM TO Compass edge acts like a ruler Looking at this mountain
1) Turn entire compass until base lines are parallel with true north and north arrow is north-ish. 2) Draw line along compass edge Step 2 Keep this end of the compass edge on the sighted point
Step 3 • Repeat with a second line feature or second compass reading • Intersection is your location. • Lost Lake is now found!