Download
1 / 77
770 likes | 789 Views
Learn all about rendering, shading, and lighting in the context of 3D images. Understand hidden surface removal, reflectance models, surface materials, lights, and shading algorithms.

E N D
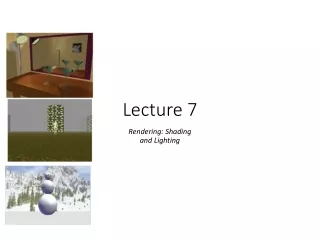
Lecture 7 Rendering: Shadingand Lighting
In the last lecture we saw how to model objects and represent them as wireframe models. Wire frame models depict the outer hull of the object but do not convey a realistic image of the model. • The next step in our quest for visual realism is to paint our models so we can render realistic images. This process is called rendering.
In this lecture you will learn all about the components of rendering: • Hidden surface removal • The CG reflectance model • Surface materials (including texture mapping) • Lights • Shading algorithms
What is Rendering? • Rendering 3D images is a multi-step process. First, we need to identify which component surfaces (usually polygons) of the model are viewable from the current viewpoint. • This process involves back-face culling as well as identifying surfaces obstructed by surfaces in front of them. • Once visible surfaces have been identified, we can simply assign a color to them and paint them.
In most cases, however, we do not want surfaces to be colored with just one color. Surfaces should appear shaded based on the amount of light that they receive, as is the case in real life. Figure. A sphere rendered with: a) a single color, b) each polygon rendered with a single color, c) shaded smoothly
To be able to simulate this effect, we need to define material properties of the surface: not only its color but also how it responds to light. This process is called shading. • We need to define light sources to light up the scene, which enable us to view it-a process called lighting. • Once the shading and lighting of a scene has been established, shading algorithms are then used to finally render the images.
Rendering is a complex process and can be very time consuming. • For example, a typical image in the film Toy Storytook anywhere between an hour and 72 hours to render on a workstation! Different shading algorithms use different methods and tricks to simulate the behavior of light and surfaces.
Obviously, which algorithm you use is based on your precise needs. An interactive game needs shaders whose output may not be very sophisticated but can be rendered quickly, whereas a blockbuster movie production can afford to use complex shaders that can take days to render images but produces spectacular results. • We shall employ some simple shading algorithms in this book and shall introduce you to some more complex ones.
Hidden Surface Removal • We learned how to eliminate the back-facing polygonal surfaces of our model using a technique called back-face culling. A sphere obstructing a cone: back-face culling is on
But when we draw our object as a solid surface, we want to see the object that is in front. • This example shows a solid cone and a sphere. The cone translates back and forth along the z-axis. A cone a. in front of the sphere, b. behind the sphere
Even when the cone is behind the sphere, we still see it being drawn in front! We want not only the back surfaces of the sphere and cone to be hidden from view, but also the portion of the cone being obstructed from view by the sphere. • The process to remove these surfaces is called hidden surface removal. • Back-face culling is part of this removal process.
Z-Buffering • One of the simplest techniques to accomplish hidden surface removal is known as z-buffering or depth buffering. • In this process, a buffer in memory called the z-buffer is used to keep track of the surface that is closest to the eye for any given pixel. • The closest object finally gets drawn onto the screen.
Note that for solid closed objects, this process will automatically remove back-facing surfaces also. • OpenGL provides z-buffering by way of a depth buffer. To use it, you need to first enable depth buffering. • You can do this by initializing the display mode to use the depth buffer
and then enabling the depth-buffering test • Before drawing the scene, you need to clear the depth buffer and then draw the objects in the scene. • Open GL will perform all the calculations to store the closest surface information in its depth buffer and draw the scene accordingly.
Light: Reflectance Model • Imagine entering a dark room with no lights in it. If the dark room is perfectly insulated from any kind of light, you will not be able to see anything in the room even though there are objects in it. • Imagine now that we switch on a bulb in the room. Immediately, we shall start seeing the objects in the room. • How brightly we see them will depend on the wattage and color of the bulb as well as on the material that the objects are made of.
We are able to see because light bounces off (reflects) from objects and eventually reaches our eyes. Light rays entering the eye enable sight
Once light reaches our eyes, signals are sent to our brain, and our brain deciphers the information in order to detect the appearance and location of the objects we are seeing. • The light sources directly or indirectly define the incident light rays. • The surface properties of the objects in the room, also called the surface material, determine how the incoming light is reflected. • Let us explore the way light is reflected in further detail.
Law of Reflection • Light is usually modeled as light rays (which can be thought of as vectors!). • Many rays traveling together are referred to as a beam of light. Light rays behave in a very predictable manner. If a ray of light could be observed approaching and reflecting off a flat mirror, then the behavior of the light as it reflects would follow the law of reflection
As shown in figure, a ray of light, I, approaches the mirror and is called the incident ray. Law of reflection
The ray of light, R, that leaves the mirror, is known as the reflected ray. • At the point of incidence where the ray strikes the mirror, we can define a normal, N, to the surface of the mirror. • The normal is perpendicular to the surface at the point of incidence and divides the angle between the incident ray and the reflected ray into two equal angles. The angle between the incident ray and the normal is known as the angle of incidence.
The law of reflection states that when a ray of light reflects off a surface, the angle of incidence is equal to the angle of reflection. • Whether the surface being observed is microscopically rough or smooth has a tremendous impact upon the subsequent reflection of a beam of light.
CG: Reflectance Model • In CG we try to emulate the above-defined reflectance model to approximate the way lights and surface materials. Mathematical equations that approximate this behavior govern the final color of each pixel in the image. • The most popular CG reflectance model is the one proposed by Phong.
Phong Reflectance Model • The Phong reflectance model is also the model employed by OpenGL. • In this reflectance model, we break reflectance into four components: • Ambient Reflectance: This is a hack introduced in CG. It is used to avoid CG scenes from going completely black. Ambient light has no direction; it impinges equally on all surfaces from all directions and is reflected by a constant multiple, resulting in flat-looking surfaces.
Diffuse Reflectance: Surfaces with diffuse reflectance scatter light equally in all directions, but the intensity of the reflection varies based on the angle of incidence. • Specular Reflectance: Specular reflections can be observed on any shiny surface, causing a dull grey or white highlight on the surface.
Emission: The emission component of a surface is again a hack. It is used to simulate luminous objects that seem to glow from their own light, such as a light bulb. • Within our CG scene, we define surface materials with reflection coefficients for each of the four components. • The reflection coefficients are defined as RGB triplets, and have a value between 0 and 1 - 1 being maximum reflection.
Many people refer to these reflectance coefficients as the color of the material, since it will be the color of the light it will reflect. • This material is then assigned to models in the scene.
CG lights are defined to illuminate the scene. These lights are again modeled with RGB colors for the ambient, diffuse, and specular components. The red, green and blue components have a value between 0 and 1. • Some software packages further define an intensity to the light: the intensity is simply a scale factor for the color of the light: the actual color of the light is the product of its color and its intensity.
When incoming light strikes an object, each of these four components is calculated to determine its individual contribution to the reflected light. • All four components then added together to attain the final color of the outgoing light • Let us look into each of these components and how they are calculated.
Ambient Reflectance • Ambient reflectance is actually just an approximation to the fact that there is never a perfect dark room in this world. Some amount of light always seeps in, enabling vision. • This kind of illumination enables us to see faint traces of objects with flat shades of surface colors and is referred to as ambient lighting.
When light with an ambient component (ambient light) strikes a surface with ambient reflectance, it is scattered equally in all directions with a constant multiple, causing the surface to look flat as shown in figure. Ambient Reflectance
Mathematically, if the incident light has an ambient color of (Ri, Gi, Bi) and the object it hits has a material with ambient reflectance of (Ra, Ga, Ba) then the reflected light due to ambient reflection will have a color defined as: (Rra, Gra, Bra) = (Ri*Ra, Gi*Ga, Bi*Ba).
Diffuse Reflectance • Surfaces with diffuse reflectance scatter light equally in all directions. The amount of light reflected is directly proportional to the angle of incidence of the incoming beam of light. • Diffuse reflectance can be observed on dull objects such as cloth or paper.
The exact math to calculate diffuse reflection was proposed by Lambert and • so this reflectance is often referred to as Lambert reflectance. • If we assume the light to have a diffuse color of (Rid, Gid, Bid) and the surface to have a diffuse reflection coefficient of (Rd, Gd, Bd). then the diffuse color component of the reflected light can be calculated as
where θ is the angle between the incident ray (direction of light source) and the normal to the surface at the point of incidence. • So if θ is 0 (the light hits the surface straight on) then the diffuse reflection is the brightest, but light incident on the surface at more than 90 degrees (cos(>90) <= 0) causes no light to be reflected, and the corresponding area appears black.
The diffuse color component of a light essentially models the color of the light as we perceive it. θ used in the diffuse reflection calculation
Specular Reflectance • Specular reflection produces shiny highlights often seen on shiny objects like glass or metal. • Specular reflection, unlike ambient and diffuse reflection depends on both the direction of the incident light as well as the direction that the surface is being viewed from. • The reflection is brightest when the viewing direction is parallel to the reflected light.
The equations to define specular reflectance have been proposed by many mathematicians. Each formula simulates the specular reflectance slightly differently. • However, in general, specular reflection depends on three components: 1.surface orientation, N 2.direction of light source, I 3. viewing direction, V
Assuming a function specular that depends on the above three factors, the specular reflection color can be defined as: Specular reflectance
Phong proposed that this function can be approximated to be where is as shown in last figure, and n is the specular exponent that determines the size of the highlight. • Other equations have been proposed by Blinn and others to model specular reflections as well. Each equation output shiny highlights, but the softness of the highlight differs.
Emission • The emissive color of a surface adds intensity to the object, but is unaffected by any light sources. • Since most real-world objects (except lights) don't emit light, you'll probably use this feature mostly to simulate lamps and other light sources in a scene. Emissive component of reflectance
Shading Models • Flat Shading Model: • In this technique, each surface is assumed to have one normal vector (usually the average of its vertex normals) as shown in Figure. • This normal vector is used in the lighting calculations, and the resultant color is assigned to the entire surface.
Notice how flat shading causes a sudden transition in color from polygon to polygon. This is because every polygon is rendered using a normal vector that changes abruptly across neighboring polygons. • Flat shading is fast to render, and is used to preview rendering effects or on objects that are very small.
Gourad Shading • Gourad shading is used when smooth shading effects are needed. In this process, each vertex defines a normal vector. This normal value is used to calculate the color at every vertex of the surface. • The resulting colors are averaged into the interior of the surface to achieve a smooth render. Since polygons share vertices (and hence the same normal value), the polygon edges blend together to produce a smooth look.