Download
1 / 25
260 likes | 360 Views
Batteries & Battery Clips – Setup for Operation. Follow these steps to prepare for battery-powered operation:

E N D
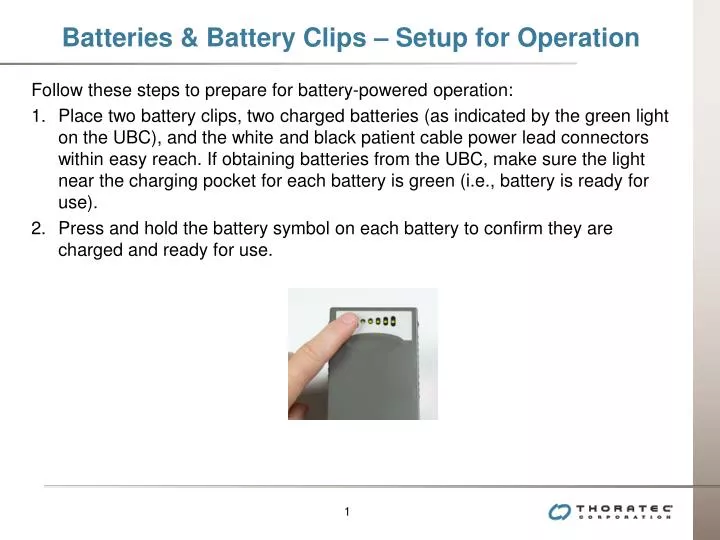
Batteries & Battery Clips – Setup for Operation • Follow these steps to prepare for battery-powered operation: • Place two battery clips, two charged batteries (as indicated by the green light on the UBC), and the white and black patient cable power lead connectors within easy reach. If obtaining batteries from the UBC, make sure the light near the charging pocket for each battery is green (i.e., battery is ready for use). • Press and hold the battery symbol on each battery to confirm they are charged and ready for use.
Batteries & Battery Clips – Setup for Operation • Place the 1st charged battery into a compatible battery clip by lining up the arrows on the battery and battery clip and pushing until the battery clicks into place. • Repeat steps 2 and 3 for the 2nd battery/battery clip. • Unscrew the black System Controller/patient cable connectors. The power disconnected alarm will come on: An alarm will sound one beep per second, the green power symbol will flash rapidly, and the four battery fuel gauge lights will flash.
Batteries & Battery Clips – Setup for Operation • Put aside the patient cable connector; then connect the battery clip connector to the black System Controller connector. The alarm will stop and both the green power symbol and battery fuel gauge lights will stop flashing. Wait until the flashing symbol(s) and audio alarm stop before continuing with step 7. • Unscrew the white System Controller/patient cable connector. The power disconnect alarm will come on: An alarm will sound one beep per second, the green power symbol will flash rapidly, and the four green battery fuel gauge lights will flash. • Put aside the patient cable connector; then connect the battery clip connector to the white System Controller connector. The alarm will stop and both the green power symbol and the battery fuel gauge lights will stop flashing. Wait until the flashing symbol(s) and audio alarm stop before continuing with step 9. • Place the batteries and the battery clips into the patient’s holster vest, modular belt, or consolidated bag. At a convenient time, recharge depleted batteries in the UBC.
Batteries & Battery Clips – Setup for Operation • Keep the patient cable connected to or near the PM until next use. If leaving the cable connected to the PM when not in use, place the cable where it will not become damaged, dirty, or wet; and so that it will not cause tripping or falling. • Place at least two additional charged batteries into the patient’s travel case for back up.
Batteries & Battery Clips – Estimated Battery Time • One pair of new HeartMate 12 volt NiMH batteries provides at least six hours of support at the “higher end” of nominal operating conditions (pump speed 12,000 rpm, flow 6.0 lpm, power 10 watts). • One pair of new HeartMate 14 volt Li-Ion batteries provide six to ten hours of support under nominal operating conditions (pump speed 12,000 rpm, flow 6.0 lpm, power 10 watts). • Both 12 and 14 volt batteries will last for less time if the patient is active or emotionally stressed. • If a pair of HeartMate batteries does not give at least four hours of support, take both out of service. The on-battery battery fuel gauge on the System Controller provides an estimate of battery power.
Batteries & Battery Clips – Checking Battery Charge Level • Follow these steps to prepare for battery-powered operation: • Locate a battery inside one of the charging pockets of the UBC. • Look at the three lights next to the charging pocket for this battery. A green light means the battery is charged and ready for use. • If the pocket light is green, remove the battery from the charging pocket. • Find and press the battery symbol on the battery’s fuel gauge. • If all five of the green fuel gauge lights come on, the battery is between 80-100% charged. • OR • If four or fewer lights come on, the battery is not yet ready for use. Return it to the pocket for more charging. If the fuel gauge continues to show four or fewer lights after additional charging, the battery may be defective. Do NOT use it. Contact Thoratec for a replacement, if needed.
Batteries & Battery Clips – Checking Battery Charge Level The battery fuel gauge on a HeartMate battery uses five green lights to show available battery power. Each light represents approximately 20% of available power. Note: A battery’s fuel gauge may show five lights illuminated, while the UBC still indicates a “charging yellow” light. This is normal, because five lights on the battery does not indicate “fully charged,” but rather, 80-100% charged.
Batteries & Battery Clips – Battery Life • The two major factors that influence battery life for a HeartMate battery are: • Number of uses • Number of months since the battery was manufactured A battery should be usable for approximately 360 cycles or 36 months from the date of manufacturer, whichever comes first. After this time, battery performance cannot be guaranteed. Call Thoratec for a replacement when either of these milestones is reached for a HeartMate battery.
Universal Battery Charger – Overview The Universal Battery Charger (UBC) performs three primary functions: • Charges up to four HeartMate batteries in four hours or less. • Monitors the need for calibration and calibrates individual HeartMate batteries. • Performs diagnostic testing on up to four HeartMate batteries at once. The components required for charging HeartMate batteries are the 1) the UBC itself, 2) up to four depleted batteries, and 3) AC electrical outlet that is grounded (not controlled by a wall switch). Universal Battery Charger Rechargeable Batteries AC Electrical Outlet
Universal Battery Charger – Setup Follow these steps for setting up the UBC: • Inspect the UBC for dents, chips, cracks, or other signs of damage. Do not use a UBC that appears damaged. Contact Thoratec for a replacement, if needed. • Examine the UBC’s four battery charging pockets. • Obtain the grey AC power cord from the product packaging. • Plug the female end of the power cord into the power entry module in the rear of the charger. Make sure the cord is fully inserted and secure. 2 3 4
Universal Battery Charger – Setup • Plug the male end of the power cord into a properly-tested and grounded (3-prong) AC electrical outlet that is not controlled by a light switch. • Turn on the UBC by pressing the on/off switch in the rear of the charger from the off (“0”) to the on (“I”) position. Once the charger is turned on, all lights on the front panel will illuminate, and the charger will beep once. This indicates that the charger is performing a Self Test. This test takes approximately 10 seconds. When successful, all the lights will turn off.
Universal Battery Charger – Setup • If the UBC detects a problem during the Self Test, an error message appears on the display panel screen and/or the lights and beep will not perform as described above. Refer to Section 5.0 of the HeartMateUniversal Battery Charger IFU, or contact Thoratec if there is a problem detected during Self Test. • OR • If the UBC passes the self test, “HeartMate CHARGER” appears on the display panel. The charger is now ready for use. Note: “Graphic Symbols” is the default display panel setting for the UBC. See “Selecting Language/Display Panel Settings,” found in section 2.2 of the Universal Battery Charger IFU (document # 103771) for instructions on selecting language/display options.
Universal Battery Charger – Battery Charge Status • Once a battery is placed into a UBC charging pocket, depending on the charge status of the inserted battery, one of three lights will illuminate. • A steady yellow light means that the battery is actively charging. If the yellow light is blinking it means the battery should be calibrated. Green means the battery is charged and ready for use. Red means the battery is defective or that there is a problem with the charger. Do not use a battery that has a red light.
Universal Battery Charger – Charging Batteries Follow these steps for charging HeartMate batteries: • Obtain one or more HeartMate batteries. • Place one of the HeartMate batteries into one of the four UBC battery charging pockets. With the battery fuel gauge on the top and facing forward. Do not force a battery into a charging pocket. Batteries will only fit with the fuel gauge at the top and facing forward. A beep and the illumination of a colored light (red, yellow, or green) confirms that the battery has been properly inserted.
Universal Battery Charger – Charging Batteries • After hearing the beep, look at the three lights (yellow, green, and red) adjacent to the number button for this pocket. • Identify which of the three lights (yellow, green, or red) comes on for this pocket. • If the yellow light comes on, the battery is actively charging. Do nothing with the battery. Leave it in the pocket to continue charging. The light will remain yellow until the battery is changed. Once the battery is charged, the yellow light turns off and the green light comes on. • OR • If the yellow light is blinking, battery calibration is being requested. Leave the battery in the pocket to be calibrated, if possible If you choose to not calibrate, after 10 seconds the battery continues charging.
Universal Battery Charger – Charging Batteries • OR • If the green light comes on, the battery is already charged and ready for use. Either remove the battery for immediate use, or leave it in the pocket until needed. Leaving charged batteries in the charger will not damage them. • OR • If the red light comes on (or no light at all), there is a problem with the battery or the charging pocket. Remove the battery and: • Reinsert it into the same pocket. • If again there is a red light (or no light), insert the battery into a different pocket. • If the battery cannot be charged in a different pocket, the battery is defective. Do not use it. Contact Thoratec for a replacement, if needed.
Universal Battery Charger – Viewing Battery Information • To check a battery’s charge status, place the battery into a charging pocket, then press and release the number button associated with that pocket. The following will appear on the display panel: • Pocket Number • Battery symbol • Percentage of available charge
Universal Battery Charger – Viewing Use/Charge Cycles • To see how many times a battery has been used/charged, press and release the number button twice The following will appear on the display panel (1): • Total number of uses/charges for this battery • How much power the battery can potentially hold if fully charged (measured in mAh) 1
Universal Battery Charger – Calibrating HeartMate Batteries • If a battery needs to be calibrated, the UBC will alert you when the battery is inserted into one of the charging pockets. If calibration is recommended the following occurs: • The yellow light for the pocket blinks • A split battery symbol and the pocket number for this battery flashes on the display panel screen. The circled number will alternate between a filled and unfilled circle as the display panel screen flashes
Universal Battery Charger – Calibrating HeartMate Batteries • You have the option of calibrating the battery when prompted or waiting for another, more convenient time (e.g., at night while the patient is sleeping). • If you choose to not calibrate at the prompt, after 10 seconds, the UBC will continue with a normal charge cycle for that battery. • Once it is charged, you may use a battery for which you have delayed calibration.However, you should still calibrate it as soon as possible. • Follow these steps to calibrate a battery: • Receive a calibration prompt from charger. • Press and release the number button for this pocket. • Pressing the number button during calibration brings up the status screen for the battery.
Universal Battery Charger – Calibrating HeartMate Batteries If a battery is being calibrated, the pocket number and a split battery symbol appear on the display panel when the number button for that pocket is pressed. • You can cancel calibration by removing the battery from its pocket. • If you do remove a battery before calibration is complete, make sure to recharge and check the battery before using it.
Universal Battery Charger – Monitoring Performance The UBC continually monitors its own performance and that of any battery placed into a charging pocket. Actual or potential problems, or “faults,” appear as “advisory messages” on the UBC’s display panel screen (e.g.,” Call Service” message) Battery-Related Advisories If the charger detects a problem with a battery (e.g., voltage too high or too low, open circuit, etc.), the red light for the battery’s pocket comes on and a telephone symbol appears on the display panel screen.
Universal Battery Charger – Maintenance • Once a week, inspect the UBC for signs of physical damage, such as dents, chips, or cracks. • Once a week, inspect the power cord used to connect the UBC to an electrical outlet. • Once a month, unplug the UBC and then clean the metal contacts inside all four charging pockets with a lint-free cloth or swab that has been moistened with rubbing alcohol. • Periodically and as needed, unplug the charger and clean the exterior surfaces using a clean, damp cloth. • Once a year, bring the HeartMate UBC to an authorized service technician for a thorough safety inspection and cleaning that includes: functional test of the device and cleaning and inspection of all internal components.
Logistics – Compatibility Summary (Controllers) * Catalog Number in parenthesis (#103696) (#1315) (#1275) (#2865) (#2265) (#2265) (#1237) (#1237) (#1237) (#2465) (#2060) (#2060) (#2025) (#2025) (#2025) (#1340) (#1340) (#1340) (#26439) (#26439) (#26439)
Logistics – Compatibility Summary (Batteries) * Catalog Number in parenthesis (#2465) (#2060) (#2025) (#1440) (#1440) (#26439)