Download

1 / 41
430 likes | 1.04k Views
Initiating a Saline Lock and Intravenous Infusion. Hypovolemic Shock. Caused by a decrease in the volume of blood in the casualty’s circulatory system Caused by serious bleeding, such as a cut artery on an extremity or amputation

E N D
Hypovolemic Shock • Caused by a decrease in the volume of blood in the casualty’s circulatory system • Caused by serious bleeding, such as a cut artery on an extremity or amputation • Can also result from internal bleeding (abdominal cavity), severe burns, or dehydration due to vomiting, diarrhea, or profuse sweating • Hypovolemic shock can result in death
Signs of Hypovolemic Shock • Sweaty but cool (clammy) skin • Pale skin • Restlessness, nervousness, agitation • Unusual thirst • Confused / unusual behavior • Rapid breathing • Blotchy bluish skin, especially around mouth • Nausea
Controlling Hypovolemic Shock • Control bleeding • Add fluids (intravenous infusion)
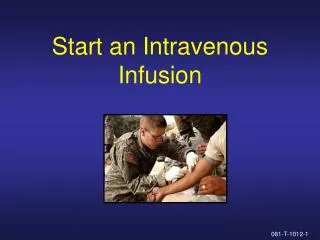
Intravenous Infusion • Referred to as an “IV” • Fluids are introduced by piercing a vein with a catheter- and-needle unit (venipuncture) • Needle is withdrawn leaving the catheter in the vein • Catheter attached to tubing and fluid
Saline Lock Sometimes, a casualty who is wounded may not need an IV at the time of initial treatment, but still may need fluids at a later time. Unfortunately, by the time fluids are needed, it may be difficult to insert a catheter into the vein The saline lock allows you to place a catheter inside the vein, then seal off the catheter until you or medical personnel are ready to administer fluids intravenously
Saline Lock A saline lock adapter should be applied even if you are going to give IV fluids immediately A saline lock gives you the ability to stop giving IV fluids, then start again at a later time without performing another venipuncture
Obtain Needed Supplies • 18 Gauge catheter/needle unit • Saline lock adapter plug • Constricting band • Tegaderm dressing • Alcohol or iodine pad
Obtain Needed Supplies • Gloves • 21 gauge 1 1/4” needle • 5 milliliter syringe • Hextend IV bag
Hextend • Physiologically balanced blood plasma volume expander for the treatment of hypovolemia • Completely sterile • Replaces sodium chloride and Ringer’s Lactate solutions
Select a Site for Venipuncture • Preferred sites are the peripheral veins of the antecubital fossa (anterior to and just below the elbow) • Large, visible, accessible • Back of the hand • Nondominant arm if possible
Select a Site for Venipuncture • Expose the site • Palpate (feel) for a vein • Select a vein that can be easily felt and seen, large enough to accommodate the catheter, straight, springy, does not roll, and is free of scars, moles, and excessive hair • Avoid joints, palpable pulse areas, and veins near or below injuries
Perform a Venipuncture and Initiate a Saline Lock • Wrap the constricting band around the limb about 2 inches above the selected site • Loop the longer end and draw it under the shorter end so the band can be released with one hand • Be sure the tails point away from the venipuncture site • Constricting band should remain in place no longer than 2 minutes
Perform a Venipuncture and Initiate a Saline Lock • Tell the casualty to clench and relax his fist several times, then keep it clenched • Palpate vein to ensure vein is still suitable • Cleanse selected site with an alcohol or povidone-iodine pad • Wipe site using a circular motion, beginning at the center and spiral outward
Perform a Venipuncture and Initiate a Saline Lock • Put on gloves • Remove catheter/needle unit from package • Hold the unit in your dominate hand and remove protective cap without contaminating the needle
Perform a Venipuncture and Initiate a Saline Lock • Hold the flash chamber of the unit with the thumb and forefinger of your dominant hand and position the unit so that the bevel of the needle is up and directly above (or slightly to one side of) the selected vein • Pull the skin over the venipuncture site taut by pressing approximately one inch below the site with the thumb of your non-dominate hand
Perform a Venipuncture and Initiate a Saline Lock • Position the point of the needle (bevel up) about ½ inch below the venipuncture site at approximately a 20 to 30 degree angle • Insert the bevel of the needle beneath the skin
Perform a Venipuncture and Initiate a Saline Lock • Lower the angle of the catheter/needle until almost parallel to the skin surface • Advance the catheter/needle until the wall of the vein is pierced • Check for blood in the flash chamber (successful puncture)
Perform a Venipuncture and Initiate a Saline Lock • Advance the catheter/needle unit approximately 1/8 inch farther to ensure that the catheter (not just the needle tip) is in the vein • Stabilize flash chamber with dominant hand, grasp catheter hub with non-dominant hand and thread catheter into vein, to catheter hub
Perform a Venipuncture and Initiate a Saline Lock While continuing to hold the catheter hub with your non-dominate hand, press lightly on the skin just beyond the catheter tip Remove the flash chamber with the attached needle from the catheter with your dominate hand and lay the flash chamber/needle aside
Perform a Venipuncture and Initiate a Saline Lock • Tell the casualty to unclench his fist • Release the constricting band • Uncap the male end of the saline lock adapter plug • Insert the male end into the hub of the catheter • Release pressure from over the vein
Perform a Venipuncture and Initiate a Saline Lock • Remove the Tegaderm dressing from its package • Apply it over the site so that the adapter and site are covered
Flush the Saline Lock • If a n IV is not to be started immediately, you should flush the catheter and examine the site for infiltration (fluid into the tissue instead of the vein) • Use fluid from the IV bag to flush the saline lock • If you are going to administer fluids immediately, you do not need to flush the saline lock
Flush the Saline Lock • Attach the 21-gauge needle to the 5 ml syringe • Remove cover from IV bag port, fill syringe with sterile fluid from IV bag, and replace cover
Flush the Saline Lock • Penetrate the Tegaderm dressing with the needle • Inject the sterile fluid into catheter • Look for signs of infiltration (pain, swelling, redness, fluid leaking from site) • Withdraw needle from lock and properly dispose of the needle
Administering Intravenous Fluids Through a Saline Lock • Check IV bag for expiration date, clearness of fluid, tears, fluid leakage, and contamination • Obtain the following: IV bag (Hextend, 500 ml), IV infusion set, 18 gauge needle/catheter unit, tape
Administering Intravenous Fluids Through a Saline Lock • Remove infusion set from package • Loosen the clamp, move the clamp along the tubing until it is 6 to 8 inches from the drip chamber, and tighten clamp OPEN CLOSED
Administering Intravenous Fluids Through a Saline Lock • Remove protective covering from outlet port (long spout) on IV bag • Remove protective cap from the spike on the infusion set without touching the spike • Insert spike into exposed IV outlet port with a twisting motion IV Tubing Port Medication Port
Administering Intravenous Fluids Through a Saline Lock • Squeeze the drip chamber until half of the chamber is filled with IV solution
Administering Intravenous Fluids Through a Saline Lock Remove air from the tubing by: • Holding the end of the tubing above the bottom of the bag • Loosening the tubing clamp to allow fluid into the tubing • Loosening protective cap on adapter to allow air to escape from tubing • Gradually lowering tubing until fluid reaches end of adapter • Reclamping the tubing and retighten the adapter cap
Administering Intravenous Fluids Through a Saline Lock • Remove 18-gauge catheter/needle unit from package • Hold catheter/needle unit in dominant hand and stabilize the saline lock adapter with thumb and forefinger of non-dominant hand • Insert catheter needle unit through Tegaderm dressing and saline lock adapter until it reaches catheter hub
Administering Intravenous Fluids Through a Saline Lock • Remove non-dominant hand from saline lock, place finger/thumb of non-dominant hand over vein just beyond the catheter tip, and apply pressure to vein • Retract and discard needle (catheter stays in place) • Grasp end of IV tubing with dominant hand and remove adapter from tubing • Grasp the hub of the catheter (outside Tegaderm dressing) with thumb and forefinger of non-dominant hand
Administering Intravenous Fluids Through a Saline Lock • Insert end of tubing into hub of catheter • Loosen clamp on tubing (about ½ way) to allow IV solution to flow into drip chamber • Unroll about 2 inches of tape • Place tape (sticky side up) on casualty’s limb and under IV tubing a few inches beyond catheter hub and beyond Tegaderm dressing
Administering Intravenous Fluids Through a Saline Lock • Fold tape strip back over tubing, trapping tubing between sticky sides of tape • Wrap additional tape around limb and IV tubing distal to first • Ensure tubing is secure and IV flow is not impeded • Check infusion site for signs of infiltration
Discontinue the Intravenous Infusion • Due to evacuation • IV fluid has been used up • Infiltration • Other reasons
Discontinue the Intravenous Infusion • Adjust clamp on tubing so flow is stopped • Loosen and remove tape • Remove IV catheter hub that is outside Tegaderm dressing • Saline lock adapter may remain in place for later use
Remove Catheter from Vein • Grasp catheter hub and remove catheter from vein at an angle almost parallel to skin • Cover puncture site with gauze dressing and hold pressure until bleeding stops • Tape dressing in place