Download
1 / 14
160 likes | 367 Views
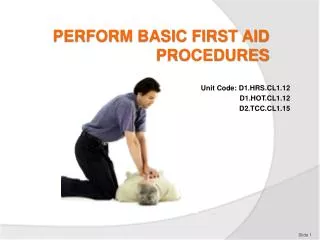
Perform First Aid for an Open Chest Wound. Instructor Assistant Instructor/s Class Length Safety Brief Evaluation Process. 081-831-1026 (SL1) - Perform First Aid for an Open Chest Wound.

E N D
Perform First Aid for an Open Chest Wound Instructor Assistant Instructor/s Class Length Safety Brief Evaluation Process
081-831-1026 (SL1) - Perform First Aid for an Open Chest Wound • Conditions: You see a casualty who has an open chest wound. The casualty is breathing. Necessary equipment and materials: casualty's first aid packet and material to improvise a dressing (clothing or blankets).
081-831-1026 (SL1) - Perform First Aid for an Open Chest Wound • Standards: Applied a dressing to the wound following the correct sequence, without causing further injury to the casualty. The wound was properly sealed and the dressing was firmly secured without interfering with breathing.
Check the casualty for signs and symptoms of an open chest wound. • A puncture wound of the chest. • "sucking" or "hissing" sound when inhaling. • Froth or bubbles around the injury
Note. If there are two wounds • Check for an exit wound • Start with more serious wound
1. Uncover the wound • unless clothing is stuck to the wound • or in a chemical environment • WARNING: Do not clean the wound
2. Apply airtight material over the wound. • Use casualty's field dressing • Use opened outer wrapper • or other airtight material
2. Apply airtight material over the wound. • After the casualty exhales • Apply inner surface over wound • Hold in place Note. When applying the airtight material try not to touch the inner surface.
3. Apply the casualty's field dressing. • Directly over the airtight material • Apply dressing white side down • casualty breathe normally
3. Apply the casualty's field dressing. • wrap the tails around the body • Than back to the starting point • maintain pressure on dressing throughout process
3. Apply the casualty's field dressing. • casualty has exhaled completely • over the center of the dressing • Tie the tails into a non-slip knot
3. Apply the casualty's field dressing. • Ensure knot is tied firmly • Enough to secure the dressing • without interfering with breathing Note. When practical, apply direct manual pressure over the dressing for 5 to 10 minutes to help control the bleeding.
4. Position the casualty • on the injured side • or sitting • whichever makes breathing easier WARNING If the casualty's condition (difficulty in breathing, shortness of breath, restlessness, or blueness of skin) worsens after placing the dressing, quickly lift or remove and then replace the airtight dressing
Task Competition Note. • Watch the casualty for life-threatening conditions • check for other injuries • and seek medical aid Questions?