Download
1 / 21
210 likes | 218 Views
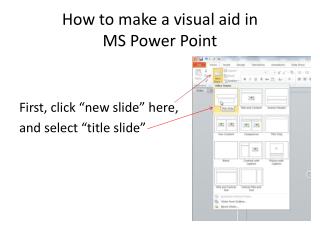
How to Make a Power Point. Go to Slide 2. (You can get there by clicking on slide 2 in Normal VIEW.). Change this title to your name. Save this tutorial as classperiod_lastname_firstname _ PowerPoint Tutorial in your PowerPoint f older .

E N D
How to Make a Power Point Go to Slide 2. (You can get there by clicking on slide 2 in Normal VIEW.)
Change this title to your name • Save this tutorial as classperiod_lastname_firstname_ PowerPoint Tutorial in your PowerPointfolder. • Click on this box and replace these instructions with the name of the city where you live. Once you have completed the instructions on one slide, move on to the next slide.
Fonts • Change the font of the title of this slide to Tahoma with a font size of 50. • Add the “shadow effect” to the title. You can do this in the Font group on the Home Ribbon. • Change the title font color to green. • Bold the title Size Color Shadow
Word Art • Add WordArt to this slide below the directions. Have the text be the name of your favorite band/singer. • Insert Ribbon, Text Group, Word Art. • Change the color of the text to your favorite color. • Right click on the WordArt and select Format Text Effects, then click Text Fill. • You can also edit the shadow by right-clicking on the WordArt, selecting Format Text Effects, then clicking Shadow.
Slide Design • Change the “design” of this entire show to Banded • On the Design Ribbon, choose Banded. • Change Design color to Blue (On Design ribbon in Variants group select More, then Colors, then Blue. • Change the design of just this Slide to “Retrospect”. If you hold your mouse over a design it will tell you the name. • HINT: Right click the design, select apply to selected slides.
Changing Slide Layouts/ Add Media • Change the layout of this slide to “Two Content”. • On Home Ribbon in the Slides Group Select Layout, then choose Two Content. • Also add a picture. • In the Content Place Holder, click Online Pictures icon, then search for a picture (you can choose what to search), insert picture.
Slide Transitions with Sound • Set the slide show to transition between each slide using the “Uncover Down” setting. Have the slides advance on mouse click and add a Sound. Be sure to Apply to all Slides • On Transitions Ribbon click Uncover. Then on Effect Options click from top. • In Timing Group choose a Sound • Click Apply to All
Animations • Add animations so that each bullet on this slide enters the screen at different times. • Select all words after the first bullet. • On Animations Ribbon choose an Animation. • Continue this for each line of text.
Inserting Images and Animation • Insert a picture of a car at the bottom right of this page. • Insert Ribbon, Online Pictures, Search car. • Add Animation to the car to make it move across the page from right to left. • Select Car, go to Animations Ribbon, Select More Animations. In Motion Paths select Line. In Effect Options select Left. • Insert an Oval Callout above the car. • On Insert Ribbon, Select Shapes, choose Oval Callout • Type Hello. Change the color of Hello to yellow.
Changing the Order of Slides • Move slide 4 so it is between slides 5 and 6. • On View Ribbon select Slide Sorter. Click and drag slide 4 so that it is between 5 & 6.
Action Buttons • Insert an action button to the bottom of this slide. • On Insert Ribbon select Shapes and choose any shape. • Draw Shape at bottom of screen. • Set the shape to link to slide one. • Click on the shape. On the Insert Ribbon in the Links group select Action. Select Hyperlink to: and click First Slide.
Headers and Footers on Slides • Add a footer to the slides. • The footer should include: Created by: (your name) and the page number. It should not be included on the Title Slide. • On Insert Ribbon select Header and Footer. Click Slide Number, Footer, and Don’t Show on Title Slide. In the box under Footer type: Created by (your name). • Select Apply to All
Footer on Handout Pages • On the last slide you inserted a footer that will appear on the slides. Now you will insert a footer that will appear on Handout pages when you print multiple slides per page. • On Insert Ribbon select Header and Footer. Click Notes and Handouts. Click Page Number and Footer. In box below footer type (your name). • Click Apply to All
Speaker Notes • Add Speaker notes to this slide. • On View Ribbon select Notes Page. • Type the following text: Don’t forget to learn how to add music to a slide. • To get out of Notes View, click Normal.
Adding Music • Add a sound to this page and have it play automatically. • On Insert Ribbon in the Media Group, select Audio, then click Audio on My PC. In the Insert Audio Dialog Box click Music. Open the Sample Music folder and choose a song. • Click on Sound Icon, in Audio Tools select Playback. In the Audio Options Group next to start click automatically. • Move the icon to bottom left corner of slide
Hyperlinks • Insert a text box and type Mrs. Roth’s Page • On Insert Ribbon in Text Group select Text box. At the bottom of the slide click and drag to draw box. Type Mrs. Roth’s Page. • Add a hyperlink that links to Mrs. Roth’s school website: http://myuen.org/63729 • Select Mrs. Roth’s Page (in text box below) • On Insert Ribbon in Links Group select Hyperlink. Next to Address: type – http://myuen.org/63729
Backgrounds • Change the color of all text on this page to any color. • Home Ribbon, Font Group • Change the Design of this slide only (not entire show) to Office Theme (right click on the Office Theme design and select apply to selected slides). • Place a picture as the background for this slide • Right click and select Format Background. Select Picture or Texture Fill. Select a picture. Click Close. Do NOT select Apply to All.
Set Slide Show to Run Automatically • On Slide Show Ribbon, Select Rehearse Timings. • Your Slide Presentation will appear with Rehearsal Box in corner. • Click the arrow key to advance to the next element. • Keep doing this until the end of the show. • When done hit yes.
Printing Handouts • Create a handout of this slide show that prints 9 slides per sheet. • Click File and then Print. • In Settings where is says Print Full Page Slides, click on arrow and under Handouts select 9 slides Horizontal. • The 3 pages need to be stapled together and turned in. • Continue to next slide for further instructions.
Turn in assignment • Submit to Mrs. Roth.
The End • Thanks for using this PowerPoint Tutorial. I hope you learned a lot about PowerPoint by doing this. • Make sure you printed handouts to turn in and also sent an electronic copy.