Download
1 / 10
100 likes | 129 Views
By using these easy tips and trick, you will be able to navigate easily in the QuickBooks and get familiar with the accounting tools

E N D
QuickBooks QuickBooks is a perfect fit for small and medium-sized business as it holds all the features which an SME needs in order to get along with their various accounting operations. The best part about QB is that all its accounting tools are very simple to learn and in order to maintain the book, one doesn’t need to have a degree in accounting.
The Navigation Tips The Dashboard Profit and Loss Creating your invoice Make addition, using plus and minus Use the search bar
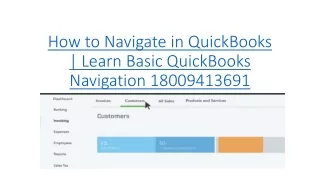
The Dashboard • The first thing which you see after logging in to your account is the Dashboard. • It gives you an overall picture of how your business is doing • You just have to click on the dashboard and all the information regarding your business will appear on the screen. • With even a basic understanding of accounting, you can get familiar with all kinds of reports and data.
Profit and Loss By looking at the Profit Loss section of your dashboard, you will be able to know the following things:- • Sales summary • How much money you spent • Client overdue report • Daily bank balance • Availability of the option to download your transactions
Creating your invoice • First of all, you will have to click on the Invoices tab and then choose New Invoice button • Then you will have to enter the detailed information of the client for whom you are creating the invoice and then click on save as customer. • Now, while creating the invoice, this particular customer will appear in the drop down menu and it will automatically fill all the details while creating an invoice. • Now, enter the product information along with tax percentage. You can add more products as per your wish. • The available options in the invoices are the total gross, discount, type of currency. You can choose these options as per your wish. • You can also add special conditions like payment on delivery. • Finally, you will have to click on the save button and the invoice would be ready to send.
Make addition, using plus and minus By using the plus and minus sign on your keyboard, you can create customers, add transactions, add vendors, and even add sales receipt.
Use the search bar The search bar is quite useful in the QuickBooks as it helps you to easily search the previously saved transactions, however, you can also use it for the finding cheques through the cheque numbers.
Call us : (607) 228-8661 Email us: Sales@cloudwalks.com Website : www.cloudwalks.com