Download
1 / 114
1.41k likes | 1.76k Views
This manual replaces earlier version of the online SAVIX MIS manual, and take into account the most recent upgrade, finalised in mid 2018. Earlier versions of the manual are published on this site without our knowledge or permission and are sout of date. Hugh Allen, CEO, VSL Associates Ltd.

E N D
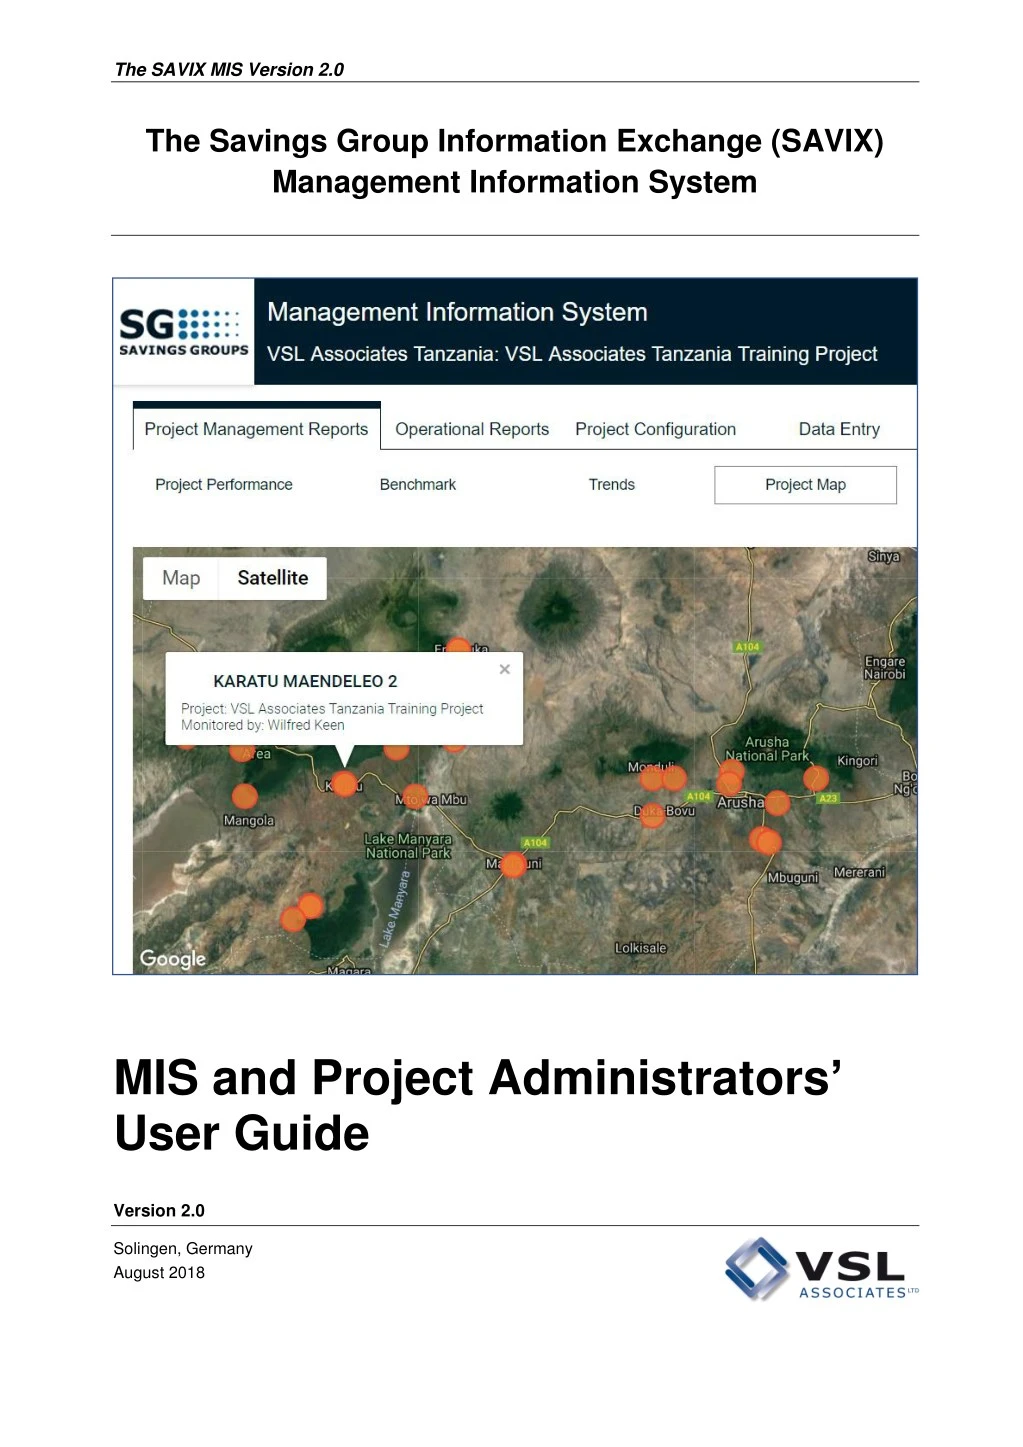
The SAVIX MIS Version 2.0 The Savings Group Information Exchange (SAVIX) Management Information System MIS and Project Administrators’ User Guide Version 2.0 Solingen, Germany August 2018
The SAVIX MIS Version 2.0 Table of contents Preface ............................................................................................................................ 4 List of acronyms .............................................................................................................. 5 Part 1 Setting up an MIS: 1 1.1 1.2 1.3 1.4 Architecture of the MIS ....................................................................... 7 The components and structure of the MIS ............................................................ 5 User-defined fields ............................................................................................... 9 Networks of projects............................................................................................. 9 Selecting the right architecture: Things to think about ........................................ 10 2 2.1 2.2 2.3 2.4 2.5 2.6 2.7 Setup - the role of the MIS Administrator ......................................... 12 Information needed to set up an MIS ................................................................. 12 Information needed to set up a project in the MIS .............................................. 14 Creating and managing credentials .................................................................... 16 Registering an MIS ............................................................................................ 18 Creating the first project ..................................................................................... 23 MIS Configuration – User-defined fields ............................................................. 30 MIS Configuration – Creating Trainer/Supervisor User-created fields ................ 45 3 3.1 3.2 Setup - the role of the Project Administrator........................................... 50 Creating a Table of Trainers ............................................................................... 50 Maintaining a Table of Trainers .......................................................................... 58 Part 2 Data collection, auditing and entry 4 The data .......................................................................................................... 62 4.1 Defining the standard data ................................................................................. 62 4.2 The data collection forms ................................................................................... 63 4.3 Basic data quality checks ................................................................................... 72 5 5.1 5.2 5.3 5.4 5.5 5.6 Data entry ......................................................................................... 74 Opening the data entry screen ........................................................................... 74 Entering Static data ............................................................................................ 75 Entering Cycle data ............................................................................................ 77 Entering Standard data ...................................................................................... 78 Entering User-defined data (UCFs and SDFs) ................................................... 79 Groups and their datasets .................................................................................. 80 Part 3 Reports 6 6.1 6.2 6.3 6.4 6.5 Project Management reports ...................................................................... 86 List of all Project reports and their functions ........................................................ 86 Project Performance report .................................................................................. 86 Benchmark report ................................................................................................ 88 Graphs ............................................................................................................... 90 Project map ......................................................................................................... 90 2
The SAVIX MIS Version 2.0 7 7.1 7.2 7.3 7.4 7.5 7.6 7.7 Project Operational reports .......................................................................... 93 List of Operational reports and their functions ...................................................... 93 Why are there 2 types of Trainer report? ............................................................. 93 Trainer Comparison report ................................................................................... 93 Trainer Performance report – how to set it up and produce a report .................... 96 How the Trainer Performance report is used ..................................................... 100 Group Comparison report .................................................................................. 100 Data Aging report .............................................................................................. 103 8 8.1 8.2 8.3 8.4 8.5 MIS reports .................................................................................................... 106 Structure of the reports ...................................................................................... 106 Project Aggregator report .................................................................................. 107 Project Comparison report ................................................................................. 109 Benchmark report .............................................................................................. 111 Consolidated Project maps ................................................................................ 112 3
The SAVIX MIS Version 2.0 Preface The SAVIX MIS 2.0 is a major new release. The old SAVIX MIS was built on an Undertree platform that had limited capacity and suffered from instability and slow performance, owing to far more projects on the system (over 4,000) than was ever envisaged. 2 years ago, it was decided to completely re-build the system from scratch on a new Microsoft platform that promised to offer much higher speed and greater capacity. The new MIS offers the following improvements: • Much greater capacity. Although all web-based systems depend on reasonably capable internet, the new system is much less affected by having large numbers of projects on the database • Much more stable and less prone to crashes and slow-down, especially since most reports are held ‘live’ rather than being pulled and assembled from the system whenever an enquiry is received. • Greatly improved Network level reporting, allowing the user automatically to identify to select clusters of projects by country, sub-region and region. • Improved on-screen report visibility and large-data print screens • Rationalisation of User created fields and Standard data fields under a single heading, User-defined fields, feeding in to both MIS and Network reports • Multiple MIS Administrator, Project Administrator and Data Entry Officer credentials •Trainer name configuration allows titles to be customised to users’ institutions This transition to this MIS in April 2018 has been accompanied by a very busy Beta period in which bugs were identified and fixed and improvements were made to the layout. For the future we expect to invest in upgrades as these are requested and as funds become available. The objective at this time has been to make the transition from an outdated system to a better, faster and more reliable system with greater capacity for development. While we now have a much more capable system, it remains essentially the same in its architecture as the SAVIX MIS 1.0, so it is easy to navigate and most people who come to it ‘cold’ (like me) are able to find their way around without much help. This manual is therefore designed as a reference work, but can also be used by users who are new to the system, whom it guides step by step through MIS setup, data entry and reporting. We welcome feedback on the manual, especially when things are not clear, or are repetitive, or when important things are missing, so please feel free to contact me at hugh@vsla.net at any time. Best wishes Hugh Allen August 2018 4
The SAVIX MIS Version 2.0 List of acronyms Banking on Change ............. Barclays Bank SG projects implemented in 11 countries CODERT ............................ Community Development and Relief Trust: Tanzanian NGO CRS .......................................................................................... Catholic Relief Services DEO .................................................................. Data Entry Officer (an optional position) EU ......................................................................................................... European Union FHH ....................................................................................... Female head of household FO ................. Field Officer. A paid staff member who creates SGs and supervises VAs FSP .........................................................................................Financial service provider INGO ........................................................... International Non-government Organisation MCHN .................... Maternal Child Health and Nutrition. A training module for mothers MIS .............................................................................. Management Information system Oxfam .................................................................... Oxford Committee for Famine Relief PA .................................................................................................. Project Administrator PROFIRA ................................................... Project for Financial Services in Rural Areas SAVIX ........................................................... The Savings Group Information Exchange SDF .............. Standard data field. These are selectable fields that are built into the MIS SG ........................................................................................................... Savings Group SPM .................... Selection, Planning and Management of Income-generating Activities TZS .................................................................................................. Tanzanian Shillings UCF ....................................................................................................User-created Field UDF .................................................................................................... User-defined Field VA .............................................................................................................. Village Agent VSLA .................................................................... Village savings and Loan Association YSLA .................................................................... Youth savings and Loan Associations 5
The SAVIX MIS Version 2.0 Part 1: Setting up an MIS 6
The SAVIX MIS Version 2.0 1 1.1 A Management Information System (MIS), is a system in which data is gathered, processed into usable information and provided, in varying forms, to all stakeholders, so that decisions can be made about how to optimise project and programme performance. Architecture of the MIS The components and structure of the MIS The SAVIX MIS has the following basic components: •The MIS itself. The MIS must contain at least one project but can contain an unlimited number of projects, in a single country and with all projects using the same currency. The MIS is managed by an MIS Administrator. The MIS Administrator is responsible for: • Creating the MIS • Creating projects • Assigning project-level user names and passwords for a Project Administrator and Data Entry Officer • Creating User-defined data fields • Managing project-level configuration settings for all projects in the MIS • Producing management reports that allow for a selection of projects in the MIS to be aggregated, or compared •Projects. These are the basic units around which all activity is centred. A project can only be in one country, using the national currency and is managed by a Project Administrator (PA). The PA is responsible for: • Setting up a table of Trainers • Managing the project’s configuration settings • Entering data. A PA only enters data in the case of a small project with maybe 150- 200 Savings Groups. In larger projects this work is often done by a Data Entry Officer (DEO) who has all of the rights of a PA, but does not have access to the project’s configuration settings. Deciding on whether or not to have a DEO also depends on the frequency with which data is collected. • Producing management reports and operational reports related to a single project Figure 1: Roles and relationships - MIS Administrator, Project PA and DEO 7
The SAVIX MIS Version 2.0 Figure 2: MIS with multiple projects in a single organisation Figure 2 shows an MIS with 3 projects, all created by the MIS Administrator. Each project has its own user name and password. It is important that the user name for each project is different to the other projects in the MIS and it is also important that the name is distinct. Naming conventions are covered later in this manual. . Many organisations have a single MIS with many projects as shown in Figure 2, but sometimes an organisation may decide to create more than one MIS. There are two main reasons for this: By having more than one MIS it is easy to maintain sectoral distinctions. Figure 3 below shows an organisation that has created three MIS instances, covering 7 different projects. The different MIS instances are distinguished from each other by their sectoral classification: Savings Group stand-alone projects, agricultural projects and health projects • Figure 3: Multiple MIS instances in a single organisation 8
The SAVIX MIS Version 2.0 The most common reason, however, for creating different MIS instances is that donors want implementing organisations to provide information that is not part of the standard dataset, and demand projects to create user-defined fields that relate to their particular interests. 1.2 User-defined fields are data that is selected or created by the MIS Administrator and, once created or selected, all User-defined fields (UDFs) will show up in all projects in a single MIS as shown in Figure 4 below. User-defined fields Figure 4: MIS with 3 Projects sharing the same User-defined field This is a labour-saving way of ensuring that all user-defined data fields in each project appear exactly the same and are configured in the same way. The disadvantage is that while an MIS Administrator is able to aggregate and compare projects in each MIS (including UDFs), they are not able to aggregate and compare all of the projects in multiple MIS instances, because each MIS is completely separated from the other MIS instances. 1.3 To get around this limitation, it is possible to create a Network of projects. A network is comprised of projects (not MIS instances) that can be selected from any MIS and, crucially, from any country, permitting aggregation and comparison of all projects, based on standard data. It does not include User-defined data from each MIS, because this will differ from MIS to MIS. If the Network Administrator wants to include UDFs from all projects in the Network, they can create their own Network-level UDFs, which will automatically appear in the data entry screens of each project that is in the network. Figure 5 on the following page shows a network of 4 projects in three MIS instances in two countries. While there are 7 projects in total, only 4 are members of the network. Networks of projects 9
The SAVIX MIS Version 2.0 Figure 5: Network example of projects in more than one MIS linked for reporting purposes 1.4 Selecting the right architecture: Things to think about Do not rush it! It is normal practice to spend as much as a day discussing system architecture. This saves a lot of difficulty later on and takes into account an implementing organisation’s plans for the future. If you go right ahead and set up an MIS without discussing architecture in detail, you will spend a lot of time later on fixing and adapting things. In designing an MIS system for your organisation, you should go through the following steps: •Who will run the MIS? First decide which organisation will be running the MIS. It is sometimes the case that International NGOS create a single MIS and then set up individual projects for each partner. This gives the INGO total control and is convenient for the INGO because they do not have to go to the trouble of setting up individual MIS instances and training partner staff in managing it, but this approach prevents the partner from creating additional projects that may not be related to the INGO and may be financed by another donor. Thus, taken as a general rule, it is a good idea for MIS instances to be created at the level of the implementing organisation. •Do you need to use UDFs? Consider whether or not the implementing organisation will be using UDFs. If these are not needed then a single MIS will be fine •Selecting UDFs so that they apply to all projects in an MIS. If you decide that you must have some UDFs, but you don’t want to have separate MISs and a Network, then you must select UDFs that apply equally to all types of projects, and UDF data must be mandatory so as to preserve statistical consistency programme wide. These should be pre-defined before setting up the MIS •Will you need to create a network? If you decide that you must have more than one MIS, because you have projects that are different in type and need different UDFs, you must request VSL Associates to create a Network that will link these projects, but you must also decide what UDFs you will have in your network, which will show up as User-defined data fields in your MIS. Once again, the Network-level UDFs will apply across all projects, but can be different to those selected at the MIS level by the MIS Administrator. In setting up UDFs at the network level it is important to understand that the Network Administrator will not have access to MIS-level UDF data, so it can be the case that the Network Manager asks for the same data from a project as the MIS Administrator. This is 10
The SAVIX MIS Version 2.0 not a problem because, if the exact same data is asked for by the MIS Administrator and the Network Administrator, it will only appear once on the data entry fields •How does geography affect the way in which you will use the MIS? It is important to understand that different people can enter data into the same project at the same time and at different locations, but sometimes a programme will implement a project across a country and will set up sub-offices in different places. In such a case it is a good idea to define a project as a physical location to which Field Officers (Paid project staff who create Savings Groups (SGs) and supervise VAs) regularly report, but the naming of the project includes location. The following table below shows how Plan Tanzania worked with a partner called CODERT to create individual sub projects for each location, so as to be able to compare sub-office performance •Thinking through how you name your MIS and projects. This step is rarely considered when most MIS Administrators set up their first MIS and project, but it is vital if you, and the people you want to inform, are to be able easily to identify and select the projects or clusters of projects that they want to include in reports Figure 6: Credentials sorted by project type In this example, where there were common UDFs, the MIS Administrator was able to select projects by the type of project (such as BoC2), by location; to make comparisons between all BoC2 projects and to aggregate the entire portfolio of their organisation. It will immediately be seen that careful naming of the projects so as to permit appropriate comparisons and aggregations must be thought through at the start. What was missing was information on the implementing organisation itself. This did not matter in this case because CODERT’s partners knew about the projects that were being implemented, but a wider audience could not know that CODERT was the implementing agency. PROFIRA in Uganda thought this through right from the start and took the interests of an external audience into account. Figure 7 Project naming convention used by PROFIRA in Uganda PROFIRA (Project for Financial Inclusion in Rural Areas) worked with 13 different partners and used the naming convention shown in figure 7, (covering a single project). In this case, the starting name was that of the national programme funded by IFAD, followed by an abbreviation for the country, then the geographical location and then the type of Savings Group project. The reason that this is important is that it enables not only the MIS manager immediately to select relevant projects for aggregation and comparison, but it also facilitates Network managers and external audiences that visit the savix.org website to select a project from among a list as of now that covers more than 4,000 projects. 11
The SAVIX MIS Version 2.0 2 2.1 Before an MIS Administrator gets to work an creates the first MIS and first project, information that is necessary to do this at a single sitting needs to be on hand. The list is as follows, using the main headings that appear on each page of the MIS and project setup routines: Setup - The role of the MIS Administrator Information needed to set up an MIS Register new MIS The MIS Administrator must first of all register the name of the MIS on the system and must have the following information available Name of MIS This is the name that will appear on the SAVIX (www.thesavix.org). It is NOT the name of an organisation, but the name an organisation will give to an MIS MIS Username This is the identity used by the MIS Administrator. It must be an email address that is unique to a single MIS and not in use on any other MIS E-mail password This password is not the password for the email itself, but a password that is used in conjunction with the MIS Username to access the MIS. It can be the same as the email password, but is not a requirement Organisation name: This is the name of the Organisation that is running the MIS and creating projects Country settings Organisation name: The name of the organisation that is implementing the project Country: A single country must be selected. An MIS cannot cover projects in more than one country, unless a network is later created Currency: This information is automatically generated when a country is selected. If it is using another currency, then the automatic currency can be over-ridden and an alternative selected. All projects in the MIS must use the same currency Project information An organisation must gather the following information to register the first project (and also any additional projects): Project title: This is the name of a single project in the MIS. If more than one project is created then each will have a unique name Donor: Only one donor can be selected from the list. If your donor is not on the list and you wish to have it added, please contact hugh@vsla.net Facilitating Agency: A Facilitating Agency is an organisation that is implementing Savings Group programmes and projects in more than one country, either directly or through partners. Implementing Organisation: This is the name of the organisation that is directly implementing a Savings Group project and is responsible for all field operations Additional information Project description This should be no more than 500 characters and is entered so that if a project decides to post its results to thesavix.org, visitors to the site can understand the goals and objectives of the project Project other services This refers to non-Savings Group activities, such as agriculture, health, 12
The SAVIX MIS Version 2.0 business management training etc. that are also being implemented by the project Project locale This allows the user to choose between rural, urban or both rural and urban Created by This is the name of the MIS Administrator who sets up the MIS and creates the project on the system Project Users Project administrator This is the user name given to the Project Administrator (as distinct from the MIS Administrator). It is not an email address. For more detail see 2.2 below Password This is the password used by the Project Administrator Data Entry Officer This is the user name given to the Data Entry Officer (as distinct from the Project Administrator). It is not an email address. Password This is the password used by the Data Entry Officer Note: This is covered in more detail in 2.3 below Custom settings Total project cost This is the amount that the project expects to spend, in total, from the day it started to the planned ending in the future. If a project is extended with new funds, this amount should comprise all old funding together with the new funding. It is an important figure, because it enables an implementing organisation to know the cost per member. In the case of projects that implement other activities, the amount should be an estimate of the amount that will be spent solely to implement Savings Group activities Project start date This is the original day in which the project was created. It should not be in the future Project end date This is the date that the project is expected to end. It can be adjusted if there is an extension SAVIX Integration Share data with the SAVIX This allows a project to display its results on the SAVIX website and is updated weekly. New projects should not activate this utility until they have at least a year's results to display Once these data have been entered and the project created, the work of the MIS Administrator is finished for the moment and continued by the Project Administrator. This has to do with managing credentials and entering the names of the Supervisors, Field Officers and VAs who are jointly responsible for field operations. 13
The SAVIX MIS Version 2.0 2.2 2.2.1 Before data can be entered in the system, the names of the Trainers that are involved in the project must be entered, so that when data is entered it can automatically be associated with a Trainer, on a dropdown list of names. Information needed to set up a project in the MIS Trainer names The MIS acknowledges 4 levels of Trainer in the system: • Supervisors (optional) • Field Officers (mandatory) known in short as FOs • Village agents (optional) known in short as VAs • Apprentices (optional) A Supervisor is a project employee who supervises FOs. A Supervisor does not create Savings Groups A Field Officer is a paid project employee who creates Savings Groups, but, over time, identifies, trains and supervises VAs. FO names must be entered. No Savings Group data can be saved without this information A Village Agent is resident in the community and is responsible for creating and supervising Savings Groups until they are independent. Village Agents may be • Paid by the project • Paid by the Savings Group • Unpaid (volunteers) • Payment status is not known An Apprentice is unique to CRS and is a person who starts out being recruited to support a Village Agent, but over time becomes an independent Village Agent Note: The categories of Trainer used here are the default terms used by the SAVIX MIS, but these can be modified to the terms used in any organisation, so long as the functions and relationships remain as they are defined above. See 2.6.3 Configuring Trainer titles, on page 47 for instructions as to how this is done. Entering the names of the Trainers is done at the project level by the Project Administrator after the MIS Administrator has completed the project setup. Normally this is done at the same time as the project is set up, so it is important to have these data at hand. The Project Administrator must have not only the names of all Supervisors, FOs and VAs at hand, but must know who is supervising who. Thus, the first step is to decide which categories of Trainer will be included. Remember, you must include the names of all FOs, but all other categories are optional. You may, for example, decide not to bother with entering the names of VAs, because you mainly hold FOs responsible for field operations and the performance of their VAs. Or you may decide that since there is no formally employed full- time supervisor, because a Project is small, that you will dispense with the name of a Supervisor. The main thing to remember is that the further down the level of Trainers you go, the more names you will have to enter and maintain current. As a result, many programmes decide only to enter the names of Supervisors and FOs. Whatever you decide, think it through in terms of the level of effort and the value added (or lost). Once you have made your choice, create a table that starts at the highest level that you have selected and indicate the names of people in categories below, linked to the name above. Thus, for a standard programme you would start by listing the names of the Supervisor(s), then the names of the FOs who are supervised by each Supervisor, then the names of each VAs supervised by each FO. Figure 8 shows the organisation structure of a small start-up Project. 14
The SAVIX MIS Version 2.0 Figure 8: Organisational structure showing the relationships between Supervisors, Field Officers and Group paid Village Agents 15
The SAVIX MIS Version 2.0 2.3 Creating and managing credentials Credentials are the user names and passwords that allow authorised users to access the system and must be agreed and written down before an MIS and any of its projects are created. In the SAVIX MIS there are three levels of credentialed users: The MIS Administrator. The user name of the MIS Administrator must be a unique email address that is not in use on any other MIS or network. The MIS Administrator can change the credentials of the Project Administrator and the Data Entry Officer The Project Administrator. The user name and password of the Project Administrator can be chosen by the Project Administrator or the MIS Administrator. No email address is needed. It is important that the credentials of the Project Administrator are different to those of all other Project Administrators and all other Data-entry Officers. The Project Administrator can change the user name and password of the DEO(s) in a project but does not have access to the MIS Administrator’s credentials. The Project Administrator can change their own password but not their user name The Data Entry Officer. Like the Project Administrator, the DEO can use any unique user name and password combination that they wish. Figure 9 below is an example of a set of credentials used by a partner of Plan in Tanzania. Figure 9: CODERT table of credentials When a project is set up, the MIS Administrator should sit with the Project Administrator and agree on credentials for the Project Administrator and the Data Entry Officer. These should not be changed without the agreement of the Project Administrator. When this step is completed, the MIS Administrator is ready to set up the MIS and register the first project.1 1 The actual credentials have been changed, but are based on the originals. 16
The SAVIX MIS Version 2.0 2.4 Registering an MIS 2.4.1 Example of information already gathered Step 1: Make sure you have your MIS setup information at hand, including what you need to set up the project as the MIS Administrator. In the case of the example used in this manual see below. MIS setup Register new MIS Name of MIS MIS Username E-mail password Maendeleo VSLA MIS Maendeleovsla@gmail.com Progressvsla Country settings Organisation name: Country: Currency: Maendeleo Tanzania Tanzania TZS Project setup Project information Project name: Donor: Facilitating Agency: Implementing Agency: Maendeleo VSLA Hanang DfID Plan International Maendeleo Tanzania Additional information Project description This is a fictitious test project for the purpose of illustrating setup, data entry and reporting for a new MIS and first project Project other services None Project locale Rural and urban Created by Bakari Murusuri Project Users Project administrator Murusuri1986 Password Data Entry Officer Password (Confidential)2 Lekuton (Confidential) Custom settings Total project cost Project start date Project end date TZS 350,500,000 01-07-2018 31-06-21 SAVIX Integration Share data with SAVIX No 2 be accessible without permission from VSL Associates,) The passwords are confidential because this MIS is being used for training purposes and cannot 17
The SAVIX MIS Version 2.0 2.4.2 Home screen and selecting MIS Registration Figure 10: Opening the home screen, setting the language and switching to MIS registration screen 1 2 3 Step 1: Go to the SAVIX MIS website at mis.thesavix.org Step 2: Click on language, in this case, English, which is the default language Step 3: Click on Register MIS This will take you to an information screen that explains the role of the MIS Administrator and the Project Administrator and their likely different geographical locations. Once you have read this message (not displayed here), press ‘Next’ to go to the main setup screen. 18
The SAVIX MIS Version 2.0 2.4.3 This page allows the MIS Administrator to enter their credentials. Note: the credentials for the MIS Administrator must be an email address. This email address must not be an address that is in use in another MIS or network Initial registration of an MIS Figure 11: Entering MIS Administrator credentials 1 2 3 3 4 Step 1: Enter the name of the MIS that is selected by the MIS Administrator. Step 2: Enter the user name, which is the unique email address Step 3: Enter and confirm your password Step 4: Click ‘Register.’ This will tell you that you must go to the email address that you have created in order to initiate the registration process 19
The SAVIX MIS Version 2.0 Figure 12: Next step advice message to go to Email. Step 5: The MIS Administrator closes down the MIS and then goes to the email address listed and open up the message received from support@vsla.eu, which appears as the message from the VSLA server as shown in Figure 13 Figure 13: Email response from server and activation 6 Step 6: The MIS Administrator clicks on the second (longer) URL, which will automatically verify that the account has been created Note: At this point only, the name and credentials are registered on the system and the MIS Administrator must now begin entering information that is needed to finalise the MIS setup and then to create a first project. A message appears as shown in Figure 14, informing the MIS Administrator that the MIS is now registered and that if there is an interruption in network access while the MIS Administrator proceeds to complete the MIS setup and create a first project, they can log back in, using the same credentials and will be able to continue where they left off. 20
The SAVIX MIS Version 2.0 Figure 14: Account setup verification message At this point the MIS Administrator can choose to continue and create a new project, or close the system. Normally the MIS Administrator clicks on the blue ‘Proceed to Login’ button to complete the initial MIS setup and then move on to creating a first project. 21
The SAVIX MIS Version 2.0 Figure 15: Country settings 1 2 3 When this page opens, there are 8 screens to navigate. The first of these are MIS-level data and relate to country location and currency The MIS Administrator must enter the name of the organisation that will be operating the MIS - in this case Maendeleo Tanzania (1). It also asks for the name of the country (2). Once the country name is selected from a dropdown list the currency of the country is automatically selected (3). Some countries do not have a national currency but use third-country currencies such as the $US or the Rand. In this case, the MIS Administrator selects the international currency, but must remember that all projects in the MIS must use the same currency. If different international currencies are used in different parts of the country (Zimbabwe uses at least 3) then a new MIS must be created for each currency. Once the data is entered the MIS Administrator clicks on ‘Next’ and is taken to a general explanation screen. Once this is read, the basic MIS setup is completed and the MIS Administrator moves on to creating the first project, usually in cooperation with partner personnel. 22
The SAVIX MIS Version 2.0 2.5 Creating the first project 2.5.1 Project information Figure 16: Mostly optional project information This page asks for biographical project information covering the project name, the name of the Donor, the name of the Facilitating Agency and the name of the Implementing agency. The MIS Administrator gives a name to the project (1). In this example, the project is a VSL project that operates in Hanang District of Arusha Region (Maendeleo VSLA Hanang). It is Funded by the EU (2) and the money is being provided through Plan International (3) which, in this case, is the INGO that is providing training services. The implementing agency is Maendeleo Tanzania (4), which is the national organisation that is supervising the Hanang project. Once this information is entered the MIS Administrator presses the blue ‘Next’ button. 1 2 3 4 23
The SAVIX MIS Version 2.0 2.5.2 Additional information Figure 17: Optional additional information 1 2 3 4 These data are editable at a later stage on the project Configuration screens, accessible to both the MIS Administrator and the Project Administrator The project description (1) is normally filed out to describe a project’s target group and the geographical location of the project. It also includes targets in terms of the number of groups to be created; the number of members by the end of the project and gender composition • Other services (2) describe other activities, such as agriculture, health and small business promotion that may also be a part of the project, • Project locale (3) s simply a choice between urban, rural or urban and rural • Data entered here does not form part of the filters used in the database but are purely descriptive. • Created by (4) is normally the name of the MIS Administrator 24
The SAVIX MIS Version 2.0 2.5.3 These are people who have access to the system, as decided by the MIS Administrator. The MIS Administrator enters the user name for the project Administrator and, if needed, for the Data Entry Officer. These are not email addresses but can be anything that the PA and DEO decide. Project Users Figure 18: Credentials for project Users 25
The SAVIX MIS Version 2.0 2.5.4 Custom settings Figure 19: Total project costs, start date and end date This is an important page. By entering project costs (1) and the start date (and end dates, we can estimate how much a project has spent. By dividing this sum by the number of members, we arrive at an estimated Cost-per-Member figure. Many projects do not enter cost data, because their Savings Group activities are only one of many activities, but it is worth taking the trouble to roughly calculate how much a project spends on creating Savings Groups, because it is only necessary to calculate this once, or when a project receives extra funding or is extended. If you do not know what you are spending per member you cannot evaluate your operational efficiency 1 2 26
The SAVIX MIS Version 2.0 2.5.5 SAVIX Integration Figure 20: Posting project results to the SAVIX website 1 The SAVIX website (www.thesavix.org) allows users of the SAVIX MIS to post their results in the public domain. It only accepts standard data and does not report on any user-defined data. With the creation of the SAVIX MIS, posting is now fully automatic and all that is needed is for the ‘Yes’ radio button to be activated. It is normally not the case that a new project posts data to the SAVIX. Normally at least 6 months should pass, during which time the MIS Administrator and project Administrator scrutinise and clean data before entry and a project can reach a scale at which its results will be of interest to a wider audience. If the ‘Yes’ radio button is activated the results will appear after the following weekend on the SAVIX, since updates take place on a Saturday morning through to Sunday. If the ‘No’ radio button (1) is activated the data will disappear from the SAVIX after the next weekend. 27
The SAVIX MIS Version 2.0 2.5.6 Setup completion and confirmation of settings Figure 21: Summary of basic setup choices The final setup screen (8) is a summary of all of the choices made so far. 1 1 The two items in blue (Country and Currency [1]) cannot be changed, but all other choices can be changed by the MIS Administrator or the Project Administrator on the project Configuration screens. Once the MIS Administrator has finalised their choices, they press the blue ‘Save’ button to the top- right and this completes the basic setup steps that must be carried out by the MIS Administrator 28
The SAVIX MIS Version 2.0 2.5.7 When this step is completed the following screen appears, showing the name of the project just created, the budgeted cost, the start and ending dates and whether or not the project shares its data with the SAVIX. Appearance of project list Figure 22: First project showing on project list The MIS Administrator is able to create additional projects by clicking on the blue ‘Add Project’ button (1). This will open up the project setup screens at part 1 of 8 and a new project can be created. Figure 23 shows a list of projects that appear on this screen for a project in Nigeria 1 Figure 23: Project Configuration screen for Oxfam Nigeria showing 9 projects in a single MIS, 7 of which are posted to the SAVIX Note: Oxfam Nigeria uses a common set of UDFs, so that it can work with a single MIS. 29
The SAVIX MIS Version 2.0 2.6 2.6.1 The SAVIX MIS requires that users collect a minimum set of data. These are mandatory and are as follows: MIS Configuration Standard, mandatory data - Definitions • Static data (Data that never changes once it has been collected) • Savings Group name • The name of the person who first trained the Savings Group • The number of members when the Savings Group was created • Cycle data (data that is collected at the start of each – usually annual - cycle) • Cycle number • The date that savings started during the current cycle • Whether the group was supervised by a Trainer or was self-managed and independent • The name of the person who is monitoring the group • The number of members at the start of the cycle • The purchase price of any property owned by the group at the start of the current cycle • Standard data (Data that is collected at every meeting). • The date that data was collected • The number of members in the group at the time of the visit • The number of female members • The number of members who attended the meeting • The number of dropouts since the start of the cycle • The total value of savings this cycle • The value of loans outstanding • The number of loans outstanding • The cumulative value of loans written off this cycle • Cash in the Loan fund in the group’s box • Cash at bank • Cash in the Social Fund bag • The purchase price of any property owned by the group at the time of the visit • Debts owed by the group • The cumulative value of any dividends paid so far during this cycle • Whether or not (Yes/No) if the meeting at which the data is collected is an end-of-cycle share-out meeting All users of the SAVIX MIS must collect these data from every Savings Group, on average about once every quarter (not monthly). 2.6.2 Many projects, however, want to know a lot more about the Savings Group. They may, for example, want to know how many members are widows, or how many of the female members are heads of households. Or how many members are running an enterprise, or own a mobile ‘phone, etc. User-defined Fields (UDFs) The SAVIX MIS allows the user to create group-level User Defined Fields (UDFs), not only at setup but at any time in the future. These fall in to two categories as shown in Figure 24 on the following page. These UDFs fall into two categories: • Standard-defined fields. These are fields that have been pre-created on the system (because they are quite commonly used by many institutions) and can be selected already formatted and within their own pre-determined categories. • User-created fields. These are fields that are created and formatted by the MIS Administrator, usually after a long discussion with FOs and can be clustered into user- created categories. They are usually created when SDFs do not meet the need. 30
The SAVIX MIS Version 2.0 Figure 24: Group-level User-defined fields Deciding whether or not to create UDFs, and, if so, which ones, is an important decision with major implications. The MIS Administrator must remember that all UDFs, whether standard or created by the user will appear in the data fields of all projects in an MIS (see Figure 4, page 9). Thus, if an MIS Administrator or an organisation’s management decides that all UDFs that are chosen or created must apply to all projects within an MIS, they must be generic and apply to all projects. If, however, UDFs are chosen that only apply to a sub-set of the projects in an MIS, this could lead to problems. For example, if some UDFs relate to agriculture, but there are health projects in the organisation’s MIS, they are likely not to be answered by the staff in the health project, invalidating the totals and averages relating to agricultural issues (and vice versa). If this happens then an organisation must create a new MIS, with different UDFs and must then create a network to link them, in order to aggregate programme-wide results. This is illustrated by Figure 3, page 8. Please also bear in mind the old saying that ‘Less is more.’ There is a natural tendency for users of the system to create a very large number of UDFs (particularly SDFs), forgetting that this can be very time consuming for the FO who collects the data and the Data Entry Officer who must not only key in the data but produce reports. Programmes should start out being guided by the simple principle of selecting UDFs based on what it is essential for a programme to know and to be sure how these data will be analysed and findings applied. We do not recommend that a programme should collect more than a combined total of 15 SDFs and UCFs. Remember, the MIS is a management tool, not a generalised research tool 2.6.2 The MIS Administrator clicks on the ‘MIS Configuration tab (Figure 25 on the following page). This displays the setup system for Group UDFs, under which are sub-tabs for User-created fields (UCFs) and for Standard data fields (SDFs). The MIS Administrator starts out by working with SDFs, because the number that can be selected is unlimited and because it is simpler to select SDFs rather than create UCFs. Selecting Standard data fields (SDFs) The MIS Administrator then clicks on the blue ‘Manage Standard Data Fields’ button (1), on Figure 25 and a new set of tabs appear in Figure 26, showing the categories (2) under which SDFs are organised. These are: • Education and training • FI interactions (Financial Institution Interactions) • Group details • Income-generating Activities • Members 31
The SAVIX MIS Version 2.0 Figure 25: Configuration – Group UDFs 1 Figure 26: Group SDF categories 2 32
The SAVIX MIS Version 2.0 The SDF choices available in each category are as follows: • Education and Training • Recvd. SPM training • Recvd. fin. ed. education training • Recvd. gender training • Recvd. child rights training • Recvd. MCHN training • No. of mbrs. who recvd. SPM training • No. of mbrs. who recvd. financial education • No. of mbrs. with impr. agric. practices training • No. of mbrs. who recvd. gender education • No. of youth mbrs. who recvd. MCHN training • No. of spouses who participated in gender training • FI Interactions • Distance to partner FSP branch • Distance to partner FSP agent (inc. MNOs) • Distance to non-partner FSP agent (inc. MNOs) • SG has acct. at partner FSP • Date of opening acct. at partner FSP • Dormancy of accounts • SG has acct. at non-partner FSP • Date of opening acct. at non-partner FSP • Group has taken FSP loan • No. of SG loans taken from FSP • Value of SG loan outstanding • Value of all SG payments on current loan • No. mbrs. with savings acct. in a bank • No. mbrs. with a loan from a bank • No. mbr. bank accts. that are active • Is SG using mobile money for group transactions • No. of SG mobile money transactions last 3 months • No. of SG mbrs. with mobile money accts. • No. of mbrs. using mobile money services • Group details • Name of community/village • Parish/Locationj • Sub-county • District • Group tel. no. •Chairperson’s name •Chairperson’s gender • Chairperson’s tel. no. •Secretary’s name •Secretary’s tel. no. • Meeting frequency • Meeting day • Meeting time • Record-keeping method • Share-out target date • Revise constitution date • No. of females in leadership in SG • No. of females in leadership outside SG 33
The SAVIX MIS Version 2.0 • No. of females who have left the SG • No. of new SGs started by SG • No. of new SGs started by SG mbr. • Share value • Loan interest rate •Secretary’s gender • Income Generating Activities • No. of mbrs. who run an enterprise • No. of mbr. enterprises older than 6 months • No. of females who run an enterprise • No. of mbr. enterprises with paid employees • No. of paid employees in mbr. enterprises • No. of mbrs. with retail business • No. of mbrs. with manufacturing business • No. of mbrs. with transport business • No. of mbrs. in ag. and livestock business • No. of mbrs. in service business • No. of enterprises run by SG • No. of SG enterprises > 6 months old • No. of paid employees at SG enterprise • Members • Youth mbrs. (all) • Youth mbrs. (female) • No. of males <15 • No of females <15 • No. of males 15-20 • No of females 15-20 • No. of males 21-24 • No of females 21-24 • No. of males 25-35 • No of females 25-35 • No. of males >35 • No of females >35 In total there are 78 possible Group SDFs, so be careful not to select an excessive number. Once the user has decided upon the categories of SDF and the SDFs themselves, these should be written down, to make sure the SDFs are relevant and essential. Once this is done and the SDFs finalised, the user selects a category and then selects SDFs one by one. Figure 27 below shows what this might look like for ‘Group Details.’ Remember that someone has to collect these data on a regular basis, so make sure that the data is really important and will definitely be needed for a well-defined reporting or learning purpose that is the specific responsibility of an identified person. Just selecting SDFs because they seem like a good idea and may turn out to be useful later on is exactly the wrong reason for selecting them. In the example that follows we show how an MIS Administrator selects 4 SDF ‘Group Details’. Figure 27 shows the screen as it appears after 3 items have been selected, which automatically show above the bold horizonal line. The blue line shows the next metric to be selected, which will be the fourth and final Group Detail metric 34
The SAVIX MIS Version 2.0 Figure 27: Selecting ‘Group Details’ SDFs 2 1 When the ‘Sub-county’ metric is selected, the line on which it appears turns blue (1), and the MIS Administrator presses the ‘Add to my List’ button (2). Also note that the MIS Administrator has selected two metrics to be mandatory, leaving two optional. Figure 28: Selected SDF transferred to the selection list above the bold black line 3 35
The SAVIX MIS Version 2.0 After the new metric is selected, the ‘Add to my list’ button changes to ‘Remove from my list’ (3) when the user clicks on an already selected metric. When all of the metrics in each section have been selected, the MIS Administrator presses the blue ‘Save’ button on the top right hand side of the table, which will return the user to the main SDF page. This will now show up as a saved selection on the main SDF setup page. The MIS Administrator then moves on to other categories, as agreed with their team and selects other metrics. In Figure 29 a final selection of 11 metrics across three categories (FI Interactions, Group Details and Income generating activities) is shown. Figure 29: Selected SDFs shown on SDF setup page, by category The sequencing of the metrics is sorted alphabetically, by category, and the type of data is listed, in this case as Radio button, Text field or as a Number. This is fixed and cannot be changed. The ‘Mandatory’ column shows that 8 SDFs are mandatory while 3 are optional. Note: A dataset cannot be saved if mandatory UDF information (both SDFs and UCFs) is not filled in. Where no data is available, use ‘N/A’ for text- formatted fields and ‘0’ for number formatted fields. 36
The SAVIX MIS Version 2.0 2.6.3 Creating UCFs is more complicated than creating SDFs, because an SDF is already sorted into a pre-defined category, pre-formatted and already translated into 4 other languages. When UCFs are created it must be understood that the maximum number of UCFs that can be created is 20, so careful thought should go in to their selection. In creating the UCFs, the MIS Administrator does the following: Creating User-created fields (UCFs) • Creates categories • Creates the UCFs • Formats the UCFs. The first thing that organisations must do is to discuss which UCFs they want to create and then decide what categories should be applied. For example, three possible UCFs might be No. of widows, No. of members who are female heads of household and No. of disabled members. These might be clustered together under a category called ‘Vulnerability,’ or it might be that the MIS Administrator clusters the first two under a Gender category and the No. of disabled members under a Vulnerability category. The main point is that while the first step is to identify UCFs that are important to the programme, the second step is to sort them into categories, because categories have to be created before UCFs, so that UCFs can be allocated to categories. Figure 30 below shows an example of a programme in Tanzania, where 7 UCFs were selected and sorted into 3 categories Figure 30: UCF schematic showing 3 main categories and 7 UCFs. Once this logic and schematic are agreed, the MIS Administrator starts to create categories. This is done by clicking on the ‘Manage Categories tab and then clicking on the blue ‘Manage Categories button (see Figure 31), which will open up the ‘Manage User-defined Categories’’ screen. (Figure 32). 37
The SAVIX MIS Version 2.0 Figure 31: Opening up the UCF category creation utility 1 Figure 32: Creating first category 3 2 In the case of our example the MIS Administrator enters ‘Gender’ (2) (or the first category created by the programme), then clicks on the blue ‘Add’ button (3), then saves the selection. The MIS Administrator then continues and creates two other categories used in this example as shown in Figure 33 - Group Quality, then Vulnerability. 38
The SAVIX MIS Version 2.0 Figure 33: All three categories entered When the MIS Administrator has finished entering all categories (1) they click on the blue ‘Save’ button (2). This takes them back to the main UCF creation screen and the MIS Administrator clicks on the ‘Create UCF’ button (3). 2 1 Figure 34: Main UCF screen to create UCFs 3 39
The SAVIX MIS Version 2.0 The MIS administrator then creates each UCF and links them to their correct category. Figure 35 shows the first UCF being created. Figure 35: First UCF entered – minimum setup The screen shows 4 entries: • Name of the field. In this case the user has created ‘No. of mbrs. who are FHH. Th reason for abbreviation is to keep the phrases shirt so that when they appear in reports, the column widths are as narrow as possible • Description. This is rarely needed, except when a new Data Entry Officer or Project Administrator needs to be reminded of the meaning of the name of the field, where there may be some uncertainty. In this case the full phrase is written which clarifies that FHH means ‘Female heads of household’ 40
The SAVIX MIS Version 2.0 • Category. The MIS Administrator clicks on the dropdown list and the UCF categories already created appear. The MIS Administrator then clicks on the appropriate category (in this case Gender) Figure 36: Selecting a category for the UCF • Data type. There are 7 choices shown in the data type dropdown. Figure 37: Selecting a data type Mostly these are self-explanatory, but the following should be understood • Drop down. This allows the user to create a drop-down list from which a single choice can be made. The user must set up the choices •Number. Be careful here. Do not use ‘Number’ for telephone numbers, because this will format the numbers with the chosen national numbering convention (commas, periods or spaces). If telephone numbers are to be entered then choose ‘Text.’ Note: When ‘Number’ is selected the data entered will appear as a selectable choice in all comparison reports (Trainer, Group and Project). • Radio button. This usually allows the user to set up binary choices such as ‘Yes’ and ‘No’ or a specific number • Multi-select. This allows multiple selections to be made. • Text. Self-explanatory. Note: When ‘Text’ is selected the data only appears in Group comparison reports. So, for example, the name of the Chairperson would appear Group by Group but not at the level of a Trainer comparison or Project comparison report 41
The SAVIX MIS Version 2.0 Figure 38: Finalising the UCF screen 1 2 3 4 After the first 4 choices the MIS Administrator must decide if the data needs decimalisation or not. In this case, since the data refers to the number of members, it is left at zero (its default value (1)). The MIS Administrator then decides if the data must be collected (mandatory) or if it is optional. In the case shown below the MIS Administrator has decided that it must be mandatory (2) If ‘Mandatory’ is selected a new field opens up, which asks what value must be given to pre- existing records. What this refers to is a situation in which the UCF is added, after some time in which many records have already been entered. It is necessary that something appears in these records for when reports are created, so the MIS Administrator enters a number. Note: This is only needed when a new UCF is being created after data already exists. In this case a zero is entered ‘Validation’ is rarely used (3). It allows the user to set up parameters, (i.e. upper and lower limits) between which the data must fall, or be queried (Warning) or rejected (Error). In this case the validation is not activated, because it is not possible to know what will be the maximum number of members who are Female heads of household in all groups. ‘Keep data in field’ (4) means that by default, once the data has been entered, it will remain in the data field the next time the group dataset is opened. The prevents the necessity for the same data to be collected time after time. For example, if data on ‘Group quality at end phase 1’ is entered, it will never change and should not need re-entry. In the case of the UCFs for the project we have been creating, once completed the UCFs appear under the UDF sub-category as seen in Figure 39 on the following page. 42
The SAVIX MIS Version 2.0 Figure 39: UCFs appearing under the User-defined field tab, above the list of selected SDFs Once the UCFs and SDFs are finalised, the MIS Administrator can edit them at any time simply by clicking on any given UCF or SDF as below (1). When this is done, the buttons that control the editing process appear on the left hand at the top of the selected list (2). Figure 40: Editing utility activated 3 2 1 43
The SAVIX MIS Version 2.0 2.6.4 Ordering categories and UCFs Categories and UCFs normally appear in alphabetical order on the data entry screens. Most projects prefer to ask the questions in the UCFs in an order that is logical, rather than alphabetical. The system allows the user to set the order in which categories and UCFs appear. The MIS Administrator starts by arranging the categories in a logical order. It will be seen that we created the categories on the following order: Gender, Group Quality and finally Vulnerability. In this example the MIS Administrator decides that they would prefer to start with Vulnerability, then Gender, then Group Quality. The MIS Administrator starts by clicking on the ‘Manage Categories’ button (3 on previous page). The table shown in Figure 41 appears. Figure 41: Table allowing user to order categories and UCFs 1 2 When this table appears, the MIS Administrator clicks on a category (in this case Vulnerability (1), clicks on ‘Up’ twice (2) and the order changes as follows, with ‘Vulnerability now appearing at the top (3) Figure 42: Re-ordered categories 3 44
The SAVIX MIS Version 2.0 Similarly, the MIS Administrator can re-order the UCFs by clicking on a UCF within a category and moving it up or down. In the case below the MIS Administrator has changed the order of the UCFs under ‘Vulnerability’ by moving the UCF ‘No.of mbrs. with orphans’ from the bottom to the top (1). Note: This is now the entire sequence with which the categories and UCFs will appear on the data entry fields. Figure 43: Re-ordered UCFs 1 2.7 2.7.1 The final step to be taken by the MIS Administrator in setting up an MIS is to consider what User-created fields will apply to the Trainers. The basic information called for by the system is to know the following, at each level of Trainer (Supervisor, FO, VA or Apprentice): • Name • Gender • Name of the Supervisor MIS Configuration - Creating Trainer/Supervisor User-created fields Purpose The programme may also call for additional information on a Trainer/Supervisor, such as telephone number, Identity card number, village of residence etc. In the case of the example in this manual we show how a field is added so that the telephone number of the Trainer can be added. 2.7.2 The MIS Administrator now moves from the ‘Group UDF’ sub-heading to the ‘Trainer/Supervisor UCF’ heading as shown in Figure 44. The MIS Administrator then clicks on the ‘Create Trainer/Supervisor UCF’ blue buttonand the ‘Add Trainer/Supervisor User-created field’ screen appears, as in Figure 45. Creating fields 45
The SAVIX MIS Version 2.0 Figure 44: Starting to create a Trainer/Supervisor UCF Figure 45: Creating ‘Telephone number’ as a Trainer/Supervisor UCF In this case the Trainer/Supervisor SDF ‘Telephone Number’ is selected (1). The MIS Administrator then selects the types of Trainer from whom these data are required (FO and VA) (2). The type of data is text (3) (because telephone numbers may have a + symbol and spaces, while number formats will automatically fill in commas and fixed spaces, depending on the numbering convention). In this case the field is not mandatory because it might be the case that an FO (or, more likely, a VA) does not own a telephone. 1 2 Once the UCF is created it will show up the ‘Name of Field’ list as shown in Figure 46 (1). Here the MIS Administrator has added another Trainer/Supervisor UCF to identify the village or town where the Trainer is resident. 3 46
The SAVIX MIS Version 2.0 Figure 46: Trainer/Supervisor UCFs created 1 The items can be ordered in the same way as other UCFs are ordered and may be edited by clicking on any item in the ‘Name of Field’ list (2) Figure 47: Editing Trainer/Supervisor UCFs 2 47
The SAVIX MIS Version 2.0 2.7.3 The following two sub-tabs (MIS Management and User Management) are dealt with later as administrative issues. The next item, Trainer configuration allows the user to substitute standard terminology used for the different types of Trainer for those used in their own programme. Configuring Trainer titles Figure 48: Customising Trainer types The MIS Administrator substitutes the titles that are used in their own programme and can eliminate as many as three different categories of VAs. Figure 49 shows changes made by the MIS Administrator, calling the Group paid Agent a Group paid Village Agent. 48
The SAVIX MIS Version 2.0 Figure 49: Configuration of Trainer labels and selection of those used for Village Agents 1 1 1 2 This tables shows that the MIS Administrator has clicked on the ‘Hide label’ blue button next to 3a. Unpaid Agent, 3b. Agent unknown if paid and 3c. Project paid Agents (1), which will not now show up as choices on the data entry fields. When this is done, the blue labels text changes to ‘Show Label’ (1), which allows the MIS Administrator to reverse these decisions. This leaves only Group paid Agents active, which the MIS Administrator has changed to ‘Group paid Village Agent’ (2). These will be the only type of VA that will be selectable, and will show with the new name. The MIS Administrator then presses the blue ‘Save’ button to preserve these changes. Once this is done the MIS Administrator has completed the basic setup process and hands over the remainder of the setup process to the Project Administrator. This is because this calls for detailed knowledge of the personnel employed by the project, which the MIS Administrator (who may be located on the other side of the country) may not have at hand. 49
The SAVIX MIS Version 2.0 3 Setup - The role of the Project Administrator 3.1 3.1.1 The last step in creating an MIS is to enter the names of the Trainers that work in the project. As noted earlier, these comprise the following: Creating a table of Trainers General • Supervisors who supervise • Field Officers, who supervise • Village Agents (of various types) who supervise • Apprentices (only used by CRS) In the case of our example, we include only the following: • Supervisors • Field Officers • Group paid Village Agents The organogram displayed in Figure 8, page 15 shows that there are two Supervisors, 6 FOs and 7 Group paid Village Agents working under 3 FOs. In setting up the table of Trainers it is important to show the linkages between Supervisors, Field Officers and Village Agents – and who is supervising whom. 3.1.2 Opening the project for the first time and accessing the table of Trainers Using this chart, the Project Administrator of the Maendeleo VSLA Hanang Project first opens up the project for the first time. They select the language (English in this case) (1) and open the project using the credentials below as shown in Figure 50 on the following page: • MIS name: • Project Administrator user name: • Password: Maendeleo VSLA MIS Bakari1986 (confidential) 50