Download
1 / 11
110 likes | 157 Views
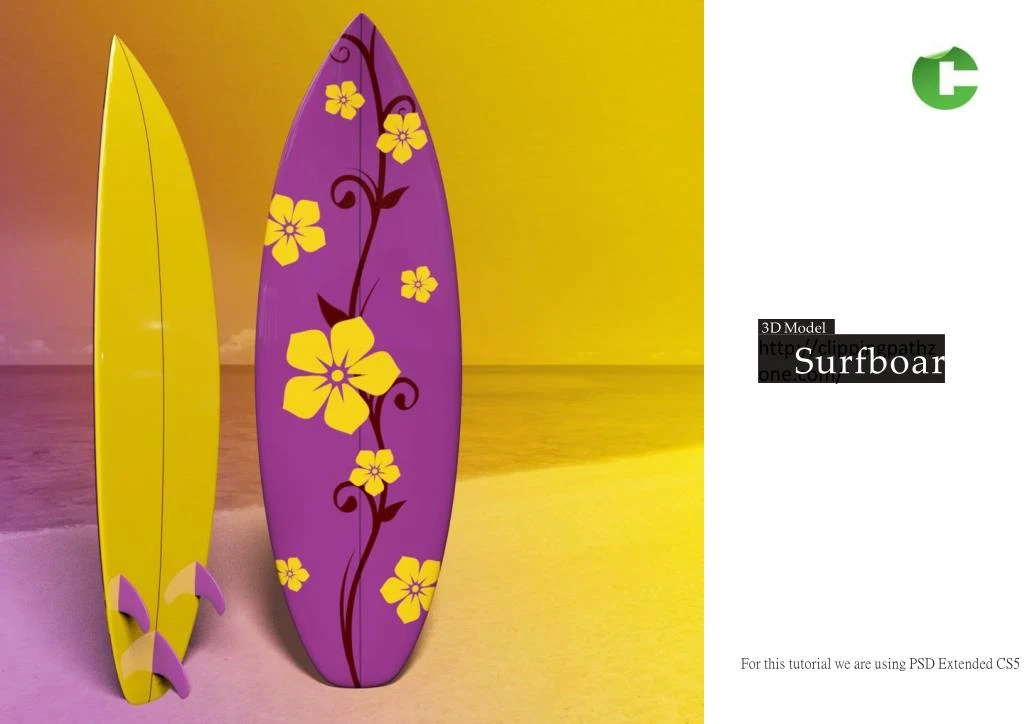
1. http://clippingpathzone.com/ 3D Model Surfboard For this tutorial we are using PSD Extended CS5<br>2. 01 Files in this set READY TO USE Finished Scenes Empty Scenes Surfboard image placeholder Rudders image placeholder Top Bottom<br>3. 02 Change render quality tointeractive After you opened one of the model samples check the 3D scene panel, to change render settings, set Quality to interactive(Painting) before starting the customizing process. Follow the pink dots, fromtop to bottom. before after<br>4. 03 Loading a new surfboarddesign Go to the 3D materials window, click on board then DIFFUSE (click in the texture icon) then OPEN TEXTURE, replace the image placeholder by yours. Clipping Path<br>5. 04 New design Replace this layer (01) by yours, close and save, repeat the same process for the rudders. 01 topview bottom view<br>6. 05 Using Ground Plane If you want to render this scene with shadows in a background transparent, make sure you have activated Ground Plane Shadow Catcher (02), can also connected the surf board to the floor by 01 02 03 PHOTOSHOP IMAGE RETOUCH<br>7. 06 Render After concluding the customizing process, you need to render theftnal picture, where you can see the soft shadows, reflections... To do that you mustgo to 3D scene to change render settings, change Quality to Ray traced Final, follow the pink dots, from top to bottom and let the computerrender the scene. 01 03 02<br>8. 07 Customizing your scene - 3D tools (Please check the QUICK TOUR tutorial) If this tool is not visible check here (03) 3DAXIS If you don’t want the standard view, you can rotate the model to ftnd the perfect angle foryour scene. Make sure to desactivatedftrst the Ground Plane Shadow Catcher discuss in chapter 05 01 Be sure to pick the model layer, before starting using the 3D tools, then select in the TOOL BOX the 3D tool you need(01). (3D axis tool interfaceto rotate (02), scale...and more. 03 02<br>9. 06 Customizing your scene - 3D lights (Please check the QUICK TOUR tutorial) If you need tolighten any dark part of themodel, change light intensity or change the lightcolor (1) Lights window (2) Pick the light you need to customize (3) Light intensity (4) Light color (5) Light control (05A) show 3D light in the scene (05B) Lightrotation (05C) Light rotationtool 01 02 03 04 05A 05B 05C<br>10. 07 Render the ftnal picture After concluding the customizingprocess, you need to render the ftnal picture, where you can see the soft shadows, reflections... To do that you mustgo to 3D scene to change render settings, change Quality to Ray traced Final, follow the pink dots, from top to bottom and let the computerrender the scene.<br>11. For any questions you can use the photoshop help or contact me through my email -info@clippingpathzone.com Photo Masking

E N D
Surfboard 3DModel http://clippingpathzone.com/ ForthistutorialweareusingPSDExtendedCS5
01 Files in thisset READYTO USE Surfboard image placeholder Finished Scenes Empty Scenes Top Bottom Rudders image placeholder
02 Change render quality tointeractive Afteryouopenedoneofthemodelsamplescheckthe3Dscenepanel, to change render settings, set Quality to interactive(Painting) before starting the customizingprocess. Follow the pink dots, fromtop to bottom. before after
03 Clipping Path Loading a new surfboarddesign Go to the 3D materials window, click onboard thenDIFFUSE(clickinthetextureicon) thenOPENTEXTURE,replacetheimageplaceholderbyyours.
04 Newdesign Replacethislayer (01) byyours,closeandsave,repeatthesameprocessfortherudders. 01 topview bottomview
05 Using GroundPlane If you want to render this scene with shadows in a background transparent, make sure you have activated Ground Plane Shadow Catcher (02), can also connected the surf board to the floor by clickinginSnapObjecttoGround Plane(03) 01 02 03 PHOTOSHOP IMAGE RETOUCH
06 Render After concluding the customizing process, you need to render theftnal picture, where you can see the soft shadows,reflections... To do that you mustgo to 3D scene to change render settings, changeQuality to Ray traced Final, follow the pink dots, from top to bottom and let the computerrender thescene. 01 02 03
07 Customizing your scene - 3Dtools (PleasechecktheQUICKTOURtutorial) If you don’t want the standard view, you can rotate the model to ftnd the perfect angle foryour scene. Make sure to desactivatedftrst the Ground Plane Shadow Catcherdiscussinchapter05 01 Besuretopickthemodellayer, beforestartingusingthe3Dtools, thenselectintheTOOLBOX the 3D tool you need(01). (3D axis tool interfaceto rotate (02), scale...andmore. Ifthistoolisnotvisiblecheck here (03) 3DAXIS 02 03
06 Customizing your scene - 3Dlights (PleasechecktheQUICKTOURtutorial) If you need tolighten any dark part of themodel, change lightintensity or change the lightcolor 05B 01 02 Lightswindow Pickthelightyouneedtocustomize Lightintensity Lightcolor Lightcontrol (05A)show3Dlightinthescene (05B) Lightrotation (05C) Light rotationtool 03 04 05C 05A
07 Render the ftnalpicture After concluding the customizingprocess, you need to render the ftnal picture, where you can see the soft shadows, reflections... To do that you mustgo to 3D scene to change render settings, changeQuality to Ray traced Final, follow the pink dots, from top to bottom and let the computerrender thescene.
Photo Masking Foranyquestionsyoucanusethephotoshophelp orcontactmethroughmyemail-info@clippingpathzone.com


![Step by Step Dropshipping Business with Shopify [Tutorial]](https://cdn4.slideserve.com/8255389/are-you-planning-to-start-up-your-online-store-dt.jpg)