Download

1 / 64
640 likes | 824 Views
Management Information Systems Introduction to MS Excel Presented by: Imdadullah, Lecturer CBA, KSU http://faculty.ksu.edu.sa/imdad. Excel.

E N D
Management Information Systems Introduction to MS Excel Presented by: Imdadullah, Lecturer CBA, KSU http://faculty.ksu.edu.sa/imdad By: Imdadullah, Lecturer Department of MIS, CBA, KSU
Excel A spreadsheet is a computer application that simulates a paper worksheet. It displays multiple cells that together make up a grid consisting of rows and columns, each cell containing either alphanumeric text or numeric values. A spreadsheet cell may alternatively contain a formula that defines how the contents of that cell is to be calculated from the contents of any other cell (or combination of cells) each time any cell is updated. Spreadsheets are frequently used for financial information because of their ability to re-calculate the entire sheet automatically after a change to a single cell is made. A Spread Sheet Program By: Imdadullah, Lecturer Department of MIS, CBA, KSU
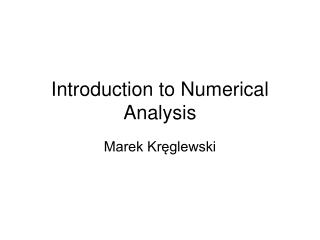
Excel FirstScreen By: Imdadullah, Lecturer Department of MIS, CBA, KSU
Cell Address • Cell Address shows where the pointer is located in the worksheet • Cell Address is composed of Column Number followed by Row Number • For Example A4 means Column A and Row 4 • Total Rows : 65536 • Total Columns : 256 By: Imdadullah, Lecturer Department of MIS, CBA, KSU
Work Book V/s Work Sheet A workbook is a spreadsheet file. By default, each workbook in Excel contains three pages or worksheets. The term spreadsheet is often used to refer to a workbook, when in actual fact, spreadsheet refers to the computer program, such as Excel. By: Imdadullah, Lecturer Department of MIS, CBA, KSU
Types of Data • Labels : Left Justified • Numbers : Right Justified • Formula : 1. Result is Displayed in Cell 2. Formula is Displayed in Formula Bar By: Imdadullah, Lecturer Department of MIS, CBA, KSU
The SUM Function There are three methods to insert the SUM function Methods-1 • Locate the pointer in the cell where you need the sum • Click on ∑ icon in the toolbar • A range of numeric values is selected automatically and the user is asked for confirmation as given below: • Press Enter Key if the selection is correct or change the range of values by dragging mouse pointer and then press Enter key to get final sum. By: Imdadullah, Lecturer Department of MIS, CBA, KSU
The SUM Function (Continued) Methods-2 • Locate the pointer in the cell where you need the sum • Type =Sum( • Select the range of numeric values either through pressing Shift+Cursor key or dragging the mouse pointer. Cell addresses of the selected range will be displayed as A3:C3 • Type ) and press Enter key to complete the formula. Sum will be shown immediately after pressing the Enter key. By: Imdadullah, Lecturer Department of MIS, CBA, KSU
The SUM Function (Continued) Methods-3 • Locate the pointer in the cell where you need the sum • Type = • Click on the value to be added and type + • Repeat step 3 until all the values are covered and the formula will look like =A3+B3+C3 • Press Enter key to complete the formula. Sum will be shown immediately after the Enter key is pressed. By: Imdadullah, Lecturer Department of MIS, CBA, KSU
SUMIF adds the cells specified by a given criteria. Syntax: =SUMIF(range,criteria,sum_range) Range is the range of cells you want evaluated. Criteria is the criteria in the form of a number, expression, or text that defines which cells will be added. For example, criteria can be expressed as 32, "32", ">32", "apples". Sum_range are the actual cells to sum. Remarks The cells in sum_range are summed only if their corresponding cells in range match the criteria. If sum_range is omitted, the cells in range are summed. The SUMIF Function By: Imdadullah, Lecturer Department of MIS, CBA, KSU 10
Example for SUMIF Function By: Imdadullah, Lecturer Department of MIS, CBA, KSU 11
The AVERAGE Function • AVERAGE function is used to find average of a range of numeric values. • Locate the pointer in the cell where you need the average • Type =AVERAGE( • Select the range of numeric values either through pressing Shift+Cursor key or dragging the mouse pointer. Cell addresses of the selected range will be displayed as A3:C3 • Type ) and press Enter key to complete the formula. Average will be shown immediately after pressing the Enter key. By: Imdadullah, Lecturer Department of MIS, CBA, KSU
Finding Percentage Example: A student scores 453 marks out of 750, find %age result • Locate the pointer in the cell where you need the percentage • Type = • Click on the numerator value then type/ • Click on the value denominator value. The formula will look like =D18/E18. Now press Enter key • To convert the result into percentage format, click on % symbol in Percentage By: Imdadullah, Lecturer Department of MIS, CBA, KSU
Finding Tax (etc.) Percentage Example: A company imports some goods of SR 100,000. Find 3% Tax. • Locate the pointer in the cell where you need the Tax amount • Type =3/100* • Click on total amount, the formula is shown as =3/100*D21 • Press Enter key, 3% tax of the total amount is displayed. By: Imdadullah, Lecturer Department of MIS, CBA, KSU
The COUNT Function Count function is used to count numeric values. • Locate the pointer in the cell where you need to count a range of numeric values • Type =COUNT( • Select the range of numeric values either through pressing Shift+Cursor key or dragging the mouse pointer. Cell addresses of the selected range will be displayed as A3:C3 • Type ) and press Enter key to complete the formula. Result is shown immediately after pressing the Enter key. By: Imdadullah, Lecturer Department of MIS, CBA, KSU
The COUNTIF function counts the number of cells within a range that meet the given criteria. Syntax: COUNTIF(range,criteria) Range is the range of cells from which you want to count cells. Criteria is the criteria in the form of a number, expression, or text that defines which cells will be counted. For example, criteria can be expressed as 32, "32", ">32", "apples". The COUNTIF Function By: Imdadullah, Lecturer Department of MIS, CBA, KSU 16
The MAX Function MAX function is used to find the maximum numeric value within a given range. • Locate the pointer in the cell where you need to find the maximum value • Type =MAX( • Select the range of numeric values either through pressing Shift+Cursor key or dragging the mouse pointer. Cell addresses of the selected range will be displayed as A3:C3 • Type ) and press Enter key to complete the formula. Required maximum value is displayed immediately after pressing the Enter key. By: Imdadullah, Lecturer Department of MIS, CBA, KSU
The MIN Function MIN function is used to find the minimum numeric value within a given range. • Locate the pointer in the cell where you need to find the maximum value • Type =MIN( • Select the range of numeric values either through pressing Shift+Cursor key or dragging the mouse pointer. Cell addresses of the selected range will be displayed as A3:C3 • Type ) and press Enter key to complete the formula. Required minimum value is displayed immediately after pressing the Enter key. By: Imdadullah, Lecturer Department of MIS, CBA, KSU
The IF Function IF checks whether a condition is met, and returns one value if TRUE, and another value if FALSE General form: =IF(logical_test, value_if_true, value_if_false) • Locate the pointer in the cell where IF function is required. • Type =IF(D5>=60,"Pass","Fail") • D5 is the cell address whose value is compared with 50. If its value is greater than or equal to 50, the Pass is displayed otherwise Fail is displayed. By: Imdadullah, Lecturer Department of MIS, CBA, KSU
The STDEV Function STDEV function estimates standard deviation based on a sample (range of numeric values) • Locate the pointer in the cell where you need to calculate the standard deviation • Type =STDEV( • Select the range of numeric values either through pressing Shift+Cursor key or dragging the mouse pointer. Cell addresses of the selected range will be displayed as A3:E3 • Type ) and press Enter key. Result is shown immediately after pressing the Enter key. By: Imdadullah, Lecturer Department of MIS, CBA, KSU
The SQRT Function SQRT function is used to calculate square root of a number. • Locate the pointer in the cell where you need to calculate square root • Type =SQRT( • Select the cell for which square root is calculated. The formula looks like s =SQRT(A3 • Type ) and press Enter key. Calculated square root value is displayed immediately after pressing the Enter key. By: Imdadullah, Lecturer Department of MIS, CBA, KSU
The SIN Function SIN function is used to find the Sine trigonometric ratio of an angle. • Click on the cell where SIN value is required • Type =SIN( • Click on the cell (angle) for which Sin value is needed. The angle is considered in Radians =SIN(A3. If measurement unit of angle is degree, then the angle should be multiplied by Pi/180 as =SIN(A3*3.143/180 • Type ) and press Enter key. Sin value for the given angle is displayed. By: Imdadullah, Lecturer Department of MIS, CBA, KSU
The COS and TAN Functions COS and TAN functions are used to find the cosine and tangent (trigonometric ) ratios of an angle respectively. • Method same as of SIN function By: Imdadullah, Lecturer Department of MIS, CBA, KSU
The DB Function DB function stands for Declining Balance. This function is used to find out the depreciation of the fixed asset by using declining balance method. • To insert DB function, Click on • Then select financial functions and click on DB, you will see the following dialogue box. By: Imdadullah, Lecturer Department of MIS, CBA, KSU
DB Function Continued… • Then provide these values Cost, Salvage, Life, Period, Month and click on OK button. Depreciation for the specific period will be found. • Cost: is the initial cost of the asset • Salvage: is the salvage value at the end of the life of the asset • Life: is the number of periods over which the asset is being depreciated • Period: is the period for which you want to calculate depreciation • Month: is the number of months in the first year. • Example: By: Imdadullah, Lecturer Department of MIS, CBA, KSU
The FV Function FV returns the future value of an investment based on periodic, constant payments and a constant interest rate. • Syntax • FV(rate,nper,pmt,pv,type) • Rate is the interest rate per period. • Nper is the total number of payment periods in an annuity. • Pmt is the payment made each period; it cannot change over the life of the annuity. • Pv is the present value, or the lump-sum amount that a series of future payments is worth right now. If pv is omitted, it is assumed to be 0 (zero), and you must include the pmt argument. • Type is the number 0 (at the end of year) or 1 and indicates when payments are due. If type is omitted, it is assumed to be 0. • To insert FV function, Click on Then select financial functions and click on FV, you will see the following dialogue box. By: Imdadullah, Lecturer Department of MIS, CBA, KSU
FV Function Continued… • This dialogue box is shown: • Provide all values in the dialogue box and click on OK. Future value is found. • Example: By: Imdadullah, Lecturer Department of MIS, CBA, KSU
The PV Function The PV function returns the value in today’s currency of a series of future payments, assuming periodic, constant payments and a constant interest rate • Syntax • PV(rate,nper,pmt,fv,type) • Rate is the interest rate per period. • Nper is the total number of payment periods in an annuity. • Pmt is the payment made each period; it cannot change over the life of the annuity. • fv is the future value (covered in previous slides). • Type is the number 0 (at the end of year) or 1 and indicates when payments are due. If type is omitted, it is assumed to be 0. • To insert PV function, Click on Then select financial functions and click on PV, you will see the following dialogue box. By: Imdadullah, Lecturer Department of MIS, CBA, KSU
PV Function Continued… • This dialogue box is shown: • Provide all values in the dialogue box and click on OK. Present value is found. • Example: By: Imdadullah, Lecturer Department of MIS, CBA, KSU
The PMT Function The PMT function computes the periodic payments for a loan, assuming constant payments and a constant interest rate. The syntax of the PMT function is: PMT (rate,#per,pv,[fv],[type]) • rate is the per period interest rate on the loan. In our example, we'll use one month as a period, so rate = 0.08/12, or 0.006666667. • #per is the number of payments made. In our case, #per = 10. • pv is the present value of all our payments. That is, pv is the amount of the loan. In our case, pv equals SR10,000. • fv is an optional argument that indicates the cash balance you want after making the last payment. In our case, fv is 0. If fv is omitted, Excel assumes it is 0. If you want to have all but SR1,000 of the loan paid off at the end of 10 months, fv would equal -1,000. • type is 0 or 1 and indicates when payments are due. If type equals 0 or is omitted, payments are made at the end of the period. In this example, we'll first assume end of month payment. If type is 1, payments are made (or money deposited) at the beginning of the period. • To insert PMT function, Click on Then select financial functions and click on PMT, you will see the following dialogue box. By: Imdadullah, Lecturer Department of MIS, CBA, KSU
PMT Function Continued… • This dialogue box is shown: • Provide all values in the dialogue box and click on OK. • Example: Solved Example of Loan taken for 10 months @8% yearly on Next Page By: Imdadullah, Lecturer Department of MIS, CBA, KSU
PMT Function Continued… By: Imdadullah, Lecturer Department of MIS, CBA, KSU
Sorting Data Sorting data means rearranging records in ascending or descending order based on any Field / Column • Select records • Click on the Data menu • Click on Sort • Select the desired options in the SORT dialogue box and click OK. By: Imdadullah, Lecturer Department of MIS, CBA, KSU
Filtering Data Filtering is a quick and easy way to find and work with a subset of data in a range. A filtered range displays only the rows that meet the criteria • Select records • Click on Data menu • Click on Filter • The selected records are shown in Filtered format. Now, you can filter data according to the criteria.You can display All, some records from top, one record or some records under any criteria by selecting Custom option. By: Imdadullah, Lecturer Department of MIS, CBA, KSU
Data Validation Ensuring valid data entry is an important task. You may want to restrict data entry to a certain range of dates, limit choices by using a list, or make sure that only positive whole numbers are entered. Providing immediate help to instruct users and clear messages when invalid data is entered is also essential to make the data entry experience go smoothly. • Select one or more cells to validate. • On the Data menu, click Validation, and then click the Settings tab. • To specify the type of validation that you want, do one of the following: • Any value, whole number, decimal, List, Date, Time, Text Length or Custom • In Custom, any criteria can be given e.g. >=3000 By: Imdadullah, Lecturer Department of MIS, CBA, KSU
Charts Creation By Using the Chart wizard, you can easily create a chart in Microsoft Excel. In this wizard, you can choose from a variety of chart types and specify various chart options. Method: • Click on the dropdown menu Insert, then click on Chart Type i.e. Column, Line Pie etc. • Now click on Design menu and then click on Select Data. • Here you can add remove series Select x-axis labels etc in this dialogue box. By: Imdadullah, Lecturer Department of MIS, CBA, KSU
Charts Creation (Continued..) • Then click on layout menu. In this menu different Chart Options appear. • Select any option and make changes as needed. For example, if you click on Chart Tile, it will display the following three options. Click on one option as per your requirements: By: Imdadullah, Lecturer Department of MIS, CBA, KSU
Formatting Cells The arrangement of data for storage or display is called formatting. To format cell(s), select the cell(s) to be formatted and follow the steps: • Click on Home > Format > • Click on Format Cells(or press Ctrl-1 alternatively for steps1 & The following dialogue box is displayed By: Imdadullah, Lecturer Department of MIS, CBA, KSU
Formatting Cells There are six tabs in the Format Cells dialog box: Number, Alignment, Font, Border, Patterns, and Protection. • Number Tab: This tab contains options regarding formats of numbers. These are General, Number, Accounting, date, time, Percentage, Fraction, Scientific, text, Special and custom. By default, the general format. The user can select any format as per requirement. • Alignment Tab: It contains options to align text horizontally (left, center, right, justify etc), vertically (left, center, right, justify etc), orientation of text, merging of cells etc. 3.Font Tab: Here the user can select a specific font type, size of text, colour and underline text etc. By: Imdadullah, Lecturer Department of MIS, CBA, KSU
Formatting Cells • Border Tab: To surround the cells with border (lines), border option is used. It contains line types, lines colours, and options to draw border on left, right, top and bottom etc. • Pattern Tab: It has the patterns and colours shown in the dialogus box: • Protection Tab: It has two options Locked and Hidden but these options work only when the worksheet is protected. To protect the sheet, click on Tools menu> Protect Sheet By: Imdadullah, Lecturer Department of MIS, CBA, KSU
Conditional Formatting Conditional Formatting is based on fulfillment of a condition. If the condition is true, formatting takes and no action otherwise. Select the cells in which conditional formatting is required. Then click on Home> Conditional Formatting>Manage Rules>. The following dialogue box is displayed: • Now click New Rules. A new Dialogue Box appears. Select “Format only cells that contain” By: Imdadullah, Lecturer Department of MIS, CBA, KSU
Conditional Formatting 1 2 3 Select condition with appropriate values, then click on format. Then select options in Format Cells Dialogue Box By: Imdadullah, Lecturer Department of MIS, CBA, KSU
Data Analysis Tools Goal Seek and Scenario Goal Seek, optimizes a goal and provides a solution when one variable changes. Scenarios create several different solutions for a complex business problem. By: Imdadullah, Lecturer Department of MIS, CBA, KSU
What-If Analysis • What-If analysis allows businesses to analyze their financial picture to forecast and make other financial decisions. • Typical questions asked: • “What if the interest rate decreases?” • “What if the markup rate increases by 1%?” • “What if the travel budget is decreased by 10%?” • “What if we increase production by 15%?” By: Imdadullah, Lecturer Department of MIS, CBA, KSU
Procedures for Planning Analysis • Define the problem • Input values • Dependent cells • Results • Complete the analysis By: Imdadullah, Lecturer Department of MIS, CBA, KSU
Define the Problem • The problem must be clearly defined to begin the what-if analysis. • Scenario: a person wants to purchase a home and cannot have payments larger than $1,000 per month. • Problem definition: what is the maximum purchase price they can pay for a house? By: Imdadullah, Lecturer Department of MIS, CBA, KSU
Input Values • Determine the data input values: • Amount of the loan (principal) • Interest Rate • Length of loan Guess By: Imdadullah, Lecturer Department of MIS, CBA, KSU
Dependent Cells • Determine which cells contain formulas – dependent cells. Input cells Dependent cell By: Imdadullah, Lecturer Department of MIS, CBA, KSU
Results • What are the results given the input data? • Monthly payment =$1,461.48 • Do the results match the requirements? • No, payment must be max $1,000 • If not, change the input data to obtain the needed results. • What happens if interest rate changes? • What happens if purchase price changes? By: Imdadullah, Lecturer Department of MIS, CBA, KSU
Complete the Analysis • Enter variables and determine the result. • Make changes in data until desired result is obtained. • Analysis completion will differ depending on which what-if tool is used. By: Imdadullah, Lecturer Department of MIS, CBA, KSU