Boardmaker 5.0 - Basic Skills
E N D
Presentation Transcript
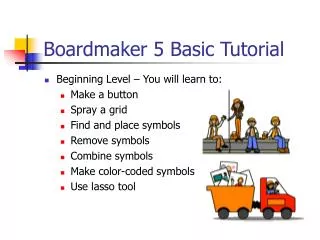
2. Boardmaker 5.0 - Basic Skills Basic skills for the following activities:
Matching Worksheet
Note Home
Self-Monitoring Activity
3. Overview of lesson Review of the three activities
Show skills activities will cover
Show picture of end product
Boardmaker Basics
Overview of basic skills
Hands-on practice of the skills Instructor:
Instructor: Use this time to review the goals of the session and talk about the included activities and the basic Boardmaker skills that will be covered. This is a good point to see what level the group is and identify anyone who hasn�t used the program before.Instructor:
Instructor: Use this time to review the goals of the session and talk about the included activities and the basic Boardmaker skills that will be covered. This is a good point to see what level the group is and identify anyone who hasn�t used the program before.
4. Activity 1 � Matching Worksheet Skill Level � Intermediate Beginner
Requires the following skills:
Draw and spray buttons
Draw lines
Type words
Copy and paste groups of buttons
Make cell lines invisible
Find and paste symbols into buttons
Change page from landscape to portrait Instructor: Activity 1 is the matching worksheet. It is an easy activity for beginning Boardmaker users. You will want to know how to make cells invisible which is noted in the student�s tutorial. Instructor: Activity 1 is the matching worksheet. It is an easy activity for beginning Boardmaker users. You will want to know how to make cells invisible which is noted in the student�s tutorial.
5. Matching Worksheet Instructor: This is a good time to show the sample worksheet included in your packet. Animals were used on the sample but symbols can be used on the worksheet activity. Instructor: This is a good time to show the sample worksheet included in your packet. Animals were used on the sample but symbols can be used on the worksheet activity.
6. Activity 2 � Note Home Skill Level � Intermediate
Requires the following skills:
Draw and spray buttons of different sizes
Draw multiple lines
Type words
Copy and paste groups of buttons
Make cell lines invisible
Find and paste symbols into buttons
Change page from landscape to portrait
Instructor: Activity 2 � the note home is an intermediate activity. While many of the skills are the same as the worksheet, there are more buttons to make and the different sizes can cause problems. Also, there is a tendency for students to make cells invisible before they have finished adding items�this can make locating the button difficult and can frustrate. It is recommended that making cells or buttons invisible is the last thing that the students do. It is also important to make this a portrait-sized paper. If the class doesn�t have a printer attached to their computer, there may be an extra red line on the screen. It is distracting but won�t cause any problems with making the activity. Once a printer is attached, the line will go away. The sample shows a digital picture for the child�s picture. A symbol can be used in place of a digital picture. Explain that either digital pictures or symbols can be used in this activity. Instructor: Activity 2 � the note home is an intermediate activity. While many of the skills are the same as the worksheet, there are more buttons to make and the different sizes can cause problems. Also, there is a tendency for students to make cells invisible before they have finished adding items�this can make locating the button difficult and can frustrate. It is recommended that making cells or buttons invisible is the last thing that the students do. It is also important to make this a portrait-sized paper. If the class doesn�t have a printer attached to their computer, there may be an extra red line on the screen. It is distracting but won�t cause any problems with making the activity. Once a printer is attached, the line will go away. The sample shows a digital picture for the child�s picture. A symbol can be used in place of a digital picture. Explain that either digital pictures or symbols can be used in this activity.
7. Note Home Instructor: Pass around the sample of the Note Home. Explain that this can be customized to fit most populations.Instructor: Pass around the sample of the Note Home. Explain that this can be customized to fit most populations.
8. Activity 3 � Self-Monitoring Form Skill Level � Advanced
Requires the following skills:
Draw and spray buttons of different sizes
Draw multiple lines between buttons
Type words and change size of words
Make button lines invisible
Find and paste symbols into buttons
Create a second document Instructor: Activity 3 � The Self-monitoring Form. This is the most advanced activity that is included in your packet. While many of the skills are the same as the other activities, this requires extensive use of the line tool and creating/copying multiple cells of different sizes. Remember to wait until the end of the activity to make button lines invisible.Instructor: Activity 3 � The Self-monitoring Form. This is the most advanced activity that is included in your packet. While many of the skills are the same as the other activities, this requires extensive use of the line tool and creating/copying multiple cells of different sizes. Remember to wait until the end of the activity to make button lines invisible.
9. Self-Monitoring Form Instructor: Pass around the sample self-monitoring form. The clock without any hands is a 2000 Addendum symbol�if you don�t have this, just use �time� and the eraser tool to remove the hands. Do one symbol then copy and paste the symbol into the other buttons.Instructor: Pass around the sample self-monitoring form. The clock without any hands is a 2000 Addendum symbol�if you don�t have this, just use �time� and the eraser tool to remove the hands. Do one symbol then copy and paste the symbol into the other buttons.
10. Hands-on with Boardmaker Instructor: This is a good time to have students open Boardmaker and get ready for the practice session.Instructor: This is a good time to have students open Boardmaker and get ready for the practice session.
11. Hands-on Overview Draw a button
Spray a group of buttons
Copy and paste a group of buttons
Use the line tool
Use the text tool
Add a symbol to a button
Delete a symbol from a button Instructor: Give the students an overview of what they will be covering in Boardmaker. If there are other items that you want them to learn, add the items to the list.Instructor: Give the students an overview of what they will be covering in Boardmaker. If there are other items that you want them to learn, add the items to the list.
12. Know Your Draw Tools
Symbol Finder � goes to symbol library
Button Spray Tool- creates multiple cells or buttons
Line Tool-draws lines
Color Tool-add color to your boards
Corner Tool-change the edge of the buttons
Instructor: You may be tempted to pass up this page but the Draw Tool Review is very helpful. It is surprising how many people don�t know what all the tools are for. This page helps with Boardmaker vocabulary which will be helpful throughout the follow-up activities. Instructor: You may be tempted to pass up this page but the Draw Tool Review is very helpful. It is surprising how many people don�t know what all the tools are for. This page helps with Boardmaker vocabulary which will be helpful throughout the follow-up activities.
13. Drawing a Button Click on BUTTON TOOL.
Move cursor over to draw window (don�t click).
CLICK and HOLD DOWN mouse while dragging to right and down.
Let go when button is size you want.
Instructor: Spend time on this skill--drawing buttons is very important. If some students are good at Boardmaker, have them draw lots of different size buttons. Some will have problems with this skill. Usually they will click after selecting the button tool and before drawing the button. Reinforce that they need to click on the button tool ONE time and then move their cursor over to the draw window WITHOUT clicking and then CLICK and HOLD DOWN mouse while dragging to right and down. Instructor: Spend time on this skill--drawing buttons is very important. If some students are good at Boardmaker, have them draw lots of different size buttons. Some will have problems with this skill. Usually they will click after selecting the button tool and before drawing the button. Reinforce that they need to click on the button tool ONE time and then move their cursor over to the draw window WITHOUT clicking and then CLICK and HOLD DOWN mouse while dragging to right and down.
14. Spraying Cells Click on SPRAY TOOL
Without clicking, move cursor in center of button.
CLICK and HOLD down mouse while dragging to right and down.
Let go when several rows of buttons have been drawn.
Instructor: This is another area that can cause problems for students. The same multiple clicking problem happens here. Have the class click on the spray tool and then move their cursor over to the draw window WITHOUT CLICKING then CLICK and HOLD DOWN mouse while dragging to the right and down. Have the class practice and practice this point.Instructor: This is another area that can cause problems for students. The same multiple clicking problem happens here. Have the class click on the spray tool and then move their cursor over to the draw window WITHOUT CLICKING then CLICK and HOLD DOWN mouse while dragging to the right and down. Have the class practice and practice this point.
15. Copying/Pasting a Group of Buttons Make a vertical group of buttons.
Click on ARROW TOOL and draw a Marquee around group of buttons.
Select Edit COPY, and Edit PASTE from MENU to duplicate buttons.
Place ARROW TOOL in center of button, CLICK & HOLD and move group to right.
Instructor: Have the class make a vertical group of buttons then copy, paste, and move the group with the dotted green outline to the right. When moving the buttons to the right, click in the center button, HOLD the mouse down and move group to the right�don�t click twice. If someone accidentally clicks twice, the group will be deselected. To reselect, use the arrow tool and click in the center of the first button, hold down the shift key, then click on the second button, thrid button, etc., until all the buttons are selected (shift key is still down) and then move the group to the right). It can be tricky for some people. The purpose of this skill is getting use to using the arrow tool to select a group of buttons. Instructor: Have the class make a vertical group of buttons then copy, paste, and move the group with the dotted green outline to the right. When moving the buttons to the right, click in the center button, HOLD the mouse down and move group to the right�don�t click twice. If someone accidentally clicks twice, the group will be deselected. To reselect, use the arrow tool and click in the center of the first button, hold down the shift key, then click on the second button, thrid button, etc., until all the buttons are selected (shift key is still down) and then move the group to the right). It can be tricky for some people. The purpose of this skill is getting use to using the arrow tool to select a group of buttons.
16. Drawing lines Boardmaker 5.0 lets you draw lines in buttons or on the background.
Select the LINE TOOL.
Click and drag the line the length you want it.
Practice making lines in buttons and on the background.
Instructor: This skill is used in making worksheets and forms. Lines can be made either on the button or on the background. Have class practice making a variety of lines. FYI: If you make a form with lines in buttons and on the background and then want to move the whole form, the background items will need to be moved separately from the items in the buttons. Using the �select all� function will still only move the buttons. Each item on the background needs to be selected, the shift-key held down, then all background items moved at once. Instructor: This skill is used in making worksheets and forms. Lines can be made either on the button or on the background. Have class practice making a variety of lines. FYI: If you make a form with lines in buttons and on the background and then want to move the whole form, the background items will need to be moved separately from the items in the buttons. Using the �select all� function will still only move the buttons. Each item on the background needs to be selected, the shift-key held down, then all background items moved at once.
17. Adding Symbols Click on the SYMBOL FINDER TOOL.
Type a word like apple in the first box.
Click on the thumbnails (circle-square-triangle).
Select symbol you like.
Click in a button on your grid.
Instructor: This is the fun part of the skill building�adding symbols to buttons. Have the students spray a small group of cells on the background. Tell them that the top typing box is for the word search and the lower typing box is for a one-time word change (it won�t change the core vocabulary). Practice searching and placing several symbols.Instructor: This is the fun part of the skill building�adding symbols to buttons. Have the students spray a small group of cells on the background. Tell them that the top typing box is for the word search and the lower typing box is for a one-time word change (it won�t change the core vocabulary). Practice searching and placing several symbols.
18. Deleting Symbols Select another symbol.
Click in a button that has a symbol.
A message box will appear with a prompt.
For this exercise, select REPLACE.
The symbol will be replaced with the new one.
Instructor: Removing symbols is very easy in the new Boardmaker. Have the students select a new symbol of their choice and click on a button that has a symbol. Select �Replace� to switch symbols. Practice this several times.Instructor: Removing symbols is very easy in the new Boardmaker. Have the students select a new symbol of their choice and click on a button that has a symbol. Select �Replace� to switch symbols. Practice this several times.
19. Adding/Changing Text Using the TEXT TOOL, words can be added to the background or to a button.
Practice typing.
The TEXT tool can also change symbol text on a button.
Instructor: Text can be added or changed in a variety of places in the new Boardmaker. Try using the text tool on the Tool Pallet to modify existing symbol text. Have students change the text over a symbol using the second window in the symbol finder and place that on a button. Have students practice changing the size and color of the text.Instructor: Text can be added or changed in a variety of places in the new Boardmaker. Try using the text tool on the Tool Pallet to modify existing symbol text. Have students change the text over a symbol using the second window in the symbol finder and place that on a button. Have students practice changing the size and color of the text.
20. Extra Boardmaker Tools Click on the symbol to see extra tools.
The arrow tools will flip the symbol.
The eraser tool will remove items.
Use the fill tool to change the color in a symbol. The 2nd fill tool will change all colors that are the same to the new color.
Instructor: There are some extra tools on the Boardmaker Tool Pallet that only show up when the symbol is selected. Have students select a symbol such as pudding and then use the arrow tool to click on the center of the symbol. Extra tools will appear. The arrow tools can flip the symbol horizontally or vertically. The eraser tool can remove unwanted items on the symbol. The top fill tool will change only one color (place the very tip of the paint can in the area that is to be changed). The bottom fill tool will change all the same color to the new color.Instructor: There are some extra tools on the Boardmaker Tool Pallet that only show up when the symbol is selected. Have students select a symbol such as pudding and then use the arrow tool to click on the center of the symbol. Extra tools will appear. The arrow tools can flip the symbol horizontally or vertically. The eraser tool can remove unwanted items on the symbol. The top fill tool will change only one color (place the very tip of the paint can in the area that is to be changed). The bottom fill tool will change all the same color to the new color.
21. Advanced Symbol Finder Settings Instructor: The Category Button helps you find symbols in one category quicker. It can also be used with the thumbnail view and automatic symbol placement to make quick topic-based boards. Using the �enter� key on the keyboard fills the buttons with all the symbols in the thumbnails. Right-click a thumbnail to place it into the currently highlighted button. Be sure to remind students to turn Use All Standard Categories back on after completing a category search. If they don�t, they won�t be able to find their symbols. Instructor: The Category Button helps you find symbols in one category quicker. It can also be used with the thumbnail view and automatic symbol placement to make quick topic-based boards. Using the �enter� key on the keyboard fills the buttons with all the symbols in the thumbnails. Right-click a thumbnail to place it into the currently highlighted button. Be sure to remind students to turn Use All Standard Categories back on after completing a category search. If they don�t, they won�t be able to find their symbols.
22. Advanced Symbol Finder Settings Instructor: The Symbol Finder Settings window houses a variety of important functions. This is where the language of choice is selected or where all languages are hidden. It is where the default font size is selected. And it is where black/white or color symbols are selected. Instructor: The Symbol Finder Settings window houses a variety of important functions. This is where the language of choice is selected or where all languages are hidden. It is where the default font size is selected. And it is where black/white or color symbols are selected.
23. Marquee/Lasso Tool Instructor: The Marquee/Lasso tool is a great way to make or customize symbols. Have students practice switching between the marquee and lasso tool by clicking on the button. Using the pointer tool, click and drag around a portion of a symbol. Once the item is surrounded, press �enter� to add to button. Instructor: The Marquee/Lasso tool is a great way to make or customize symbols. Have students practice switching between the marquee and lasso tool by clicking on the button. Using the pointer tool, click and drag around a portion of a symbol. Once the item is surrounded, press �enter� to add to button.
24. Creating a New Symbol Instructor: It is easy to make your own symbols. Have students bring 2 symbols into 1 button. When the 2nd symbol is added, a box will appear asking if you want to �replace� �add to� or �cancel� symbol change. Students will be �adding to� the button. The 2 symbols will be on top of each other. The next step is to make the top symbol smaller. Use the �arrow� tool and select the top symbol�an orange dotted line will appear around this symbol if it is selected correctly. Next, move the arrow tool to the right corner of the dotted line�a double arrow will appear�then the symbol can be made smaller. Hint: If you hold down the �Shift-Key� the size will remain proportional. Once the top symbol has been sized, the bottom symbol can be sized if necessary. When happy with the placement of the symbols, use the arrow tool to select EACH of the symbols�dotted green lines will appear around each of the symbols when done correctly then �COPY� the symbol. Click on the �symbol finder window� and PASTE the symbol in this window. A large window will appear that will prompt to add a Name and Assign a Category. When completed, click on OK. Instructor: It is easy to make your own symbols. Have students bring 2 symbols into 1 button. When the 2nd symbol is added, a box will appear asking if you want to �replace� �add to� or �cancel� symbol change. Students will be �adding to� the button. The 2 symbols will be on top of each other. The next step is to make the top symbol smaller. Use the �arrow� tool and select the top symbol�an orange dotted line will appear around this symbol if it is selected correctly. Next, move the arrow tool to the right corner of the dotted line�a double arrow will appear�then the symbol can be made smaller. Hint: If you hold down the �Shift-Key� the size will remain proportional. Once the top symbol has been sized, the bottom symbol can be sized if necessary. When happy with the placement of the symbols, use the arrow tool to select EACH of the symbols�dotted green lines will appear around each of the symbols when done correctly then �COPY� the symbol. Click on the �symbol finder window� and PASTE the symbol in this window. A large window will appear that will prompt to add a Name and Assign a Category. When completed, click on OK.
25. Speaking Dynamically Pro Create fun, interactive activities! When introducing SDPro to your group you are going to want to mention it�s relationship with Boardmaker.
-SDPro doesn�t come with symbols; need Boardmaker for symbols
-SDPro (Windows) works with Boardmaker as one program
-SDPro (Mac) ??????When introducing SDPro to your group you are going to want to mention it�s relationship with Boardmaker.
-SDPro doesn�t come with symbols; need Boardmaker for symbols
-SDPro (Windows) works with Boardmaker as one program
-SDPro (Mac) ??????
26. Today you will learn�
Who can use SDPro.
What SDPro is.
Where SDPro can be used.
When SDPro can be valuable.
Plus Applications! Point out that seeing applications and samples will help them see different ways that SDPro may be helpful to them.Point out that seeing applications and samples will help them see different ways that SDPro may be helpful to them.
27. Who? Young children through senior citizens
Users of any access method
touch screen
switch
adapted keyboard
head mouse
joystick
rollerball
Individuals who are verbal or nonverbal It is important to point out that one of the great things about SDPro is that it can make activities for all ages. If showing sample boards, the medical board is a great board to demonstrate how sophisticated you can make activities/boards.
Access is one of the strengths of this program, particularly for switch users. SDPro allows you individualize the scanning for each user. You can group buttons together and design the order of scanning. Plus there are three types of scanning previews to select from.
It is important to stress that SDPro is not just for people who are nonverbal. Teachers are using this program in regular ed, for children with learning disabilities, and individuals with severe disabilities. By creating educational activities you can meet the needs of individual�s at all levels.It is important to point out that one of the great things about SDPro is that it can make activities for all ages. If showing sample boards, the medical board is a great board to demonstrate how sophisticated you can make activities/boards.
Access is one of the strengths of this program, particularly for switch users. SDPro allows you individualize the scanning for each user. You can group buttons together and design the order of scanning. Plus there are three types of scanning previews to select from.
It is important to stress that SDPro is not just for people who are nonverbal. Teachers are using this program in regular ed, for children with learning disabilities, and individuals with severe disabilities. By creating educational activities you can meet the needs of individual�s at all levels.
28. What?
Most basic answer
Gives your computer a voice
29. What can I do with that voice? This is really important to stress. The two ways of using this program are very different and help people in different ways.
This in essence is using SDPro as the software the runs on an individual�s communication device. It uses dynamic displays to navigate through boards that allow the individual to speak and communicate. Keep in mind that the device that the software is on becomes important. Think about portability, durability, cost, size, etc. In other words people often think that that means using SDPro on a desktop computer as the individual�s device. This certainly has some limitations (obviously!) and therefore individual�s should consult the various other companies that sell devices that use SDPro as the software.
--Picture an individual in a wheelchair in the community with a device mounted onto the chair with SDPro running. The individual then uses a switch to get to the board that will allow him or her to order lunch
2. This function is actually what the majority of people would use SDPro for. While communication can be addressed when using the program in this way. You really are using this as an authoring tool to create your own lessons/activities that multiple users would access! Another way to elaborate on this is that BM allows the teacher/therapist to print out boards that the user can access as a printed page�SDPro allows the user to access created boards on the computer.
--Picture a classroom computer with students accessing the computer to stress concepts taught in their mainstream science class. They can read about the unit, write, about it and even take a quiz. One student may use a switch, another a touch screen, and another an adapted computer!This is really important to stress. The two ways of using this program are very different and help people in different ways.
This in essence is using SDPro as the software the runs on an individual�s communication device. It uses dynamic displays to navigate through boards that allow the individual to speak and communicate. Keep in mind that the device that the software is on becomes important. Think about portability, durability, cost, size, etc. In other words people often think that that means using SDPro on a desktop computer as the individual�s device. This certainly has some limitations (obviously!) and therefore individual�s should consult the various other companies that sell devices that use SDPro as the software.
--Picture an individual in a wheelchair in the community with a device mounted onto the chair with SDPro running. The individual then uses a switch to get to the board that will allow him or her to order lunch
2. This function is actually what the majority of people would use SDPro for. While communication can be addressed when using the program in this way. You really are using this as an authoring tool to create your own lessons/activities that multiple users would access! Another way to elaborate on this is that BM allows the teacher/therapist to print out boards that the user can access as a printed page�SDPro allows the user to access created boards on the computer.
--Picture a classroom computer with students accessing the computer to stress concepts taught in their mainstream science class. They can read about the unit, write, about it and even take a quiz. One student may use a switch, another a touch screen, and another an adapted computer!
30. Where? Classroom computer
Home computer
Speech therapy computer
Hospital
Nursing home
Laptop computer
Portable touchscreen device These are the different locations where SDPro could be a valuable tool. These are some suggestions. Again when thinking about a portable device consider the different features of the device when trying to meet the user�s needs.These are the different locations where SDPro could be a valuable tool. These are some suggestions. Again when thinking about a portable device consider the different features of the device when trying to meet the user�s needs.
31. When? I need to reinforce curriculum concepts.
I want the computer to be a teaching tool in the classroom.
I want my students to create writing.
I want to more actively involve students in an inclusive setting.
I want to make books that students can read and interact with. As a teacher, therapist, or parent�When would you use this program?
SDPro can easily create cross-curricular activites.
Students can use the computer to independently go through a series of boards to learn different concepts.
Students at any level can create writing through sentence building activities. These activities are easy to tailor to the individual�s writing/reading level. Users can print, save, clear and delete by selecting a single button.
Having boards available allow users to become an active participant in inclusive settings. Inclusion is fostered by giving the user control, communication, and complete activities with the assistance of SDPro.
One of the neatest applications for SDPro, is adapting books. You can create your own stories, adapt existing books, or create a story of a real experience and bring in digital images.
As a teacher, therapist, or parent�When would you use this program?
SDPro can easily create cross-curricular activites.
Students can use the computer to independently go through a series of boards to learn different concepts.
Students at any level can create writing through sentence building activities. These activities are easy to tailor to the individual�s writing/reading level. Users can print, save, clear and delete by selecting a single button.
Having boards available allow users to become an active participant in inclusive settings. Inclusion is fostered by giving the user control, communication, and complete activities with the assistance of SDPro.
One of the neatest applications for SDPro, is adapting books. You can create your own stories, adapt existing books, or create a story of a real experience and bring in digital images.
32. When else? I want provide opportunities for communication.
I want the user to have fun, interactive activities they can access on the computer.
I want to provide assessments on the computer.
I want to train individuals on using: symbols, switches and dynamic displays. Communication is obviously an important piece of the program. Topical, well organized boards allow users to speak in different settings during various activities to express their wants, needs, and thoughts. A well planned series of boards can give an individual freedom and independence.
Activities created with SDPro involve the users and give you the opportunity to make the activities fun and reinforcing with sounds, movies, animations, and more.
With SDPro you can assess students to decide best access method, scanning settings that are most effective, mastery of curriculum concepts.
4. It�s good to point out that dynamic displays are a concept that may need to be taught. Many communication devices use dynamic displays and often, navigating can be quite difficult. With pop up boards and our navigational tools this a great way to get users comfortable on dynamic displays.
Communication is obviously an important piece of the program. Topical, well organized boards allow users to speak in different settings during various activities to express their wants, needs, and thoughts. A well planned series of boards can give an individual freedom and independence.
Activities created with SDPro involve the users and give you the opportunity to make the activities fun and reinforcing with sounds, movies, animations, and more.
With SDPro you can assess students to decide best access method, scanning settings that are most effective, mastery of curriculum concepts.
4. It�s good to point out that dynamic displays are a concept that may need to be taught. Many communication devices use dynamic displays and often, navigating can be quite difficult. With pop up boards and our navigational tools this a great way to get users comfortable on dynamic displays.
33. Let�s talk about�Programming
It�s not as bad as it sounds!
34. Designing Boards Simply create the boards using Boardmaker.
Use the shadow tool to make buttons POP!
Fill buttons with symbols, words, or digital images.
Use color to increase the effectiveness of the boards.
Tip: If using Windows, select print setup and change board size to �use display size.� This will allow you to design the board more easily.
It is important to point out to people that as they look at sample SDPro boards they should look at them as Boardmaker boards. Creating a button, spraying it and using color, the same way they do on BM.
Encourage the users to use digital images to enhance the board and individualize activities for the user.
It is important to remember to use color. Perhaps you want all Science activities to have a yellow background or all of Suzie�s boards to have a blue background.
If questions arise about the suggested tip�point out that for mac it automatically sizes the board to fit the computer screen. With Windows, unless you specify otherwise, It will be the size of a printed page, rather than the size of the board. Using this tip allows you to more easily center items on the board and design using the entire board size.
35. Assigning actions Only 8 basic actions to learn:
Speak message
Type message
Play recorded message
Change board
Return to last board
Spoken preview
Recorded preview
Picture button By double clicking on the button you will access the one menu necessary to assign actions to the buttons.
It is important to know that you can create activities with just the basic actions and then learn more as you become comfortableBy double clicking on the button you will access the one menu necessary to assign actions to the buttons.
It is important to know that you can create activities with just the basic actions and then learn more as you become comfortable
36. Basic Actions The basic actions make:
Buttons talk with recorded (digitized) speech
Buttons talk with computer (synthesized) speech
A typed message, with or without symbols
A link to other boards, including the last board
Previews for scanning You may want to point out digitized vs. synthesized speech, as it can be easily confused.
You may want to point out digitized vs. synthesized speech, as it can be easily confused.
37. Bells and Whistles Pop-Up Boards
Play a Movie
Including PCS Animations
Random Speech
Quick Text
Launch Application
There are many, many additional actions that you can assign to buttons. By clicking on the action category and then choosing from the action menu you can easily assign these actions.
Also, point out the preview display on the right side of the menu that allows you to see what each action can do.There are many, many additional actions that you can assign to buttons. By clicking on the action category and then choosing from the action menu you can easily assign these actions.
Also, point out the preview display on the right side of the menu that allows you to see what each action can do.
38. Tips and Tricks Use the spray feature. Program one button and spray�each of the new buttons will keep those actions!
The �Use button text� option is a great way to save time!
Make a message box selectable by double clicking on it and choosing this option!
Use �save as� to create templates and to individualize boards for different users!
Save unwanted buttons in a file titled �Jimmy�s closet� those buttons will be ready to access when the individual is ready for them!
39. Applications
40. More Applications
41. Clinical Fundamentals
42. Technical Fundamentals