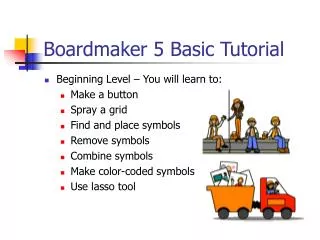
Boardmaker 5 Basic Tutorial
Boardmaker 5 Basic Tutorial. Beginning Level – You will learn to: Make a button Spray a grid Find and place symbols Remove symbols Combine symbols Make color-coded symbols Use lasso tool. Starting Boardmaker. Double-click on the Boardmaker icon on the desktop.

Boardmaker 5 Basic Tutorial
E N D
Presentation Transcript
Boardmaker 5 Basic Tutorial • Beginning Level – You will learn to: • Make a button • Spray a grid • Find and place symbols • Remove symbols • Combine symbols • Make color-coded symbols • Use lasso tool
Starting Boardmaker Double-click on the Boardmaker icon on the desktop • Be sure the CD is in the drive. • Use the short-cut on the desktop to start your Boardmaker • Or, click on START>Programs and select Boardmaker. OR Open via the START menu
Creating a New Board • After the program opens, you have choices. . . • Select “Open a new board” for this exercise. This button will open a saved board This button will open the pre-made grid and template folder Click on “Open a new board”
Creating a New Board • Boardmaker opens to a blank workspace. • The tool pallet has the design, writing, and color tools
Drawing a Button Click on the button tool • Select the “Button Tool” from the tool palette. • Move the cursor to the blank workspace. • Click and drag diagonally to create a button. Click, HOLD, and drag to the right. DO NOT release the mouse key until the button is drawn.
Note: to change the grid position. Select EDIT>SELECT ALL and move all the buttons at once. Spraying a Grid • Select the “Button Sprayer Tool” from the tool pallet. • Move the cursor into the center of the button. • Click and HOLD DOWN the mouse key. Drag cursor to the right. For this exercise, make a grid 4 cells across and 2 cells down.
Finding a symbol • To open the Symbol Finder Window, click on the Boardmaker icon in the tool pallet. • The symbol finder window will open. Click on the Boardmaker icon.
Finding a symbol - Step 1 • Type the word “story” in the “Symbol Search Window”. 3 ways to search Search beginning of word Search anywhere in word Search whole word Symbol Search Window Next
Finding a symbol - Step 2 • Click on the “thumbnail” view button to display symbols that match “story”. Thumbnail view Thumbnail view button (this is one button with 3 objects on it) Next
Finding a symbol - Step 3 • Select the “storyteller” choice and type the words “Let’s read” in the Alternative Symbol Name Field. Alternative Symbol Name Field Click on the storyteller selection Next
Finding a symbol - Step 4 • Press the Enter Key and the symbol will be placed in the grid.
Building a Board • Continue building your board by typing “bear” in the Symbol Search Window. • Select one of the bears from the thumbnail selections. • Type in 6 more words of your choice and fill the buttons of the grid. When placing a symbol by clicking in a cell, the cursor will change to the Boardmaker Icon symbol.
Removing a symbol • Type the word “butterfly in the Symbol Search Window. • Click on the button that has the bear. • When the prompt comes up asking you to Replace, Add to, or Cancel, select Replace.
Put Two Symbols on a Button • Type the word “read” in the Symbol Search Window. • Click on “thumbnails” and select the stick figure reading. • Remove the word from the Alternative Symbol Name window. Highlight the word and use the delete key on your keyboard to remove the word. Next
Put Two Symbols on a Button • Click on a button to add the symbol. • A prompt will appear asking if you want to Replace, Add To, or Cancel. Select “Add To”. • The symbol will be added to the button. Next
Put Two Symbols on a Button • Work with the two symbols to make them fit nicely on the button. Practice this step with several symbols. Symbol is added to button. Now there are 2 symbols on the button. Click in center of “read” (top symbol). Dotted line will appear around this symbol. Click on the lower right corner of the dotted line. An arrow will appear. Move arrow diagonally to left. Do this slowly. Repeat with the second symbol. Then move the 2 symbols around on the button to look good.
Using the Lasso/Marquee Tool • Using the Symbol Finder Window, type “I want to talk to you”. • Click on the Lasso/Marquee tool. • Use the cursor to draw around a portion of the symbol. • Press enter key to add to grid. Marquee tool is a square. Lasso tool is an irregular circle. Try adding this to another symbol on your grid.
Add a Background Color • Click on the background. • Click on the color tool on the tool pallet. • Select one of the colors.
Clearing Symbols from Buttons Close Symbol Finder Window here. • Remove symbols but leave the grid. • Close the Symbol Finder Window. • Pull down the Edit Menu from the Menu Bar choose Select All. • Pull down the Edit Menu again and select Clear. The symbols are removed but the grid remains.
B/W Symbol-Color Background • Click on the Boardmaker Icon to open the Symbol Finder Window • Click on the Symbol Finder Settings Button. • Select “Use Black & White Symbols” and click on OK. Symbol Finder Settings Button Note: This window also controls the languages, word default size and more. Next
B/W Symbol-Color Background • Type the word “happy” in the Symbol Finder Window. • Click on thumbnails and select one of the happy symbols. • Add several more symbols to your grid. Note: the thumbnails will appear in color but will transfer to the grid in black and white. Next
B/W Symbol-Color Background • To add color to a button, click on the button first. • Click on the Color Tool selection on the Tool Pallet. • Click on the word “Button” and choose a color. • Repeat for other buttons.
Adding a Title to the Board • Click on the “A” tool on the Tool Pallet. • Click above your grid and type a title. • Without clicking off the sentence, pull down the Text menu from the menu bar and select 30 pts. • Use the arrow tool to center the sentence.
Review • This completes the Boardmaker basics. You can now: • Draw buttons and spray grids • Add background color • Add a board title • Place symbols on buttons • Add to and remove symbols • Create color-coded symbols • Change the symbols from color to B/W