Download
1 / 36
360 likes | 497 Views
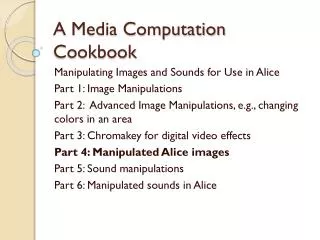
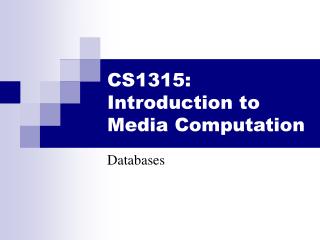
A Media Computation Cookbook. Manipulating Images and Sounds for Use in Alice Part 1: Image Manipulations Part 2: Changing colors in an area Part 3: Chromakey for digital video effects Part 4: Manipulated images in Alice Part 5: Sound manipulations Part 6: Manipulated sounds in Alice.

E N D
A Media Computation Cookbook Manipulating Images and Sounds for Use in Alice Part 1: Image Manipulations Part 2: Changing colors in an area Part 3: Chromakey for digital video effects Part 4: Manipulated images in Alice Part 5: Sound manipulations Part 6: Manipulated sounds in Alice
“Can’t I do everything in Alice?” • Why do programming outside of Alice? • Sometimes you want special images or sounds in your Alice story. • You can make them by programming those images and sounds, then bringing them into Alice. • Sometimes you want to add in special movie effects to your Alice movie. • Overall, programming outside of Alice is the special effects studio for Alice.
Sound Frequency Project • Create an Alice world with 3 frogs • Resize one to be bigger and one to be smaller • Using croak.wav • Create a higher sound • Take every other sample • Create a lower sound • Take every sample twice • Import the sound files and have the frogs play their sounds and tap their foot Alice and Media Computation Intro
Using Chromakey • Create objects in Alice and position them as desired • Delete the ground • Set the color of the background to green • in the world properties • Use a conditional to replace the green color • You may also need to scale one of the pictures Alice and Media Computation Intro
Drawing Projects • Draw something on an Alice picture • Like a hat, glasses, or a scarf • Fireworks • Create images in Media Computation that you use as textures in Alice • like a gradient for the ground • Clip an Alice picture • To look like a porthole • Create a poster advertisement for your Alice movie. • With your name on it • Create a comic panel with Alice pictures Alice and Media Computation Intro
Comic Strip Project • Create several scenes in Alice and take pictures of the scenes • Use Media Computation to create a Comic Panel and/or Comic Strips • Draw different types of text balloons • Speech balloon, thought balloon, scream balloon Alice and Media Computation Intro
Add Yourself to an Alice Movie Alice and Media Computation Intro
Add Alice Characters to a Real Movie • Split out frames from a movie of people • Capture frames from an Alice movie using MovieCapturePanel • Use chromakey to copy the Alice items to the real movie Alice and Media Computation Intro
Start JES • Double-click the JES.exe (Python with glasses) icon
Using JES to access images • Type commands in the bottom part of JES to get filenames, print filenames, make pictures, and view pictures. • .JPG/.JPEG files are images • .WAV files are sounds. (JES can read some MP3’s)
An example interaction with JES >>> filename = pickAFile() >>> print filename C:\mediasources\barbara.jpg >>> picture = makePicture(filename) >>> explore(picture)
Key commands to use in JES • (UPPERCASE/lowercase matters!) • print - prints out the value of whatever • variable=Something – sets variable equal to the value of Something. • pickAFile() – lets you pick a file, and has a value of the filename you pick. • makePicture(filename) – takes a filename as input, and has a value of a Picture object. • explore(picture) – shows you the picture.
Making a new function in JES def decreaseRed(picture): for p in getPixels(picture): value=getRed(p) setRed(p,value*0.5)
Save the function in a file to use it later • First, save it (maybe “myfunctions.py”) • Then hit the Load Program button. • Then use your new functions.
Use a loop!Our first picture recipe def decreaseRed(picture): for p in getPixels(picture): value=getRed(p) setRed(p,value*0.5) Used like this: >>> file=pickAFile() >>> picture=makePicture(file) >>> explore(picture) >>> decreaseRed(picture) >>> explore(picture)
Saving the picture to use in Alice: writePictureTo(picture,file)
How writing functions works • To make a function, use the command def • Then, the name of the function, and the names of the input values between parentheses (“(input1)”) • End the line with a colon (“:”) • The body of the recipe is indented (Hint: Use three spaces) • That’s called a block
How does that function work? • What are pixels? • How does color work on a computer? • How does that function reduce red in all the pixels of a picture?
Digitizing pictures as bunches of little dots • We digitize pictures into lots of little dots • Enough dots and it looks like a continuous whole to our eye • Our eye has limited resolution • Our background/depth acuity is particularly low • Each picture element is referred to as a pixel • Pixels are picture elements • Each pixel object knows its color • It also knows where it is in its picture
Encoding color • Each pixel encodes color at that position in the picture • Lots of encodings for color • Printers use CMYK: Cyan, Magenta, Yellow, and blacK. • Others use HSB for Hue, Saturation, and Brightness (also called HSV for Hue, Saturation, and Value). • We’ll use the most common for computers • RGB: Red, Green, Blue
Encoding Color: RGB • In RGB, each color has three component colors: • Amount of redness • Amount of greenness • Amount of blueness • Each does appear as a separate dot on most devices, but our eye blends them. • In most computer-based models of RGB, a single byte (8 bits) is used for each • So a complete RGB color is 24 bits, 8 bits of each
Encoding RGB • Each component color (red, green, and blue) is encoded as a single byte • Colors go from (0,0,0) to (255,255,255) • If all three components are the same, the color is in greyscale • (50,50,50) at (2,2) • (0,0,0) (at position (1,2) in example) is black • (255,255,255) is white
How does that work? def decreaseRed(picture): for p ingetPixels(picture): value=getRed(p) setRed(p,value*0.5) Used like this: >>> file=pickAFile() >>> picture=makePicture(file) >>> explore(picture) >>> decreaseRed(picture) >>> explore(picture)
Let’s walk that through slowly… Here we take a picture object in as a parameter to the function and call it picture def decreaseRed(picture): for p ingetPixels(picture): originalRed = getRed(p) setRed(p, originalRed * 0.5) picture
Now, get the pixels We get all the pixels from the picture, then make p be the name of each one one at a time def decreaseRed(picture): for p ingetPixels(picture): originalRed = getRed(p) setRed(p, originalRed * 0.5) picture getPixels() Pixel, color r=135 g=131b=105 Pixel, color r=133g=114 b=46 Pixel, color r=134 g=114b=45 … p
Get the red value from pixel def decreaseRed(picture): for p ingetPixels(picture): originalRed = getRed(p) setRed(p, originalRed * 0.5) We get the red value of pixel p and name it originalRed picture getPixels() Pixel, color r=135 g=131b=105 Pixel, color r=133g=114 b=46 Pixel, color r=134 g=114b=45 … … value = 135 p
Now change the pixel def decreaseRed(picture): for p ingetPixels(picture): originalRed = getRed(p) setRed(p, originalRed * 0.5) Set the red value of pixel p to 0.5 (50%) of originalRed picture getPixels() Pixel, color r=67 g=131 b=105 Pixel, color r=133g=114 b=46 Pixel, color r=134 g=114b=45 … value = 135 p
Then move on to the next pixel def decreaseRed(picture): for p ingetPixels(picture): originalRed = getRed(p) setRed(p, originalRed * 0.5) Move on to the next pixel and name itp picture getPixels() Pixel, color r=67 g=131 b=105 Pixel, color r=133g=114 b=46 Pixel, color r=134 g=114b=45 … value = 135 p
Get its red value Get its red value def decreaseRed(picture): for p ingetPixels(picture): originalRed = getRed(p) setRed(p, originalRed * 0.5) Set originalRed to the red value at the new p, then change the red at that new pixel. picture getPixels() Pixel, color r=67 g=131 b=105 Pixel, color r=133g=114 b=46 Pixel, color r=134 g=114b=45 … value = 133 p p p
And change this red value def decreaseRed(picture): for p ingetPixels(picture): originalRed = getRed(p) setRed(p, originalRed * 0.5) Change the red value at pixel p to 50% of value picture getPixels() Pixel, color r=67 g=131 b=105 Pixel, color r=66g=114 b=46 Pixel, color r=134 g=114b=45 … value = 133 p p p
And eventually, we do all pixels • We go from this… to this!
How do we change anything else? • Each component of the pixel is change-able. • getRed/setRed • getBlue/setBlue • getGreen/setGreen • We can multiply each by anything we want, or even just set it to a single value.
Some more functions to add to your file (feel free to make more!) def decreaseRed(picture): for p in getPixels(picture): value=getRed(p) setRed(p,value*0.5) def decreaseBlue(picture): for p in getPixels(picture): value=getBlue(p) setBlue(p,value*0.7) def maxBlue(picture): for p in getPixels(picture): setBlue(p,0) def decreaseGreen(picture): for p in getPixels(picture): value=getGreen(p) setGreen(p,value*0.7) def clearRed(picture): for p in getPixels(picture): setRed(p,0)
Making a sunset • We can do more than one change to a picture! >>> picture = makePicture(filename) >>> decreaseBlue(picture) >>> decreaseGreen(picture) >>> writePictureTo(picture,"C:/sunsetbeach.jpg")
Try it! • Open some pictures and change them! • Make your own recipe by copy-pasting a function, then changing its name and what it does!