Download
1 / 5
50 likes | 60 Views
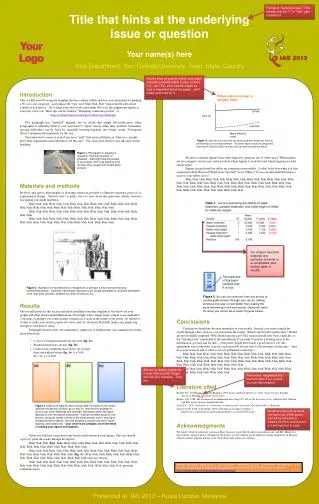
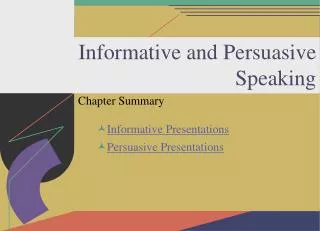
This informative guide from the Department of BlahDeBlah at Harvard Medical School provides helpful tips for planning and formatting a poster presentation. Learn about poster size requirements, file formats, and the use of graphics to enhance your poster. Follow these guidelines to create a visually appealing and informative poster for your next presentation.

E N D
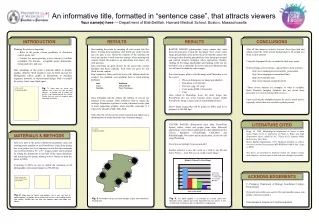
An informative title, formatted in “sentence case”, that attracts viewers Your name(s) here — Department of BlahDeBlah, Harvard Medical School, Boston, Massachusetts INTRODUCTION RESULTS RESULTS CONCLUSIONS • Planning the poster is important. • Refer to the poster session guidelines to determine correct poster size. • Contact the poster printing service bureau to confirm acceptable file formats, acceptable poster dimensions, turnaround time, and cost. • Take advantage of the poster’s inherent ability to display graphic elements: With regards to text, be brief, and opt for photographs, tables, graphs or illustrations to elucidate organism, protocol, or experimental design. Don’t overstuff the poster- leave some blank space. Start making the poster by inserting all text content into Text Boxes. If using these templates, first delete all ‘slides’ but the one you plan to use. Select the contents of the existing text boxes and replace it with your own content. After inserting text content, format the content to an appropriate font choice, text style and size. Sans serif fonts are good choices for the poster title, section headings and figure captions. Serif fonts are good for text block section content. Don’t underline. Italics and bold text is OK. Bullets should be avoided. Use standard, cross-platform fonts to avoid printing problems: Once formatted, edit the content. Be ruthless. If you are too attached to the content, enlist someone’s help to reduce the verbiage. Remember a picture is worth a thousand words- plan to insert supporting graphics where possible, especially if it reduces the amount of blah, blah, blah. Only after the text boxes have been inserted and edited can a determination be made about the size of inserted images. • RASTER IMAGES (photographs, scans, images that come from microscopes): Using the Rectangle Tool, create raster image placeholders in the poster. Keep in mind the aspect ratio of images when drawing placeholders: draw landscape oriented and portrait oriented rectangles where appropriate. Double-clicking on the image placeholders and looking at the size tab will allow you to determine the correct physical dimension that you will need to make the raster images. • For raster images, plan to edit the image with Photoshop to set the correct • Physical dimension (see image placeholder) • Resolution (125-200 dpi) • File type (.jpg, .tif, .png) • Color mode (RGB or Grayscale) • Crop • Once edited in Photoshop, Insert the raster image into PowerPoint. Do not resize Inserted raster images within PowerPoint- doing so may result in non-printable posters. • (Don’t forget images that will be printed at 200% need to be prepared at 250-400 dpi.) • After all the content is entered, Inserted, Paste Specialed and edited, resize the white section backgrounds to fit around text block section content. • Using the Alignment Tools can make the final steps easier. • Poster printing service bureaus - upload files to their websites: • http://www.makesigns.com/scientific_posters.htm • http://www.megaprint.com/medical.html • http://www.thinkiii.com/ • http://www.imagers.com/poster.html • *These service bureaus are examples of what is available. Since Research Imaging Solutions has not tested these providers, we can not endorse their services. • Upon receiving the completed poster, be sure to proof read it, especially where there are scientific symbols present. 5.75” x 3.75” Image placeholder Fig. 1.Allow room for figures and captions. Use a sans serif font for figure captions to provide cue to reader that he/she is not reading normal text section. Smaller font size also sets captions apart from body text blocks. LITERATURE CITED VECTOR IMAGES (Illustrations from other PowerPoint figures; tables, charts and graphs from other Microsoft applications; vector objects generated by other applications like Canvas, Illustrator, CricketGraph, ChemDraw and KaleidiaGraph): No need to put in placeholders, no need to edit using Photoshop. Paste Special, perhaps Ungroup and edit! Another option is to save the vector as a .wmf or .eps file and Insert Picture… from File as you would a raster image. 4” x 8.75” Image placeholder Begg, J.E. 1980. Morphological adaptations of leaves to water stress. Pages 33-43 in Adaptation of Plants to Water and High Temperature Stress, edited by N.C. Turner & P.J. Kramer. Wiley Interscience, New York. World Health Organization. 1999. Malarial mortality in Africa. www.who.int/rbm/Presentations/MIP-RBM-final/sld005.htmk (June 4, 2000). The above are provided to illustrate format for articles, books, book chapters, and web sites (avoid web sites, though, if possible). MATERIALS & METHODS After you refer to the poster submission guidelines, open and existing poster template or use PowerPoint’s Page Setup dialog box to set poster size. It is important to note that the maximum size for PowerPoint is 56” x 56”. Larger posters can be printed by setting the dimensions to one half of the target dimension and instructing the poster printing service bureau to print the poster at 200%. If printing at 200%, be sure to double the resolution of all photographic and scanned images to 250-400 dpi. ACKNOWLEDGEMENTS Each of these are 2.25” x 2.25” Image placeholders C. Purington, Department of Biology, Swarthmore College, Pennsylvania [Typically only initials are used for first (and middle) names, and people’s titles are omitted.] Fig. 2.Allow room for figures and captions. Use a sans serif font for figure captions to provide cue to reader that he/she is not reading normal text section. Smaller font size also sets captions apart from body text blocks. Fig. 3.Remember that you can draw complex shapes with PowerPoint drawing tools Fig. 4.The above graphic is an example of a vector taken from Microsoft Excel, copied and Paste Specialed into the poster. It was resized once in the poster with no reduction in image quality. Download poster templates at it.med.harvard.edu/ris
An informative title, formatted in “sentence case”, that attracts viewers Your name(s) here — Department of BlahDeBlah, Harvard Medical School, Boston, Massachusetts INTRODUCTION RESULTS RESULTS CONCLUSIONS • Planning the poster is important. • Refer to the poster session guidelines to determine correct poster size. • Contact the poster printing service bureau to confirm acceptable file formats, acceptable poster dimensions, turnaround time, and cost. • Take advantage of the poster’s inherent ability to display graphic elements: With regards to text, be brief, and opt for photographs, tables, graphs or illustrations to elucidate organism, protocol, or experimental design. Don’t overstuff the poster- leave some blank space. Start making the poster by inserting all text content into Text Boxes. If using these templates, first delete all ‘slides’ but the one you plan to use. Select the contents of the existing text boxes and replace it with your own content. After inserting text content, format the content to an appropriate font choice, text style and size. Sans serif fonts are good choices for the poster title, section headings and figure captions. Serif fonts are good for text block section content. Don’t underline. Italics and bold text is OK. Bullets should be avoided. Use standard, cross-platform fonts to avoid printing problems: Once formatted, edit the content. Be ruthless. If you are too attached to the content, enlist someone’s help to reduce the verbiage. Remember a picture is worth a thousand words- plan to insert supporting graphics where possible, especially if it reduces the amount of blah, blah, blah. Only after the text boxes have been inserted and edited can a determination be made about the size of inserted images. • RASTER IMAGES (photographs, scans, images that come from microscopes): Using the Rectangle Tool, create raster image placeholders in the poster. Keep in mind the aspect ratio of images when drawing placeholders: draw landscape oriented and portrait oriented rectangles where appropriate. Double-clicking on the image placeholders and looking at the size tab will allow you to determine the correct physical dimension that you will need to make the raster images. • For raster images, plan to edit the image with Photoshop to set the correct • Physical dimension (see image placeholder) • Resolution (125-200 dpi) • File type (.jpg, .tif, .png) • Color mode (RGB or Grayscale) • Crop • Once edited in Photoshop, Insert the raster image into PowerPoint. Do not resize Inserted raster images within PowerPoint- doing so may result in non-printable posters. • (Don’t forget images that will be printed at 200% need to be prepared at 250-400 dpi.) • After all the content is entered, Inserted, Paste Specialed and edited, resize the white section backgrounds to fit around text block section content. • Using the Alignment Tools can make the final steps easier. • Poster printing service bureaus - upload files to their websites: • http://www.makesigns.com/scientific_posters.htm • http://www.megaprint.com/medical.html • http://www.thinkiii.com/ • http://www.imagers.com/poster.html • *These service bureaus are examples of what is available. Since Research Imaging Solutions has not tested these providers, we can not endorse their services. • Upon receiving the completed poster, be sure to proof read it, especially where there are scientific symbols present. 5.75” x 3.75” Image placeholder Fig. 1.Allow room for figures and captions. Use a sans serif font for figure captions to provide cue to reader that he/she is not reading normal text section. Smaller font size also sets captions apart from body text blocks. LITERATURE CITED VECTOR IMAGES (Illustrations from other PowerPoint figures; tables, charts and graphs from other Microsoft applications; vector objects generated by other applications like Canvas, Illustrator, CricketGraph, ChemDraw and KaleidiaGraph): No need to put in placeholders, no need to edit using Photoshop. Paste Special, perhaps Ungroup and edit! Another option is to save the vector as a .wmf or .eps file and Insert Picture… from File as you would a raster image. 4” x 8.75” Image placeholder Begg, J.E. 1980. Morphological adaptations of leaves to water stress. Pages 33-43 in Adaptation of Plants to Water and High Temperature Stress, edited by N.C. Turner & P.J. Kramer. Wiley Interscience, New York. World Health Organization. 1999. Malarial mortality in Africa. www.who.int/rbm/Presentations/MIP-RBM-final/sld005.htmk (June 4, 2000). The above are provided to illustrate format for articles, books, book chapters, and web sites (avoid web sites, though, if possible). MATERIALS & METHODS After you refer to the poster submission guidelines, open and existing poster template or use PowerPoint’s Page Setup dialog box to set poster size. It is important to note that the maximum size for PowerPoint is 56” x 56”. Larger posters can be printed by setting the dimensions to one half of the target dimension and instructing the poster printing service bureau to print the poster at 200%. If printing at 200%, be sure to double the resolution of all photographic and scanned images to 250-400 dpi. ACKNOWLEDGEMENTS Each of these are 2.25” x 2.25” Image placeholders C. Purington, Department of Biology, Swarthmore College, Pennsylvania [Typically only initials are used for first (and middle) names, and people’s titles are omitted.] Fig. 2.Allow room for figures and captions. Use a sans serif font for figure captions to provide cue to reader that he/she is not reading normal text section. Smaller font size also sets captions apart from body text blocks. Fig. 3.Remember that you can draw complex shapes with PowerPoint drawing tools Fig. 4.The above graphic is an example of a vector taken from Microsoft Excel, copied and Paste Specialed into the poster. It was resized once in the poster with no reduction in image quality. Download poster templates at it.med.harvard.edu/ris
An informative title, formatted in “sentence case”, that attracts viewers Your name(s) here — Department of BlahDeBlah, Harvard Medical School, Boston, Massachusetts INTRODUCTION RESULTS RESULTS CONCLUSIONS • Planning the poster is important. • Refer to the poster session guidelines to determine correct poster size. • Contact the poster printing service bureau to confirm acceptable file formats, acceptable poster dimensions, turnaround time, and cost. • Take advantage of the poster’s inherent ability to display graphic elements: With regards to text, be brief, and opt for photographs, tables, graphs or illustrations to elucidate organism, protocol, or experimental design. Don’t overstuff the poster- leave some blank space. Start making the poster by inserting all text content into Text Boxes. If using these templates, first delete all ‘slides’ but the one you plan to use. Select the contents of the existing text boxes and replace it with your own content. After inserting text content, format the content to an appropriate font choice, text style and size. Sans serif fonts are good choices for the poster title, section headings and figure captions. Serif fonts are good for text block section content. Don’t underline. Italics and bold text is OK. Bullets should be avoided. Use standard, cross-platform fonts to avoid printing problems: Once formatted, edit the content. Be ruthless. If you are too attached to the content, enlist someone’s help to reduce the verbiage. Remember a picture is worth a thousand words- plan to insert supporting graphics where possible, especially if it reduces the amount of blah, blah, blah. Only after the text boxes have been inserted and edited can a determination be made about the size of inserted images. • RASTER IMAGES (photographs, scans, images that come from microscopes): Using the Rectangle Tool, create raster image placeholders in the poster. Keep in mind the aspect ratio of images when drawing placeholders: draw landscape oriented and portrait oriented rectangles where appropriate. Double-clicking on the image placeholders and looking at the size tab will allow you to determine the correct physical dimension that you will need to make the raster images. • For raster images, plan to edit the image with Photoshop to set the correct • Physical dimension (see image placeholder) • Resolution (125-200 dpi) • File type (.jpg, .tif, .png) • Color mode (RGB or Grayscale) • Crop • Once edited in Photoshop, Insert the raster image into PowerPoint. Do not resize Inserted raster images within PowerPoint- doing so may result in non-printable posters. • (Don’t forget images that will be printed at 200% need to be prepared at 250-400 dpi.) • After all the content is entered, Inserted, Paste Specialed and edited, resize the white section backgrounds to fit around text block section content. • Using the Alignment Tools can make the final steps easier. • Poster printing service bureaus - upload files to their websites: • http://www.makesigns.com/scientific_posters.htm • http://www.megaprint.com/medical.html • http://www.thinkiii.com/ • http://www.imagers.com/poster.html • *These service bureaus are examples of what is available. Since Research Imaging Solutions has not tested these providers, we can not endorse their services. • Upon receiving the completed poster, be sure to proof read it, especially where there are scientific symbols present. 5.75” x 3.75” Image placeholder Fig. 1.Allow room for figures and captions. Use a sans serif font for figure captions to provide cue to reader that he/she is not reading normal text section. Smaller font size also sets captions apart from body text blocks. LITERATURE CITED VECTOR IMAGES (Illustrations from other PowerPoint figures; tables, charts and graphs from other Microsoft applications; vector objects generated by other applications like Canvas, Illustrator, CricketGraph, ChemDraw and KaleidiaGraph): No need to put in placeholders, no need to edit using Photoshop. Paste Special, perhaps Ungroup and edit! Another option is to save the vector as a .wmf or .eps file and Insert Picture… from File as you would a raster image. 4” x 8.75” Image placeholder Begg, J.E. 1980. Morphological adaptations of leaves to water stress. Pages 33-43 in Adaptation of Plants to Water and High Temperature Stress, edited by N.C. Turner & P.J. Kramer. Wiley Interscience, New York. World Health Organization. 1999. Malarial mortality in Africa. www.who.int/rbm/Presentations/MIP-RBM-final/sld005.htmk (June 4, 2000). The above are provided to illustrate format for articles, books, book chapters, and web sites (avoid web sites, though, if possible). MATERIALS & METHODS After you refer to the poster submission guidelines, open and existing poster template or use PowerPoint’s Page Setup dialog box to set poster size. It is important to note that the maximum size for PowerPoint is 56” x 56”. Larger posters can be printed by setting the dimensions to one half of the target dimension and instructing the poster printing service bureau to print the poster at 200%. If printing at 200%, be sure to double the resolution of all photographic and scanned images to 250-400 dpi. ACKNOWLEDGEMENTS Each of these are 2.25” x 2.25” Image placeholders C. Purington, Department of Biology, Swarthmore College, Pennsylvania [Typically only initials are used for first (and middle) names, and people’s titles are omitted.] Fig. 2.Allow room for figures and captions. Use a sans serif font for figure captions to provide cue to reader that he/she is not reading normal text section. Smaller font size also sets captions apart from body text blocks. Fig. 3.Remember that you can draw complex shapes with PowerPoint drawing tools Fig. 4.The above graphic is an example of a vector taken from Microsoft Excel, copied and Paste Specialed into the poster. It was resized once in the poster with no reduction in image quality. Download poster templates at it.med.harvard.edu/ris
An informative title, formatted in “sentence case”, that attracts viewers Your name(s) here — Department of BlahDeBlah, Harvard Medical School, Boston, Massachusetts INTRODUCTION RESULTS RESULTS CONCLUSIONS • Planning the poster is important. • Refer to the poster session guidelines to determine correct poster size. • Contact the poster printing service bureau to confirm acceptable file formats, acceptable poster dimensions, turnaround time, and cost. • Take advantage of the poster’s inherent ability to display graphic elements: With regards to text, be brief, and opt for photographs, tables, graphs or illustrations to elucidate organism, protocol, or experimental design. Don’t overstuff the poster- leave some blank space. Start making the poster by inserting all text content into Text Boxes. If using these templates, first delete all ‘slides’ but the one you plan to use. Select the contents of the existing text boxes and replace it with your own content. After inserting text content, format the content to an appropriate font choice, text style and size. Sans serif fonts are good choices for the poster title, section headings and figure captions. Serif fonts are good for text block section content. Don’t underline. Italics and bold text is OK. Bullets should be avoided. Use standard, cross-platform fonts to avoid printing problems: Once formatted, edit the content. Be ruthless. If you are too attached to the content, enlist someone’s help to reduce the verbiage. Remember a picture is worth a thousand words- plan to insert supporting graphics where possible, especially if it reduces the amount of blah, blah, blah. Only after the text boxes have been inserted and edited can a determination be made about the size of inserted images. • RASTER IMAGES (photographs, scans, images that come from microscopes): Using the Rectangle Tool, create raster image placeholders in the poster. Keep in mind the aspect ratio of images when drawing placeholders: draw landscape oriented and portrait oriented rectangles where appropriate. Double-clicking on the image placeholders and looking at the size tab will allow you to determine the correct physical dimension that you will need to make the raster images. • For raster images, plan to edit the image with Photoshop to set the correct • Physical dimension (see image placeholder) • Resolution (125-200 dpi) • File type (.jpg, .tif, .png) • Color mode (RGB or Grayscale) • Crop • Once edited in Photoshop, Insert the raster image into PowerPoint. Do not resize Inserted raster images within PowerPoint- doing so may result in non-printable posters. • (Don’t forget images that will be printed at 200% need to be prepared at 250-400 dpi.) • After all the content is entered, Inserted, Paste Specialed and edited, resize the white section backgrounds to fit around text block section content. • Using the Alignment Tools can make the final steps easier. • Poster printing service bureaus - upload files to their websites: • http://www.makesigns.com/scientific_posters.htm • http://www.megaprint.com/medical.html • http://www.thinkiii.com/ • http://www.imagers.com/poster.html • *These service bureaus are examples of what is available. Since Research Imaging Solutions has not tested these providers, we can not endorse their services. • Upon receiving the completed poster, be sure to proof read it, especially where there are scientific symbols present. 5.75” x 3.75” Image placeholder Fig. 1.Allow room for figures and captions. Use a sans serif font for figure captions to provide cue to reader that he/she is not reading normal text section. Smaller font size also sets captions apart from body text blocks. LITERATURE CITED VECTOR IMAGES (Illustrations from other PowerPoint figures; tables, charts and graphs from other Microsoft applications; vector objects generated by other applications like Canvas, Illustrator, CricketGraph, ChemDraw and KaleidiaGraph): No need to put in placeholders, no need to edit using Photoshop. Paste Special, perhaps Ungroup and edit! Another option is to save the vector as a .wmf or .eps file and Insert Picture… from File as you would a raster image. 4” x 8.75” Image placeholder Begg, J.E. 1980. Morphological adaptations of leaves to water stress. Pages 33-43 in Adaptation of Plants to Water and High Temperature Stress, edited by N.C. Turner & P.J. Kramer. Wiley Interscience, New York. World Health Organization. 1999. Malarial mortality in Africa. www.who.int/rbm/Presentations/MIP-RBM-final/sld005.htmk (June 4, 2000). The above are provided to illustrate format for articles, books, book chapters, and web sites (avoid web sites, though, if possible). MATERIALS & METHODS After you refer to the poster submission guidelines, open and existing poster template or use PowerPoint’s Page Setup dialog box to set poster size. It is important to note that the maximum size for PowerPoint is 56” x 56”. Larger posters can be printed by setting the dimensions to one half of the target dimension and instructing the poster printing service bureau to print the poster at 200%. If printing at 200%, be sure to double the resolution of all photographic and scanned images to 250-400 dpi. ACKNOWLEDGEMENTS Each of these are 2.25” x 2.25” Image placeholders C. Purington, Department of Biology, Swarthmore College, Pennsylvania [Typically only initials are used for first (and middle) names, and people’s titles are omitted.] Fig. 2.Allow room for figures and captions. Use a sans serif font for figure captions to provide cue to reader that he/she is not reading normal text section. Smaller font size also sets captions apart from body text blocks. Fig. 3.Remember that you can draw complex shapes with PowerPoint drawing tools Fig. 4.The above graphic is an example of a vector taken from Microsoft Excel, copied and Paste Specialed into the poster. It was resized once in the poster with no reduction in image quality. Download poster templates at it.med.harvard.edu/ris
An informative title, formatted in “sentence case”, that attracts viewers Your name(s) here — Department of BlahDeBlah, Harvard Medical School, Boston, Massachusetts INTRODUCTION RESULTS RESULTS CONCLUSIONS • Planning the poster is important. • Refer to the poster session guidelines to determine correct poster size. • Contact the poster printing service bureau to confirm acceptable file formats, acceptable poster dimensions, turnaround time, and cost. • Take advantage of the poster’s inherent ability to display graphic elements: With regards to text, be brief, and opt for photographs, tables, graphs or illustrations to elucidate organism, protocol, or experimental design. Don’t overstuff the poster- leave some blank space. Start making the poster by inserting all text content into Text Boxes. If using these templates, first delete all ‘slides’ but the one you plan to use. Select the contents of the existing text boxes and replace it with your own content. After inserting text content, format the content to an appropriate font choice, text style and size. Sans serif fonts are good choices for the poster title, section headings and figure captions. Serif fonts are good for text block section content. Don’t underline. Italics and bold text is OK. Bullets should be avoided. Use standard, cross-platform fonts to avoid printing problems: Once formatted, edit the content. Be ruthless. If you are too attached to the content, enlist someone’s help to reduce the verbiage. Remember a picture is worth a thousand words- plan to insert supporting graphics where possible, especially if it reduces the amount of blah, blah, blah. Only after the text boxes have been inserted and edited can a determination be made about the size of inserted images. • RASTER IMAGES (photographs, scans, images that come from microscopes): Using the Rectangle Tool, create raster image placeholders in the poster. Keep in mind the aspect ratio of images when drawing placeholders: draw landscape oriented and portrait oriented rectangles where appropriate. Double-clicking on the image placeholders and looking at the size tab will allow you to determine the correct physical dimension that you will need to make the raster images. • For raster images, plan to edit the image with Photoshop to set the correct • Physical dimension (see image placeholder) • Resolution (125-200 dpi) • File type (.jpg, .tif, .png) • Color mode (RGB or Grayscale) • Crop • Once edited in Photoshop, Insert the raster image into PowerPoint. Do not resize Inserted raster images within PowerPoint- doing so may result in non-printable posters. • (Don’t forget images that will be printed at 200% need to be prepared at 250-400 dpi.) • After all the content is entered, Inserted, Paste Specialed and edited, resize the white section backgrounds to fit around text block section content. • Using the Alignment Tools can make the final steps easier. • Poster printing service bureaus - upload files to their websites: • http://www.makesigns.com/scientific_posters.htm • http://www.megaprint.com/medical.html • http://www.thinkiii.com/ • http://www.imagers.com/poster.html • *These service bureaus are examples of what is available. Since Research Imaging Solutions has not tested these providers, we can not endorse their services. • Upon receiving the completed poster, be sure to proof read it, especially where there are scientific symbols present. 5.75” x 3.75” Image placeholder Fig. 1.Allow room for figures and captions. Use a sans serif font for figure captions to provide cue to reader that he/she is not reading normal text section. Smaller font size also sets captions apart from body text blocks. LITERATURE CITED VECTOR IMAGES (Illustrations from other PowerPoint figures; tables, charts and graphs from other Microsoft applications; vector objects generated by other applications like Canvas, Illustrator, CricketGraph, ChemDraw and KaleidiaGraph): No need to put in placeholders, no need to edit using Photoshop. Paste Special, perhaps Ungroup and edit! Another option is to save the vector as a .wmf or .eps file and Insert Picture… from File as you would a raster image. 4” x 8.75” Image placeholder Begg, J.E. 1980. Morphological adaptations of leaves to water stress. Pages 33-43 in Adaptation of Plants to Water and High Temperature Stress, edited by N.C. Turner & P.J. Kramer. Wiley Interscience, New York. World Health Organization. 1999. Malarial mortality in Africa. www.who.int/rbm/Presentations/MIP-RBM-final/sld005.htmk (June 4, 2000). The above are provided to illustrate format for articles, books, book chapters, and web sites (avoid web sites, though, if possible). MATERIALS & METHODS After you refer to the poster submission guidelines, open and existing poster template or use PowerPoint’s Page Setup dialog box to set poster size. It is important to note that the maximum size for PowerPoint is 56” x 56”. Larger posters can be printed by setting the dimensions to one half of the target dimension and instructing the poster printing service bureau to print the poster at 200%. If printing at 200%, be sure to double the resolution of all photographic and scanned images to 250-400 dpi. ACKNOWLEDGEMENTS Each of these are 2.25” x 2.25” Image placeholders C. Purington, Department of Biology, Swarthmore College, Pennsylvania [Typically only initials are used for first (and middle) names, and people’s titles are omitted.] Fig. 2.Allow room for figures and captions. Use a sans serif font for figure captions to provide cue to reader that he/she is not reading normal text section. Smaller font size also sets captions apart from body text blocks. Fig. 3.Remember that you can draw complex shapes with PowerPoint drawing tools Fig. 4.The above graphic is an example of a vector taken from Microsoft Excel, copied and Paste Specialed into the poster. It was resized once in the poster with no reduction in image quality. Download poster templates at it.med.harvard.edu/ris