Advanced Reflection Techniques in Game Rendering - CS-378 Lecture 8
430 likes | 551 Views
In this lecture, Prof. Okan Arikan from the University of Texas at Austin explores advanced mapping techniques in game technology, focusing on reflections and rendering strategies. Key topics include the use of the stencil, color, and depth buffers for realistic reflection effects, methods for rendering scenes with mirrors, and techniques for managing multiple mirrors. The lecture also addresses challenges with shadowing and reflection order, alongside strategies for optimizing rendering efficiency. With insights from industry leaders, this session provides vital knowledge for aspiring game developers.

Advanced Reflection Techniques in Game Rendering - CS-378 Lecture 8
E N D
Presentation Transcript
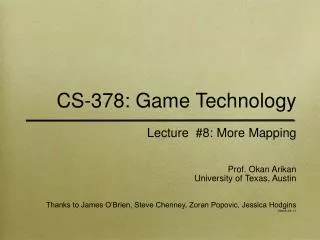
CS-378: Game Technology • Lecture #8: More Mapping • Prof. Okan Arikan • University of Texas, Austin • Thanks to James O’Brien, Steve Chenney, Zoran Popovic, Jessica Hodgins • V2005-08-1.1
Today • Background on math • Ongoing Course Assessment • More on mapping • Reflections • Shadows
Planar Reflections (Flat Mirrors) • Use the stencil buffer, color buffer and depth buffer • Basic idea: • We need to draw all the stuff around the mirror • We need to draw the stuff in the mirror, reflected, without drawing over the things around the mirror • Key point: You can reflect the viewpoint about the mirror to see what is seen in the mirror, or you can reflect the world about the mirror
Reflecting Objects • If the mirror passes through the origin, and is aligned with a coordinate axis, then just negate appropriate coordinate • Otherwise, transform into mirror space, reflect, transform back Wall Mirror
Small Problem • Reflecting changes the apparent vertex order as seen by the viewer • Why is this a problem? • Reflecting the view has the same effect, but this time it also shifts the left-right sense in the frame buffer • Works, just harder to understand what’s happening
Rendering Reflected First • First pass: • Render the reflected scene without mirror, depth test on • Second pass: • Disable the color buffer, Enable the stencil buffer to always pass but set the buffer, Render the mirror polygon • Now, set the stencil test to only pass points outside the mirror • Clear the color buffer - does not clear points inside mirror area • Third Pass: • Enable the color buffer again, Disable the stencil buffer • Render the original scene, without the mirror • Depth buffer stops from writing over things in mirror
Reflection Example The stencil buffer after the second pass The color buffer after the second pass – the reflected scene cleared outside the stencil
Reflection Example The color buffer after the final pass
Making it Faster • Under what circumstances can you skip the second pass (the stencil buffer pass)? • These are examples of designing for efficient rendering
Making it Faster • Under what circumstances can you skip the second pass (the stencil buffer pass)? • Infinite mirror plane (effectively infinite) • Solid object covering mirror plane • These are examples of designing for efficient rendering
Reflected Scene First (issues) • Objects behind the mirror cause problems: • Will appear in reflected view in front of mirror • Solution is to use clipping plane to cut away things on wrong side of mirror • Curved mirrors by reflecting vertices differently • Doesn’t do: • Reflections of mirrors in mirrors (recursive reflections) • Multiple mirrors in one scene (that aren’t seen in each other)
Rendering Normal First • First pass: • Render the scene without the mirror • Second pass: • Clear the stencil, Render the mirror, setting the stencil if the depth test passes • Third pass: • Clear the depth buffer with the stencil active, passing things inside the mirror only • Reflect the world and draw using the stencil test. Only things seen in the mirror will be drawn
Normal First Addendum • Same problem with objects behind mirror • Same solution • Can manage multiple mirrors • Render normal view, then do other passes for each mirror • Only works for non-overlapping mirrors (in view) • But, could be extended with more tests and passes • A recursive formulation exists for mirrors that see other mirrors
Frame Buffer Blending • When a fragment gets to the frame buffer, it is blended with the existing pixel, and the result goes in the buffer • Blending is of the form: • s=source fragment, d = destination buffer, RGBA color • In words: You get to specify how much of the fragment to take, and how much of the destination, and you add the pieces together • All done per-channel
Blending Factors • The default is: Srgba=(1,1,1,1), Drgba=(0,0,0,0) • Overwrite buffer contents with incoming fragment • You can use the colors themselves as blending functions: eg Srgba=(Rd,Gd,Bd,Ad), Drgba=(0,0,0,0) • What use is this? • Hint: What if there is an image in the buffer and the source is a constant gray image? A light map? • Common is to use the source alpha: • Srgba=(As,As,As,As), Drgba=(1-As,1-As,1-As,1-As) • What does this achieve? When might you use it? • Note that blending can simulate multi-texturing with multi-pass
Accumulation Buffer • The accumulation buffer is not available for writing directly • It is more like a place to hold and compute on pixel data • Operations: • Load the contents of a color buffer into the accumulation buffer • Accumulate the contents of a color buffer, which means multiply them by a value then add them into the buffer • Return the buffer contents to a color buffer (scaled by a constant) • Add or multiply all pixel values by a given constant • It would appear that it is too slow for games • Lots of copying data too and fro
Accum. Buffer Algorithms • Anti-aliasing: Render multiple frames with the image plane jittered slightly, and add them together • Hardware now does this for you, but this would be higher quality • Motion blur: Render multiple frames representing samples in time, and add them together • More like strobing the object • Depth of field: Render multiple frames moving both the viewpoint and the image plane in concert • Keep a point – the focal point – fixed in the image plane while things in front and behind appear to shift
Why Shadows? • Shadows tell us about the relative locations and motions of objects
Facts about Shadows • Shadows can be considered as areas hidden from the light source • Suggests the use of hidden surface algorithms • A shadow on A due to B can be found by projecting B onto A with the light as the center of projection • Suggests the use of projection transformations • For scenes with static lights and geometry, the shadows are fixed • Can pre-process such cases • Cost is in moving lights or objects • Point lights have hard edges, and area lights have soft edges
Ground Plane Shadows • Shadows cast by point light sources onto planes are an important case that is relatively easy to compute • Shadows cast by objects (cars, players) onto the ground • Accurate if shadows don’t overlap • Can be fixed, but not well L(directional light) (xp,yp,zp) (xsw,ysw,zsw)
Ground Shadow Math • The shadow point lies on the line from the light through the vertex: • The shadow is on the ground, zsw=0, so =zp/zl, giving: • Matrix form:
Drawing the Shadow • We now have a matrix that transforms an object into its shadow • Drawing the shadow: • Draw the ground and the object • Multiply the shadow matrix into the model transformation • Redraw the object in gray with blending on • Tricks: • Lift the shadow a little off the plane to avoid z-buffer quantization errors (can be done with extra term in matrix) • Works for other planes by transforming into plane space, then shadow, then back again • Take care with vertex ordering for the shadow (it reverses)
Point Light Shadows • Blinn ’88 gives a matrix that works for local point light sources • Takes advantage of perspective transformation (and homogeneous coordinates) • Game Programming Gems has an approximation that does not use perspective matrices, Chapter 5.7
Shadows in Light Maps • Static shadows can be incorporated into light maps • When creating the map, test for shadows by ray-casting to the light source - quite efficient • Area light sources should cast soft shadows • Interpolating the texture will give soft shadows, but not good ones, and you loose hard shadows • Sampling the light will give better results: Cast multiple rays to different points on the area light, and average the results • Should still filter for best results • What about light map resolution?
Quick Dirty Shadows • Blend a dark polygon into the frame-buffer in the place where the shadow should be • Cast a ray from light source, through object center, and see where it hits something • Blend a fixed shape polygon in at that location (with depth) • Why dirty? • Use a fixed shape - shadow won’t match object • Use a single ray-cast to determine shadow location - no partial shadow and wrong parts of shadow may be drawn • Good for things like car games for under-car shadow • Fast action and near planar receiving surfaces
Drawing Quick Dirty Shadows Light Viewer
Shadows in Games Megaman Grand Theft Auto Metal Gear
Projective Shadows • Create a texture (dark on white) representing the appearance of the occluder as seen by the light • Game programmers frequently call this a shadow map • Can create it by “render to texture” with the light as viewpoint • Use projective texturing to apply it to receivers • Works if the appearance of the occluder from the light is reasonably constant • Requires work to identify occluders and receivers • Resolution issues • Better than quick-dirty shadows, worse than other methods
Shadow Volumes • A shadow volume for an object and light is the volume of space that is shadowed • That is, all points in the volume are in shadow for that light/object pair • Creating the volume: • Find silhouette edges of shadowing object as seen by the light source • Extrude these edges away from the light, forming polygons • Clip the polygons to the view volume
Practicalities • For many algorithms, it is not necessary to find silhouette edges – just use all edges • Silhouette edges can be found by looking at polygon normals • Silhouette edges are those between a front facing face and back facing face (from light’s point of view) • The result is a sequence of edges with common vertices • Assuming convex shadowing objects • Extend all the vertices of silhouette edges away from the light source • Clip them to the view volume, and form the polygons that bound the shadow volume • Final result are a set of shadow volume boundary polygons
Key Observation • All points inside a shadow volume are in shadow • Along a ray from the eye, we can track the shadow state by looking at intersections with shadow volume boundaries • Assume the eye is not in shadow • Each time the ray crosses a front facing shadow polygon, add one to a counter • Each time the ray crosses a back facing shadow polygon, subtract one from a counter • Places where the counter is zero are lit, others are shadowed • We need to count the number of shadow polygons in front of a point. Which buffer can count for us?
Using Shadow Volumes +1 -1 -1 +1 0 1 0 1
Real-Time Shadow Volumes • Compute shadow volumes per frame • Not a problem for only a few moving objects • Use simplified object geometry to speed things up • Vertex programs can be used to create volumes • Four pass algorithm • Render scene with ambient light only (everything shadowed) • Render front facing shadow polygons to increment stencil buffer • Render back facing shadow polygons to decrement stencil buffer • Render scene again only for non-shadowed (stencil=0) regions • Horrible details follow…
Details • Turn off any light sources and render scene with ambient light only, depth on, color buffer active • Disable the color and depth buffers for writing, but leave the depth test active • Initialize the stencil buffer to 0 or 1 depending on whether the viewer is in shadow or not (ray cast) • Set the stencil test to always pass and the operation to increment if depth test passes • Enable back face culling • Render the shadow volumes - this will increment the stencil for every front facing polygon that is in front of a visible surface • Cont…
Details • Enable front face culling, disable back face culling • Set the stencil operation to decrement if the depth test passes (and leave the test as always pass) • Render the shadow volumes - this decrements for all the back facing shadow polygons that are in front of visible objects. The stencil buffer now has positive values for places in shadow • Set the stencil function to equality with 0, operations to keep • Clear the depth buffer, and enable it and the color buffer for writing • Render the scene with the lights turned on • Voila, we’re done
Alternate • 2 Problems: Finding how many shadow volumes the viewer is in, and the near clip plane • Solution: Count the number of shadow volume faces behind the visible scene • Assume shadow volumes are capped • Why does it work? • New problem? • Resolved by Nvidia extension NV_depth_clamp • Resolved by smart homogeneous coordinate math • Textbook has details
Why Use Shadow Volumes? • They correctly account for shadows of all surfaces on all other surfaces • No shadow where there shouldn’t be shadow • No problem with multiple light sources • Adaptable quality by creating shadow volumes with approximate geometry • Shadow volumes for static object/light pairs can be pre-computed and don’t change • More expensive than light maps, but not too bad on current hardware • Can’t combine the techniques. Why not?
Why Not Use Shadow Volumes? • Place very high demands on rendering pipeline • In particular, fill rate can be a major problem • Shadow volume polygons tend to cover very large parts of the screen • Using coarse occluder geometry won’t help this much • Sharp shadows, and hard to make soft
Variant • Render fully lit, then add shadows (blend a dark polygon) where the stencil buffer is set – in what cases is it wrong? • http://www.gamasutra.com/features/19991115/bestimt_freitag_01.htm
Shadow Buffer Algorithms • Compute z-buffer from light viewpoint • Put it into the shadow buffer • Render normal view, compare world locations of points in the z-buffer and shadow buffer • Have to transform pts into same coordinate system • Points with same location in both buffers are lit. Why? • Problems: • Resolution is a big issue – both depth and spatial • Only some hardware supports the required computations