Download
1 / 24
240 likes | 380 Views
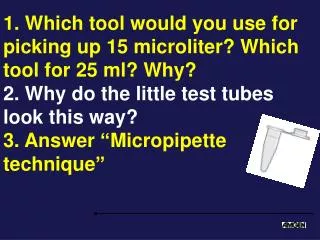
1. Which tool would you use for picking up 15 microliter? Which tool for 25 ml? Why? 2. Why do the little test tubes look this way? 3. Answer “Micropipette technique”. Presenting students: Refer to this handout, solve it and explain it.

E N D
1. Which tool would you use for picking up 15 microliter? Which tool for 25 ml? Why? 2. Why do the little test tubes look this way? 3. Answer “Micropipette technique”
Presenting students: Refer to this handout, solve it and explain it.
Pre-lab 1 with practice plates andLab 1 - Introduction toMicrovolumetrics and Pipetting Hand out Practice ExerciseStudent Guide pages 1.1 – 1.6
Purpose of Pre-lab 1 and Lab 1 Become familiar with the small volumes of solutions used in molecular biology Introduce proper use of the adjustable digital pipette Practice loading and running a gel
Decimals, prefixes, and units microliter (l)= 1 / 1,000,000 = 10-6 0.000001 = one millionth of a liter mililiter (ml)= 1 / 1,000 = 10-3 of 0.001 = one thousandth of a l 1 l=0.001 ml 10 l=0.01 ml 100 l=0.1 ml 1000 l=1.0 ml
Calculations: PreLab 1 Video – Micropipettes (Open directly from folder; about 10 minutes!) OR – Go to SLIDE 11
Top number = maximum allowed! Types of digital micropipettes How to set volume and use digital pipettes Types of digital micropipettes Dispensing small volumes into a microfuge tube
Micropipetting “ Nevers” Never - Use without a tip in place Never - Lay it down with sample in the tip Never - Let the “plunger” button snap back
Micropipette Tips * Treat tips as “sterile”. Always replace the top cover of the tip box quickly. * To add a tip, press the end of the micropipette firmly into the top of the tip. * To eject a tip, press the eject button.
Get a feel for the first and second “stops” * See the different heights of the plungers. * Feel the different distances the plunger travels to the first stop at the different settings. Set at 2.0 ul 20.0 ul
Loading and dispensing a sample • Loading: • Depress the plunger to the first stop. (Not to the second stop!) • While still holding down the plunger, place the tip in the sample and draw fluid up by gradually allowing the plunger to rise. • Withdraw the tip. • Examine the sample. It should extend to the tip with no air bubble.
Dispensing: • Move pipette tip into the desired tube near the bottom. • Slowly press plunger to the first stop to transfer the sample, watch liquid stick to wall. • Continue to press the plunger to the second stop to insure transfer of all the sample. • Remove tip, then release plunger.
Pipetting Technique Hold micropipette and microfuge tubes at eye level when loading or dispensing samples
With both elbows on the table, use your other hand to stabilize the bottom of the pipette. This student is showing one technique using a practice gel.
Pipetting exercise 2 (p1.4) Write group symbol and period # on test tubes. Keep mixtures in your box for next step.
Journal 05.10.13: • No journal question yet. Get your samples ready to be loaded onto a gel. • Complete mixtures A,B,C (Page 1.4) • Spin down (if needed).
Loading Gels: Insert pipette tip: Under buffer level Above gel well
Pipetting into a gel: Cover the gel in the petri dish with water. Load 10 µ liter of loading dye in each well. (The glycerol in the sample should help it sink in the well)
K. Schramm Tip should be above, not in the well. Tip punched through the gel Dye spreading under the well Loading errors
Proper loading of the gel Tip in buffer Top surface of gel Sample in well Bottom surface of gel K. Schramm
Different pipetting techniques – stablility is the key K. Schramm
Types of digital micropipettes How to set volume and use digital pipettes Dispensing small volumes into a microfuge tube Using small volumes Preparing an agarose gel loading agarose gel Teacherdomain folder (e.g. for Andres Berrio)